
Quickly add the ZEN52 Double Relay to the Z-Box hub and start automating! You don't need any extra device handlers or drivers here! Simply follow the instructions in the manual to correctly install and power the device, then follow the steps below to add the device to your Z-Box hub. You can add a new device via the web interface, or the mobile app. Check out the simple inclusion instructions below!
Important Note: A steady, blinking green is the standard state for the device; as long as the unit has power, it will blink green at a steady pace. The device has an internal relay, which can turn on and off with a click of the Z-Wave button. This means that when you are attempting to include or exclude the device, the clicks need to happen as fast as possible; if the clicks are not completed fast enough, the relay will engage instead and the device will not enter inclusion or exclusion mode. You will know you have clicked fast enough when the LED indicator begins flashing rapidly.
If you're running Z-Box firmware release 5.172.18 or higher, you have the option to include your Z-Wave Long Range (ZWLR) supporting devices via the new Long Range protocol. Adding via ZWLR can be done both via the Web UI and the app; however, scanning is much easier via the app so that is the process we recommend for ZWLR or SmartStart inclusion.
Mesh Inclusion Steps
ZEN52 Mesh Inclusion From the Web UI
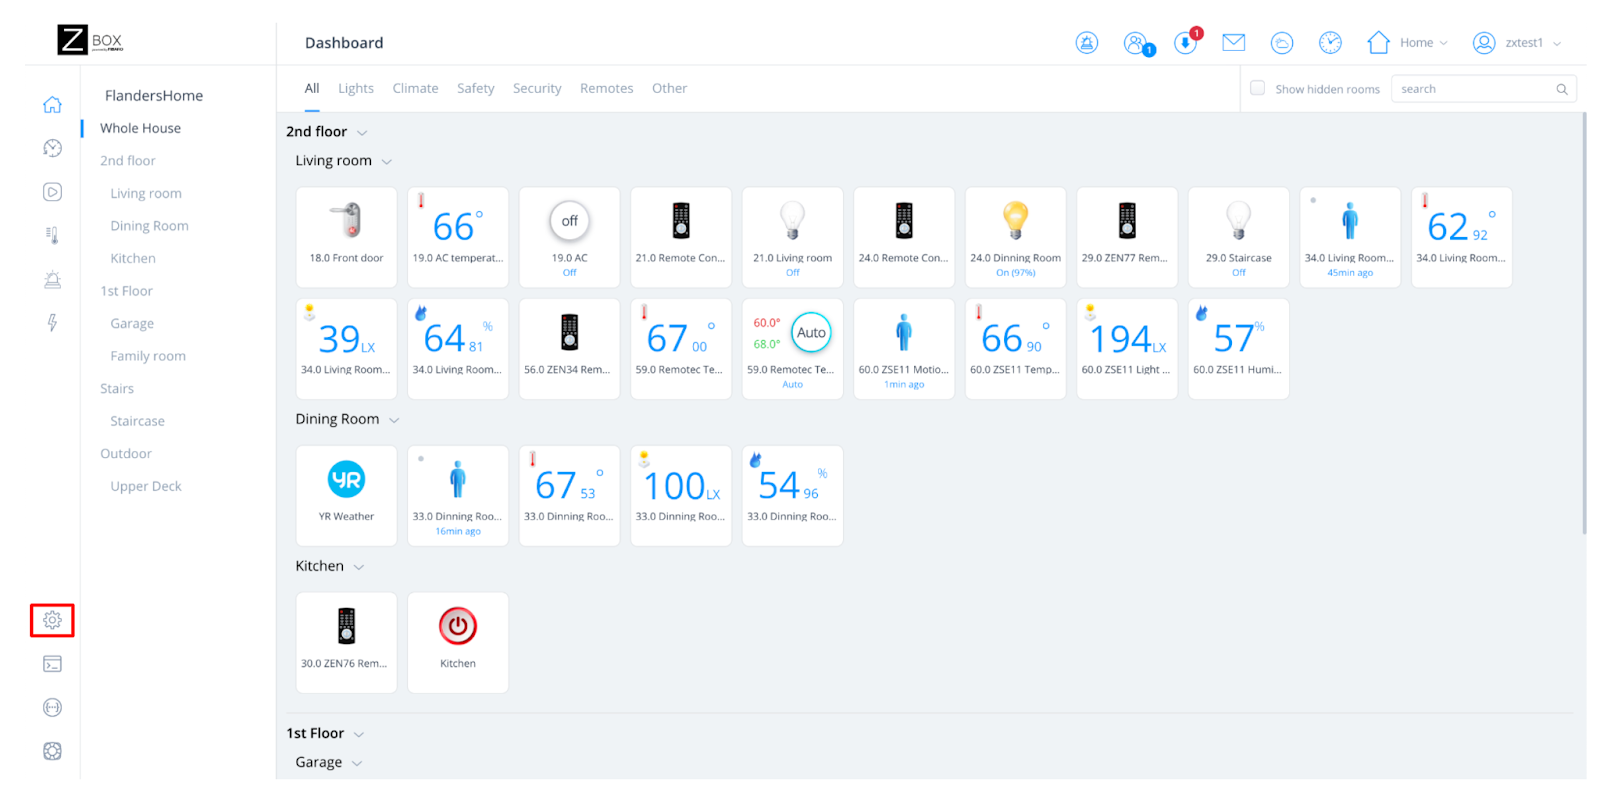
1. From the sidebar navigation menu of the Z-Box web interface, go to Settings by clicking on the gear icon.
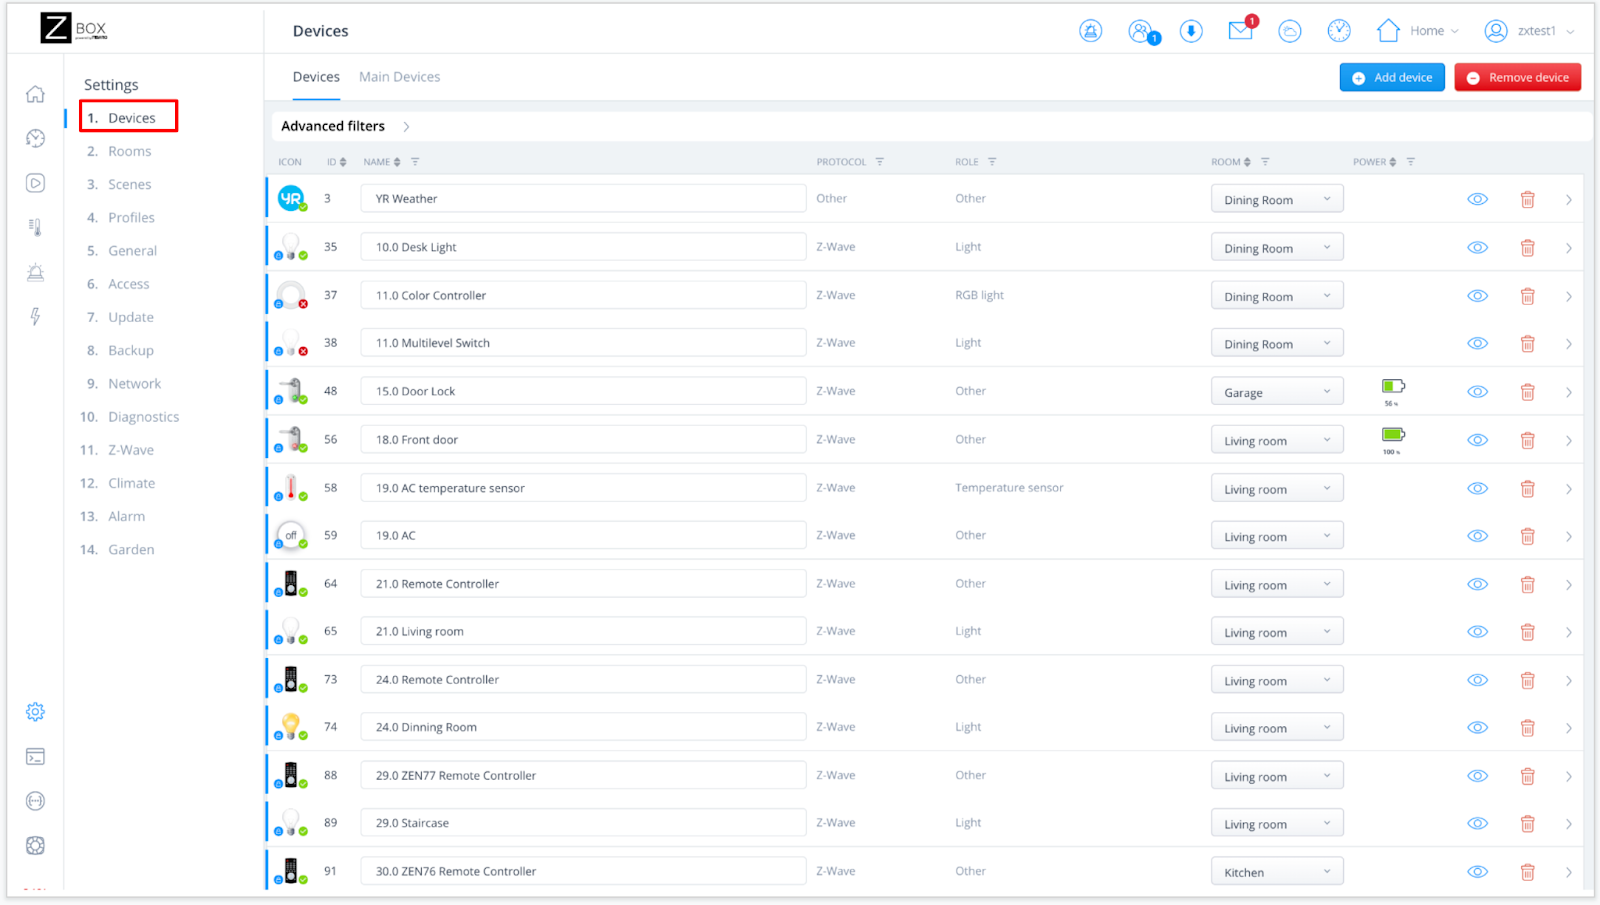
2. You will be redirected to the Devices menu.
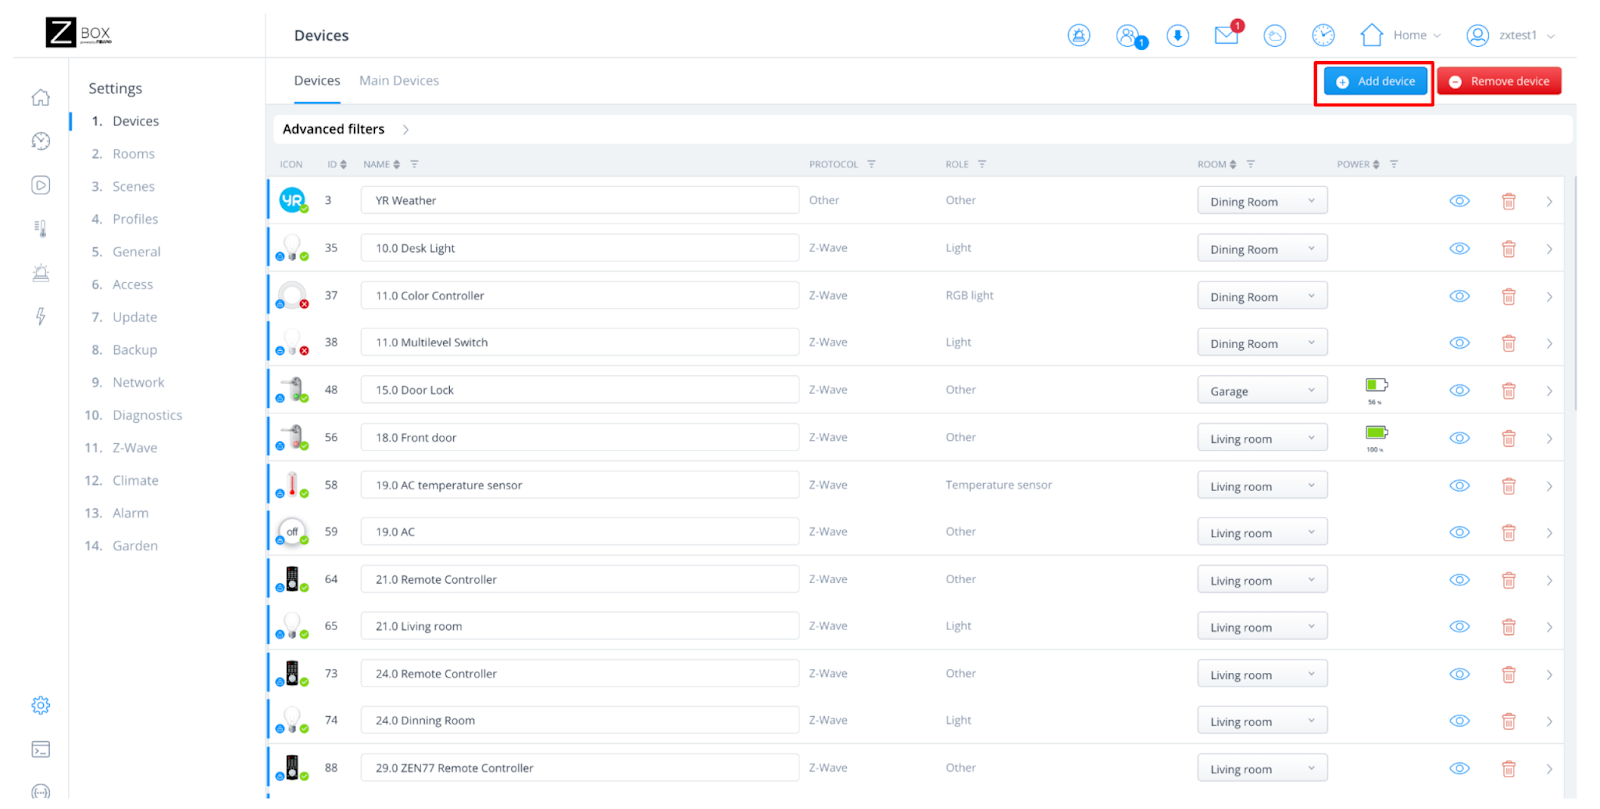
3. Click on + Add device.
4. Select the Z-Wave Device option.

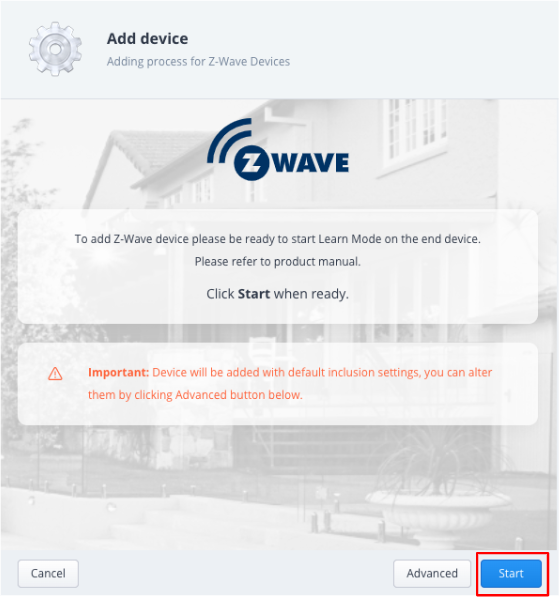
5. Make sure you can physically access your ZEN52 Double Relay and click Start on the screen..
6. While the hub is in inclusion mode, click the Z-Wave button 3 times as quickly as possible. The LED indicator will start blinking rapidly. Alternatively, if the relay is already installed with a physical switch connected, you can simply toggle the external switch connected to ZEN52 very quickly from off to on, so: "up-down, up-down, up-down." Check out the video linked here to show you how this process works! It may take a few minutes for the device to add and configure so please wait patiently and don't exit the screen.
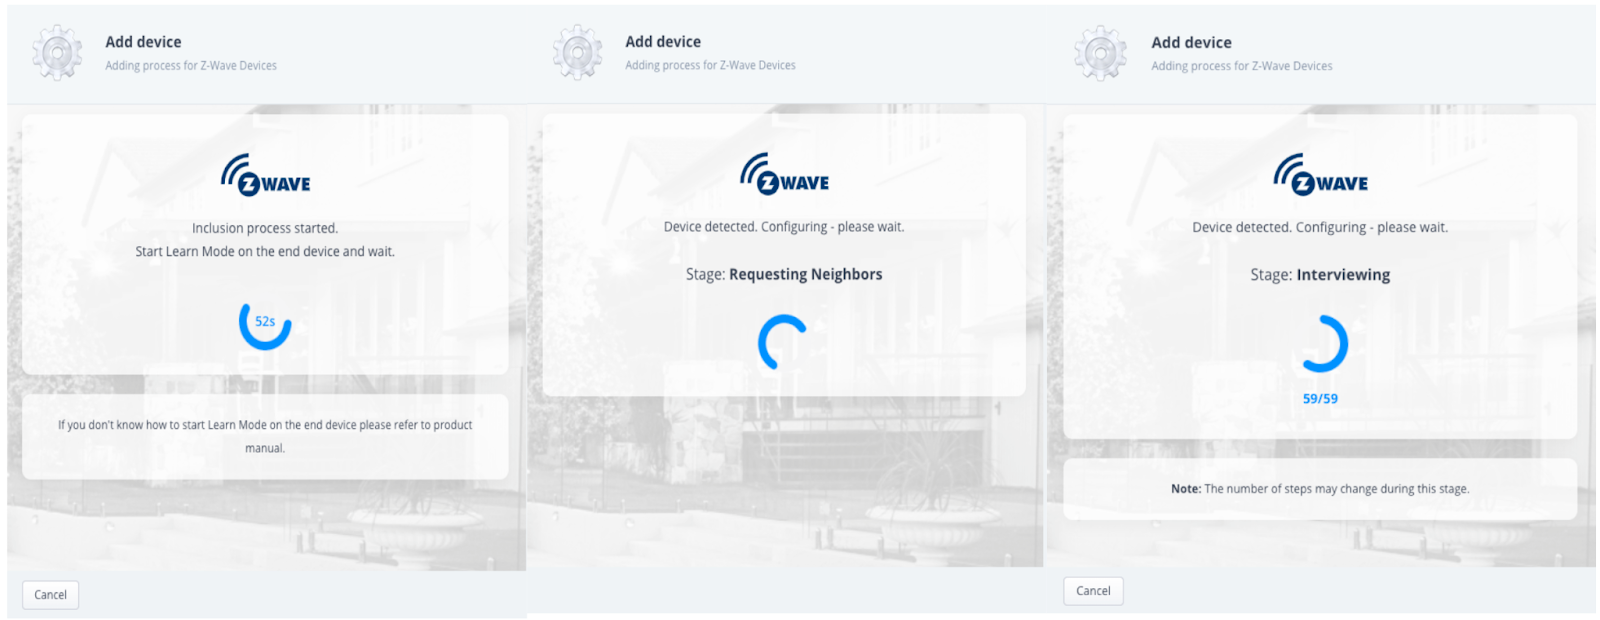
7. Once the device is detected successfully, you will see the list of all child devices that have been detected. Click Next. Rename your device and assign it to a room. Click Next.
8. Click Finish once you are done editing all devices.
ZEN52 Mesh Inclusion From the App
1. Open the Z-Box Hub app on your mobile device.
2. Click More in the bottom navigation menu.
3. Click on + Add Devices.
4. Click on Z-Wave Protocol and follow the same inclusion steps as described for the WEB UI above.
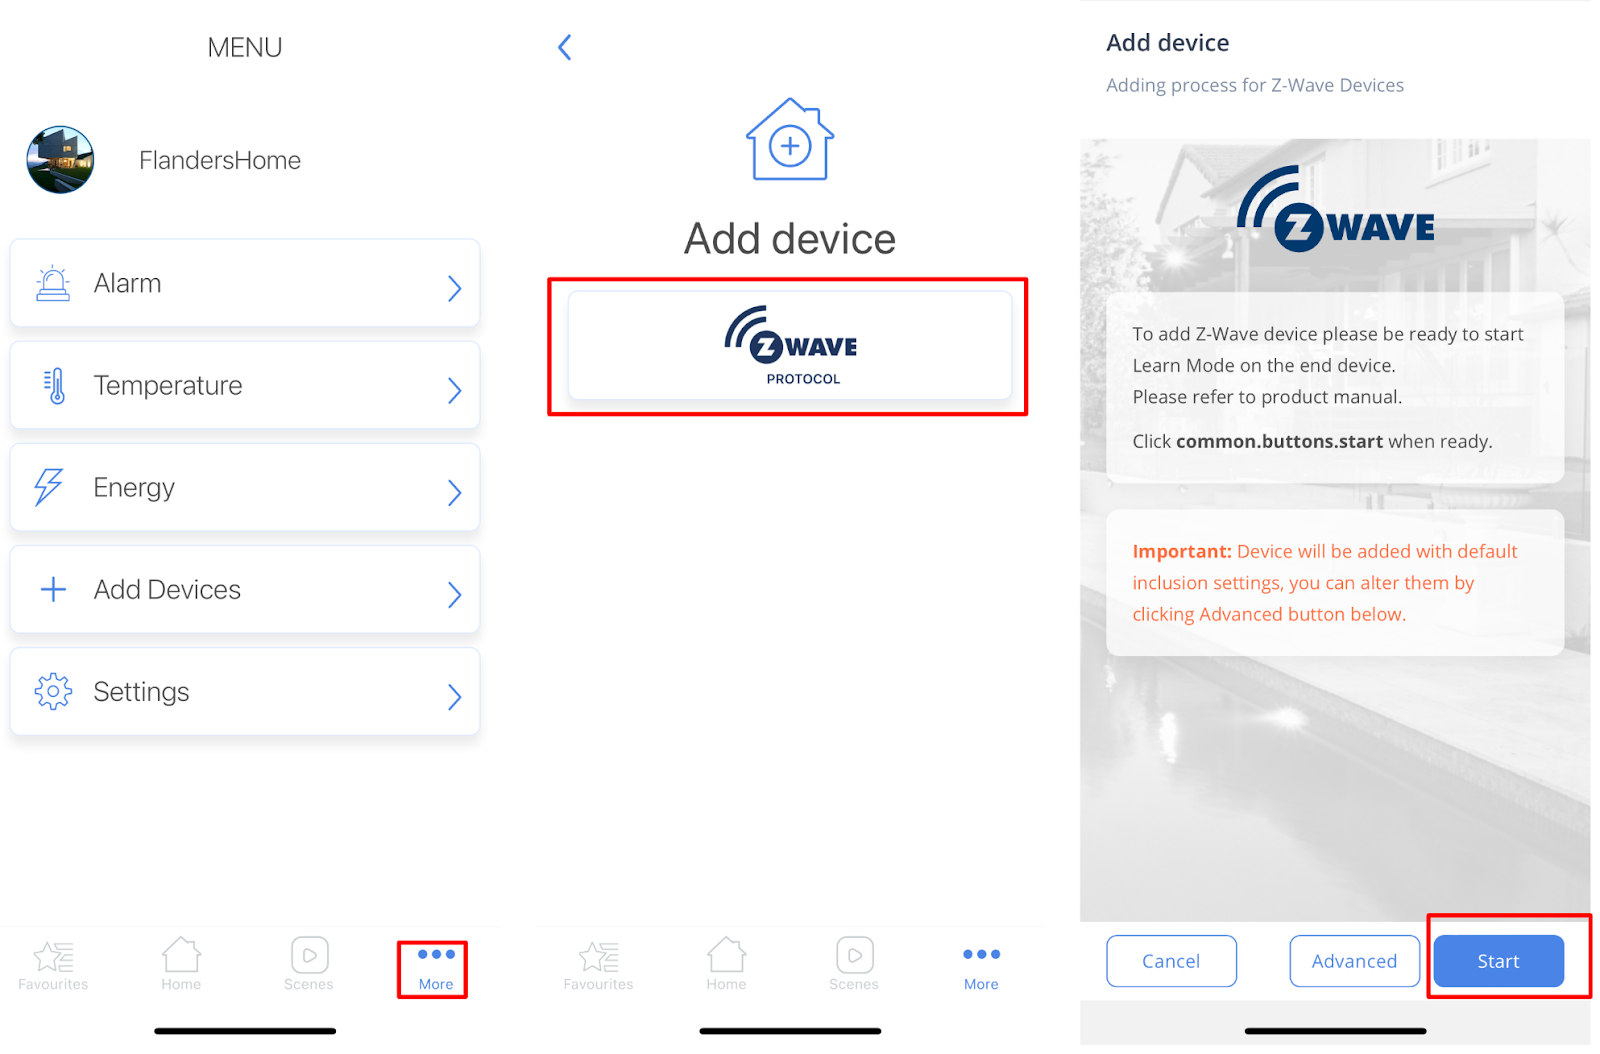
5. Make sure you can physically access your ZEN52 Double Relay and click Start on the screen.
6. While the hub is in inclusion mode, click the Z-Wave button on the ZEN52 3 times as quickly as possible. The LED indicator will start blinking rapidly. Alternatively, if the relay is already installed, you can simply toggle the external switch connected to ZEN51 very quickly from off to on, so: "up-down, up-down, up-down." Check out the video linked here to show you how this process works! It may take a few minutes for the device to add and configure so please wait patiently and don't exit the screen.
7. Once the device is found, you'll be able to rename it and assign it to its room.
Z-Wave Long Range Inclusion Steps
If you're running Z-Box firmware release 5.172.18 or higher, you have the option to include your Z-Wave Long Range (ZWLR) supporting devices via the new Long Range protocol. Adding via ZWLR can be done both via the Web UI and the app; however, scanning is much easier via the app so that is the process we recommend for ZWLR or SmartStart inclusion.
ZEN52 Z-Wave Long Range Inclusion From the App
Ensure the ZEN52 is NOT powered on at this time. You must initiate SmartStart before powering on the device in step 5.
1. Open the Z-Box Hub app on your mobile device and click More in the bottom navigation menu.
2. Click on + Add Devices.
3. Click on Z-Wave Smart Start Protocol.

4. Select Long Range and scan the QR code on the device or device package.
5. Z-Wave Smart Start will initialize. Power on the ZEN52. Wait for the device to be configured.
6. You can edit the name, room, icon, etc. for the device. Please note that the Node ID for the device will show a number higher than 255 for ZWLR devices. Nodes 1-255 are reserved for the hub and mesh devices. 256 and higher will be ZWLR nodes in accordance with the Z-Wave Specification.

ZEN52 Inclusion Troubleshooting Steps
If your relay is not found on the Z-Box Hub, you may need to reset it first. We recommend performing the reset using your hub and the exclusion option (it works even if the device has never been added to your hub before):
- Open your Z-Box web interface in the Internet browser and select Settings (the gear icon) from the sidebar navigation menu. A list of your existing devices will appear.
- Click the red - Remove device button in the top right corner.
- Select Z-Wave Device in the next screen.
- Make sure you can physically access your ZEN52 relay and click Start on the screen.
- Click the Z-Wave button on the relay 3 times as quickly as possible. The LED indicator will start blinking rapidly and the Z-Box Hub will display a "Device removed" message.
If the LED indicator on the relay isn't blinking, make sure that the device turns on the light from a single click on the Z-Wave button or a toggle from the connected switch. If it works well physically, try a factory reset and then follow the inclusion steps above.
Please let us know if you have any issues and we'll be glad to help!

