
Programming the ZEN56 RGBW Dimmer on the Z-Box Hub opens the door to some genuinely fun and surprisingly powerful lighting options. Whether you want to build color-based scenes that shift the entire room’s mood or you prefer the precision of controlling each channel on its own, the ZEN56 gives you both paths.
You can keep things simple with scene-driven color presets, or take advantage of the advanced mode where each color channel appears as its own endpoint for direct associations and fine-tuned automation. This guide will walk you through those options step by step so you can get your ZEN56 behaving exactly the way you want.
Sample Scene
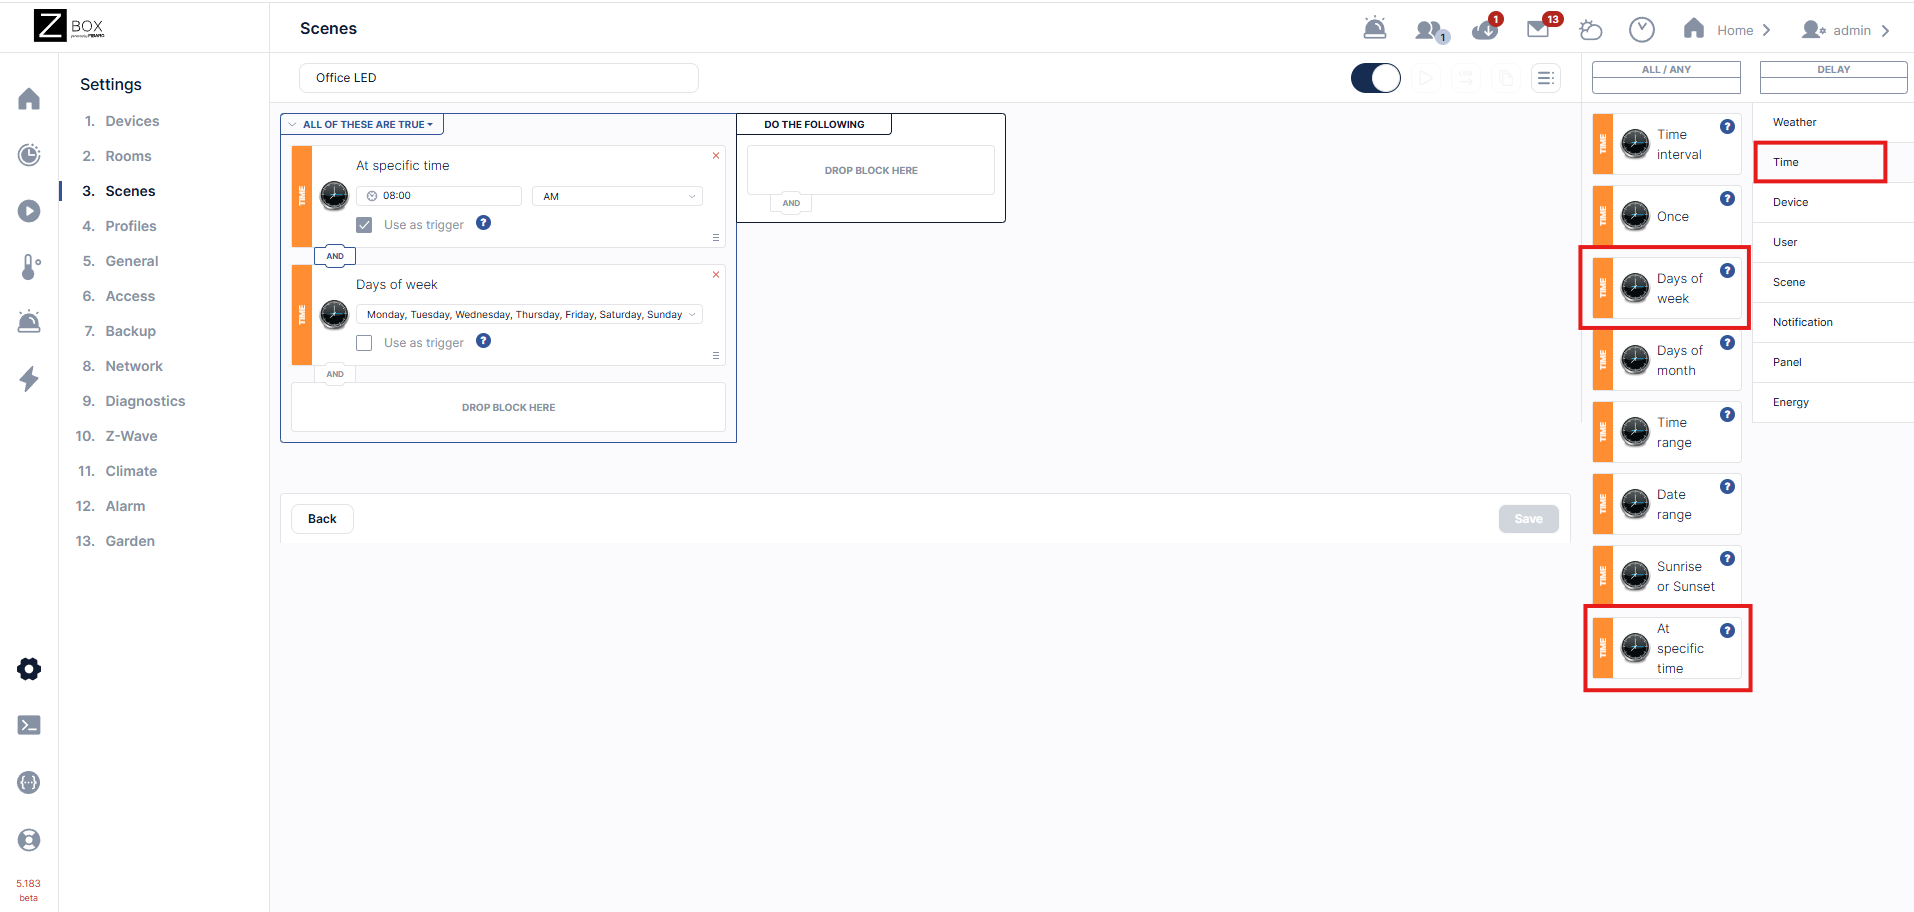
We've created a simple scene below to provide some general ideas. We want to have the ZEN56 turn to green at 50% brightness, Monday through Friday at 8AM.
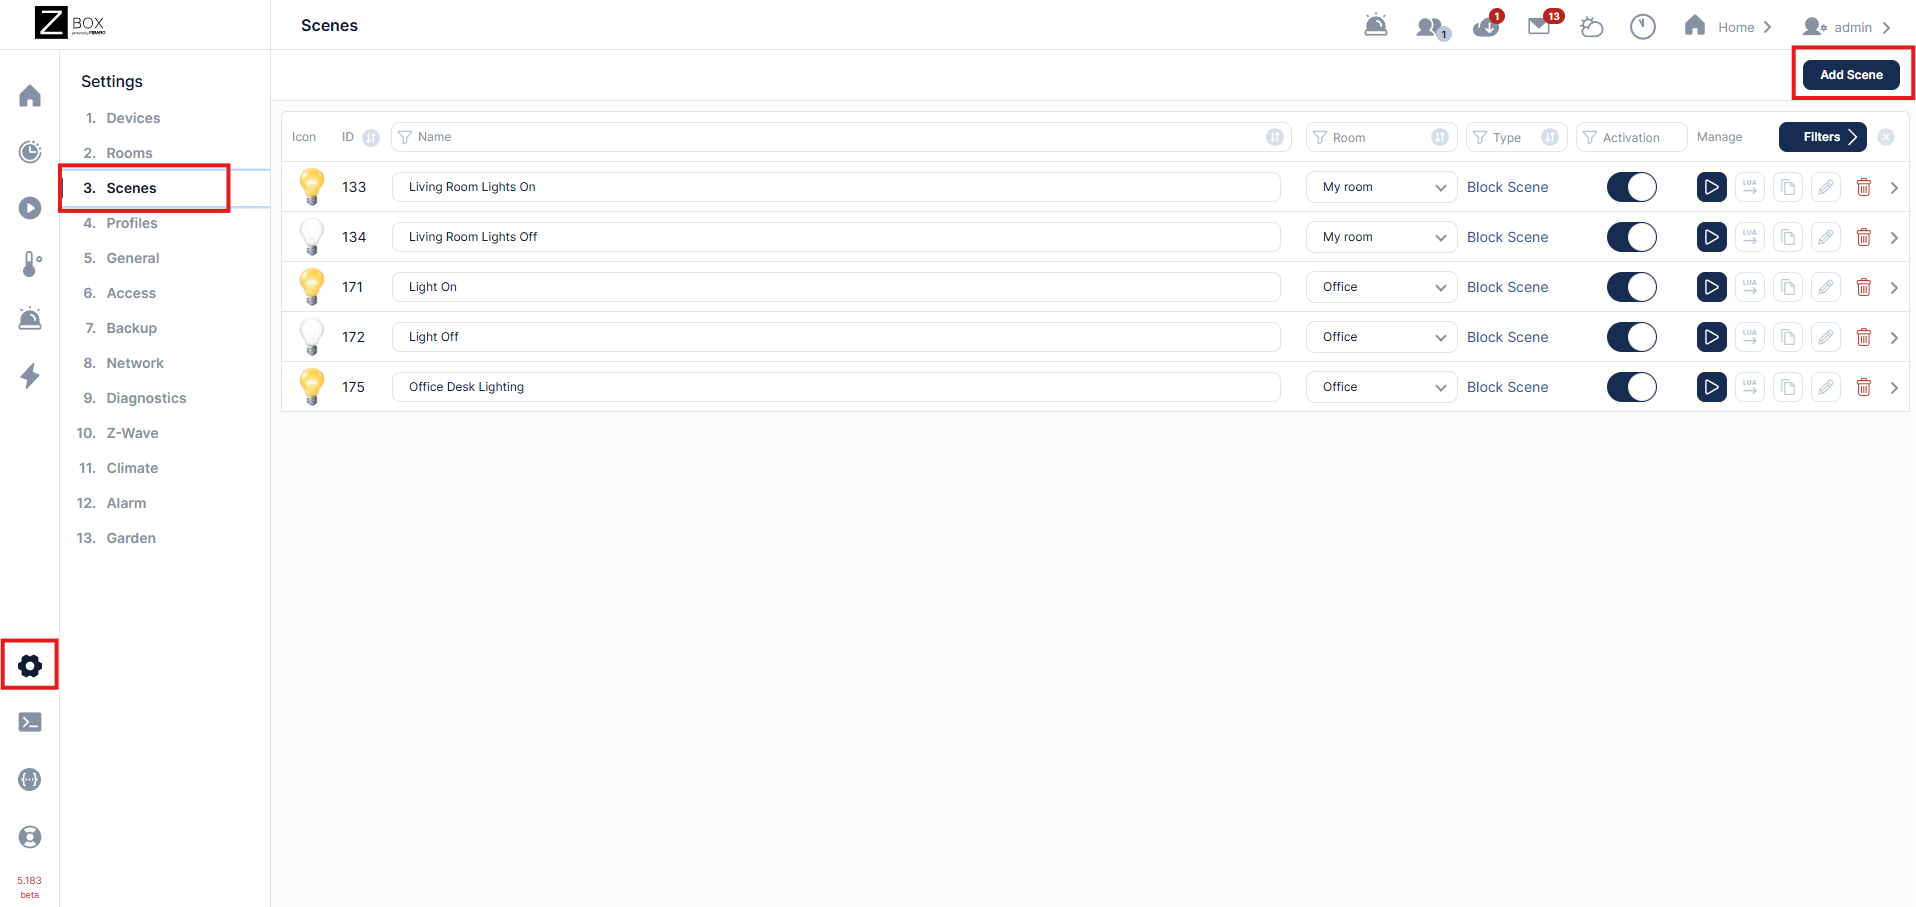
1. Click the Settings cogwheel > click Scenes.
2. From the far right, select Time > drag and drop At Specific Time into the scene builder. For our scene, we are using a specific time (08:00 AM).
Next, drag and drop Days of the Week to the scene builder. Select Monday - Friday.
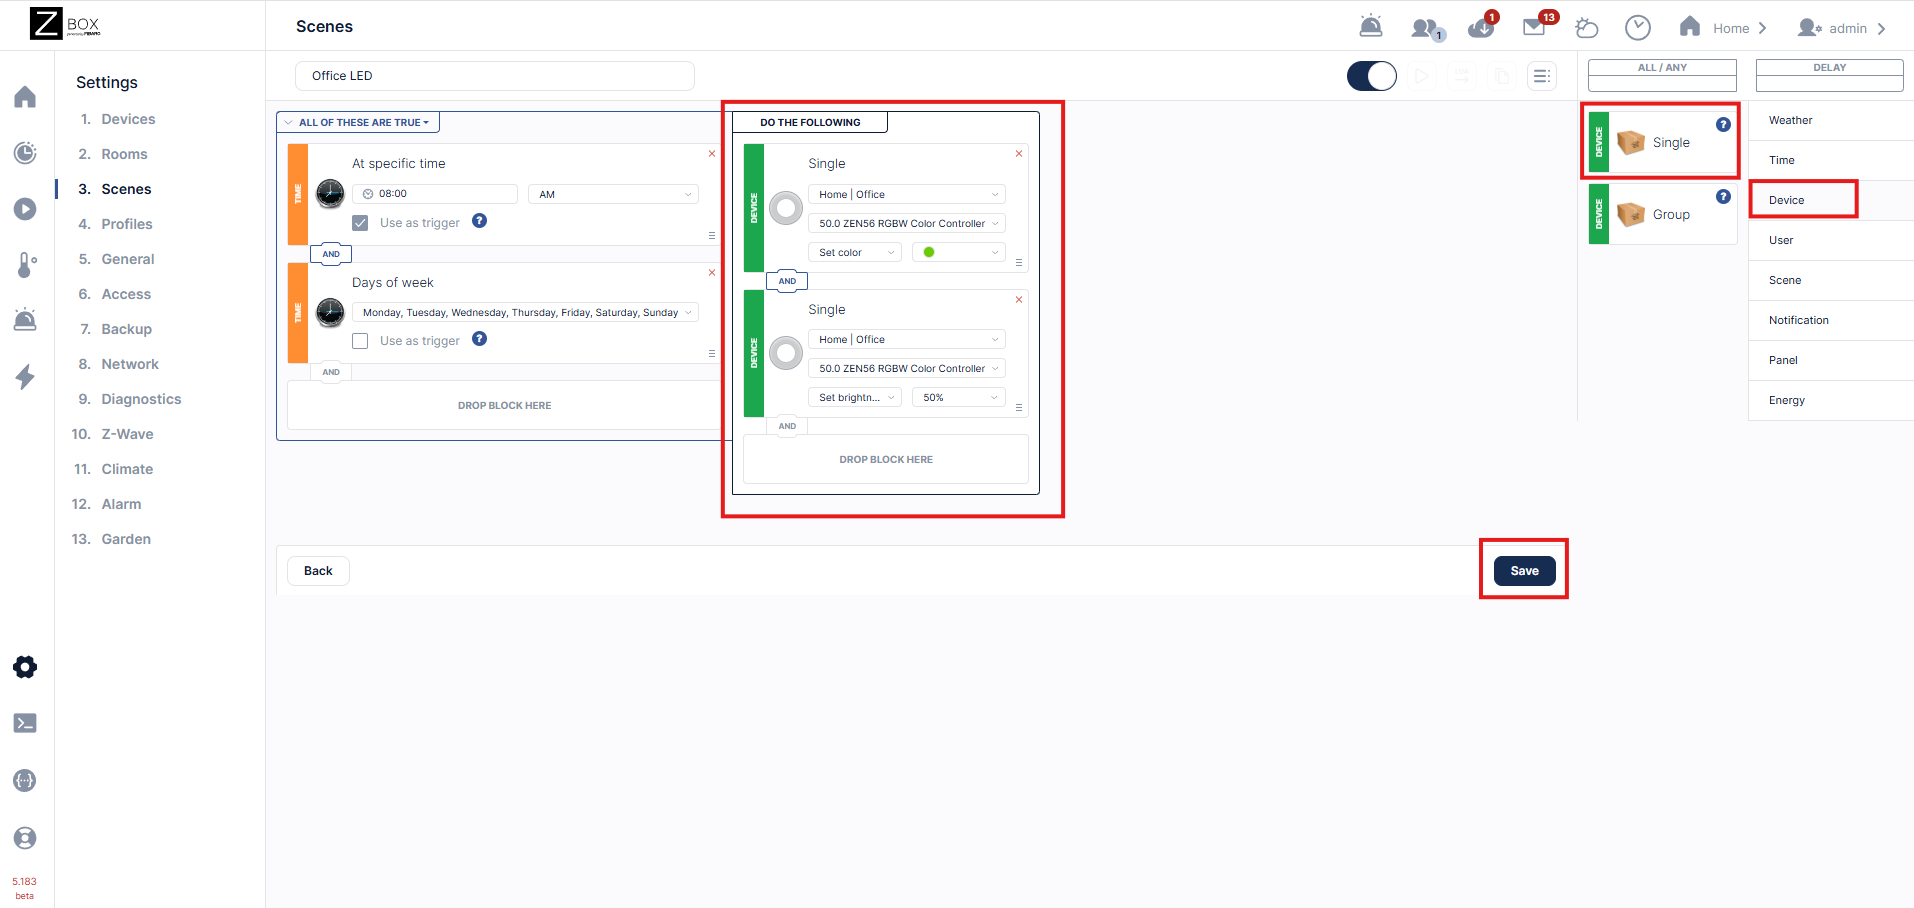
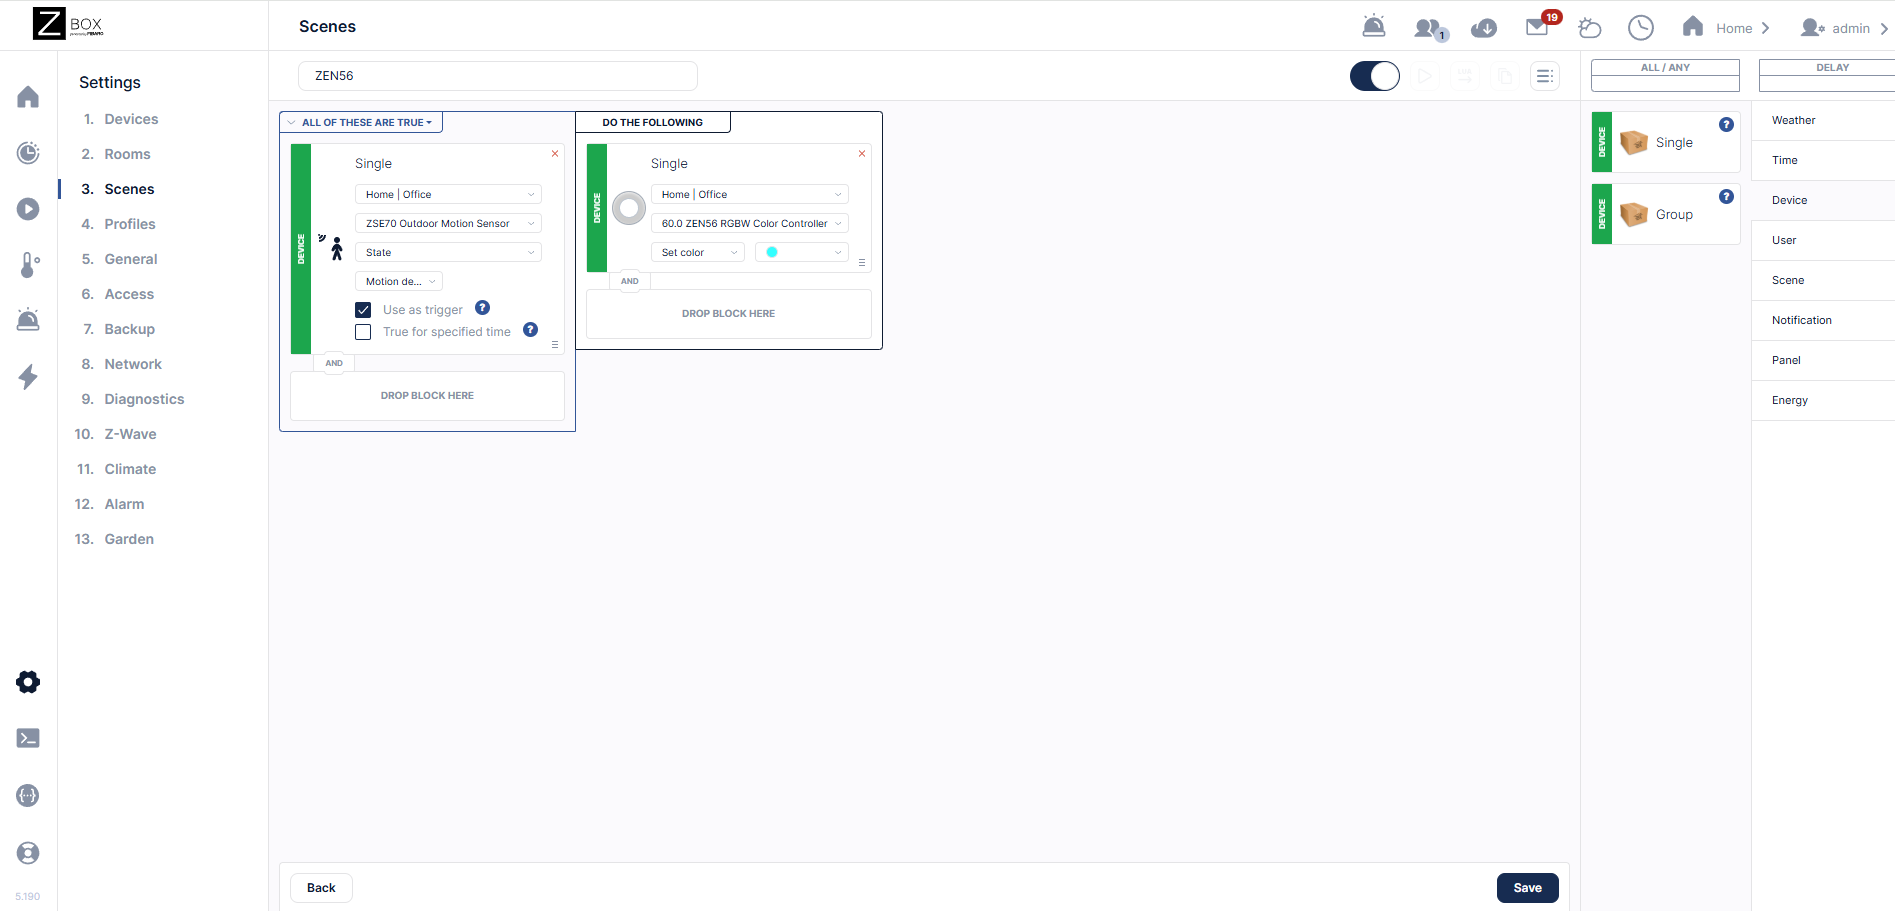
3. From the far right, select Devices. Drag and drop the Single device tile to the scene builder. Repeat.
In the first box, we're selecting the ZEN56 RGBW Color Controller and setting the color to green.
In the second box, we're selecting the ZEN56 RGBW Color Controller and setting the brightness to 50%. Click Save when done.
Custom Colors
You can also set a custom color for each scene as well. When programming your scene, choose Set Color > Other Color:
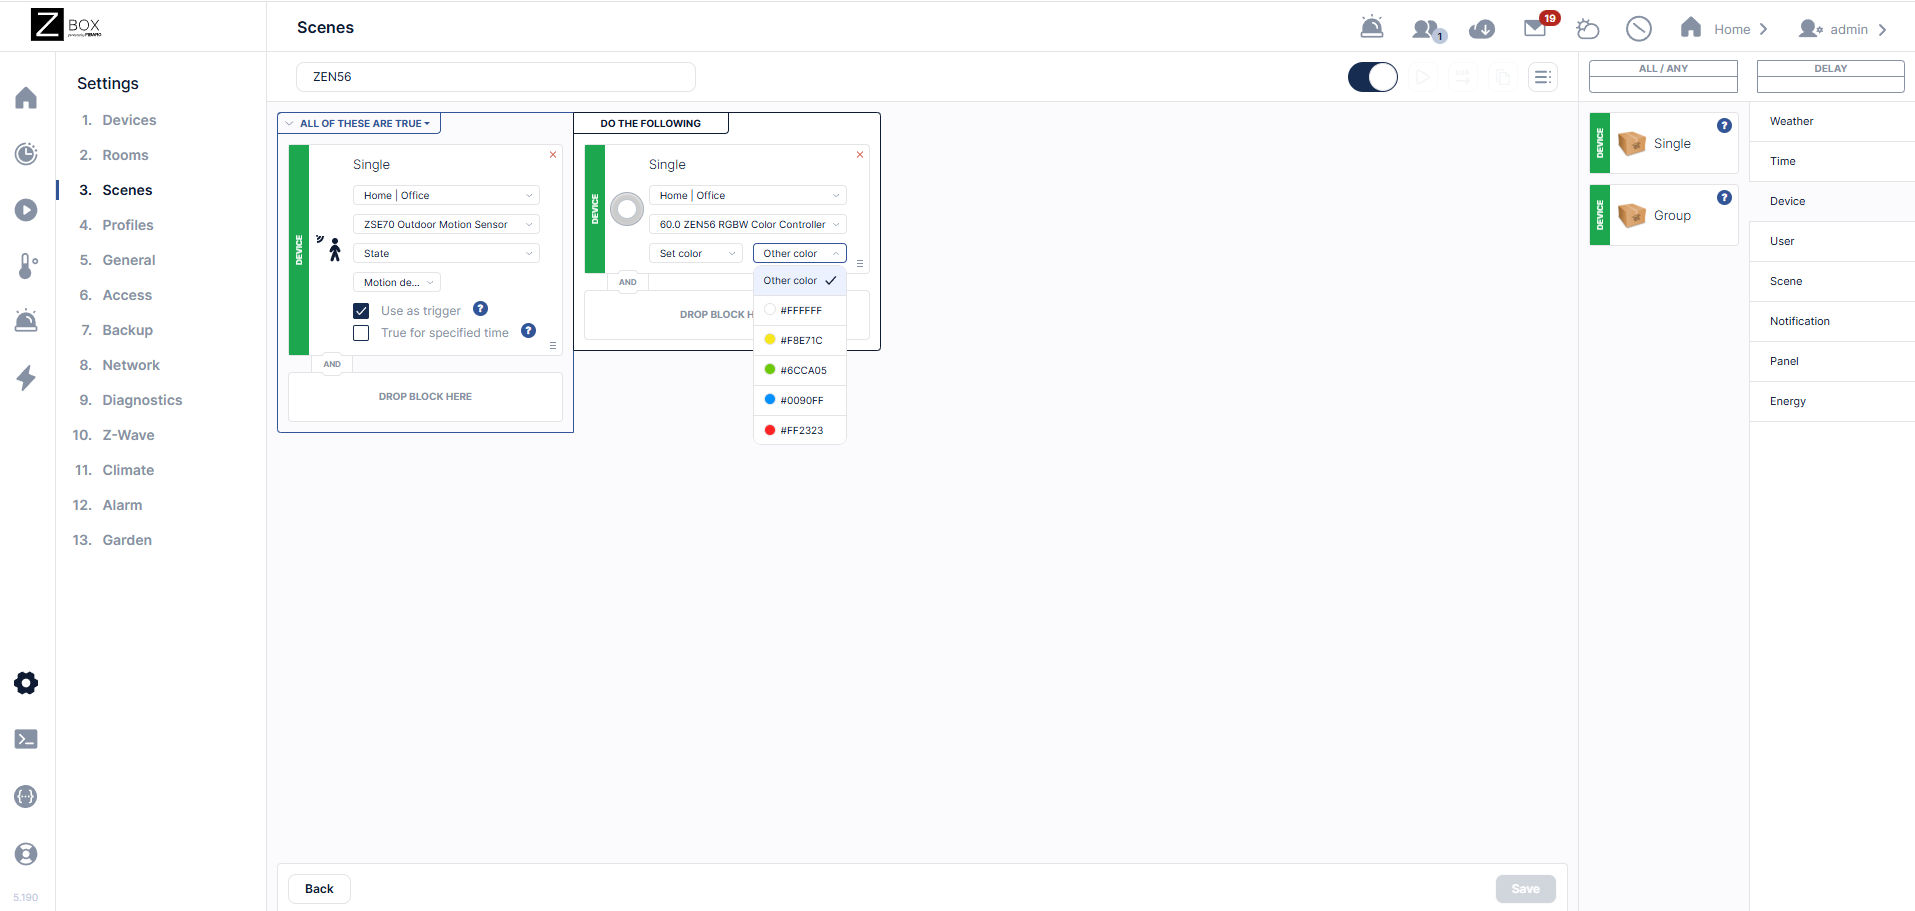
This will bring up the custom color configuration. You can choose your color via the sliders, or enter it in Hex value (see below for more information on Hex values). Click Set when you've selected your color.
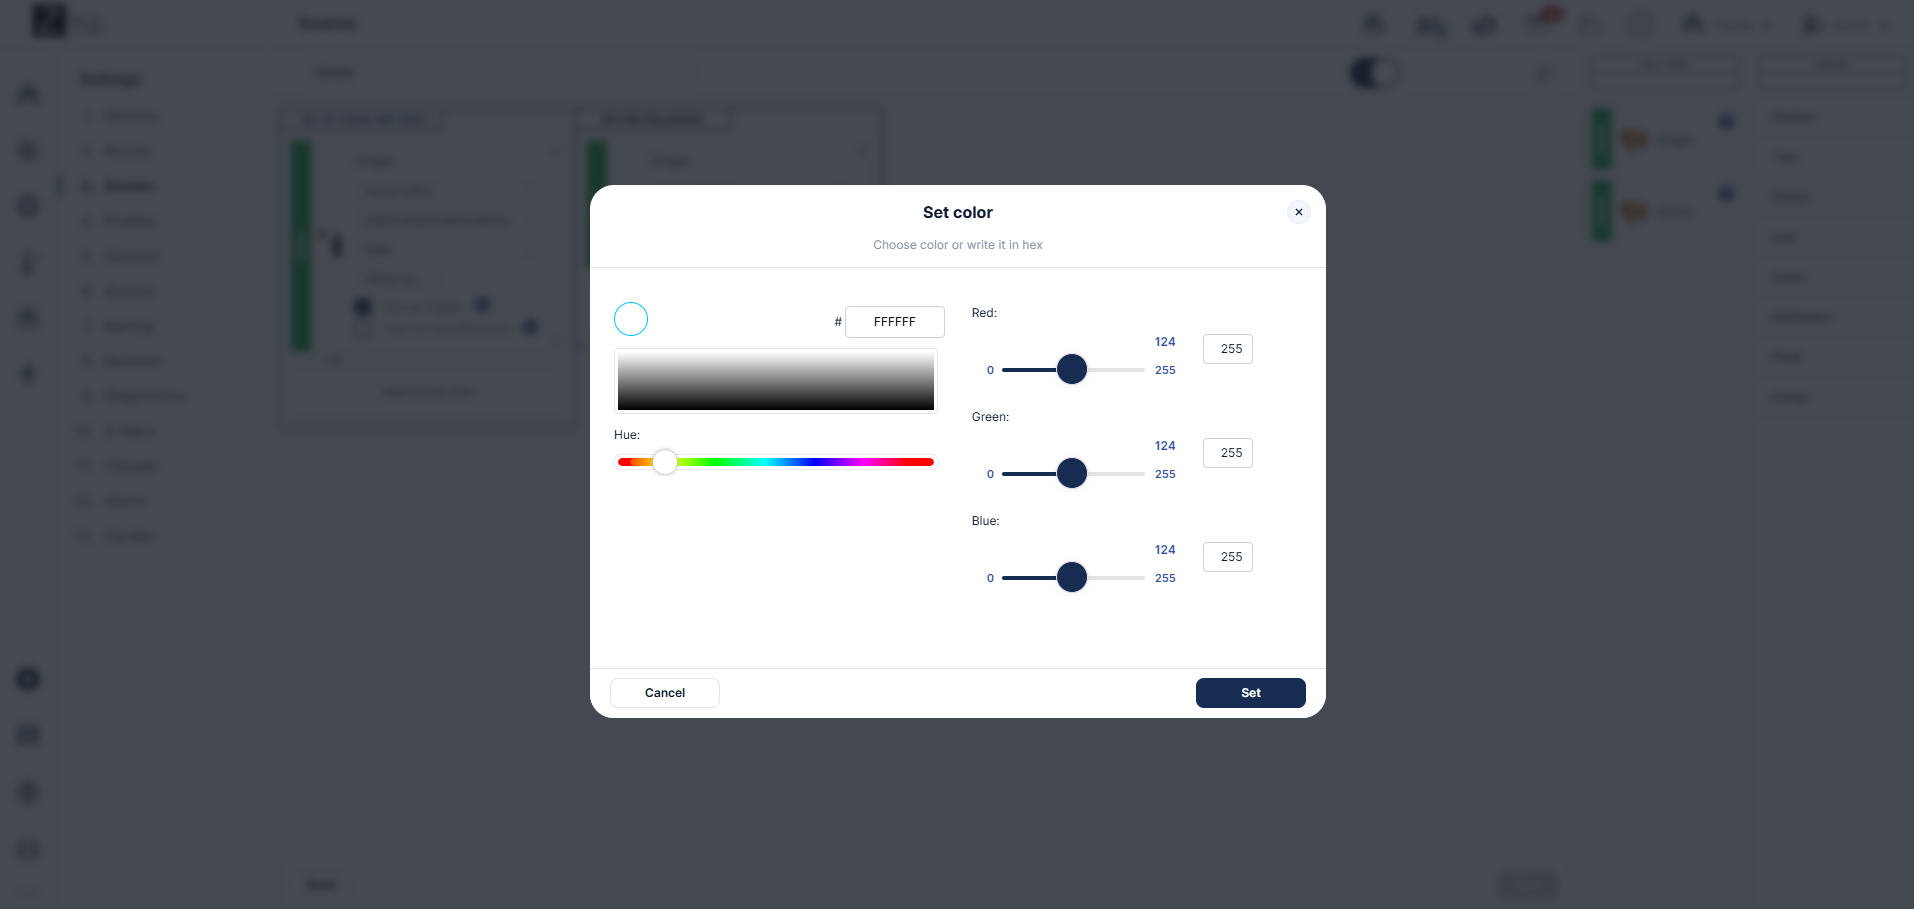
This will set the RGBW Dimmer to your custom color:
Using Hex Values to Set Custom Colors on Your RGBW Dimmer
A hex value is just a short code that tells your dimmer how bright each color channel should be.
How Hex Color Codes Work:
-
Every color is made up of three parts:
-
Red (RR)
-
Green (GG)
-
Blue (BB)
-
-
Each part is written as two characters in a hexadecimal (0–9, A–F) and each color channel (Red, Green, Blue) in your RGBW Dimmer can have a value between
00andFF-
00= off -
FF= full brightness -
Anything in between represents a brightness level between 0–255
-
-
Put them together as:
RRGGBB -
Example:
FF0000means full red, no green, no blue → bright red light.
Hex Brightness Chart for One Channel
| Hex Value | Decimal | Aproximate Brightness |
| 00 | 0 | Off 0% |
| 20 | 32 | Very dim (12%) |
| 40 | 64 | Dim (25%) |
| 60 | 96 | Medium-low (38%) |
| 80 | 128 | Half brightness (50%) |
| A0 | 160 | Medium-high (63%) |
| C0 | 192 | Bright (75%) |
| E0 | 224 | Very bright (88%) |
| FF | 255 | Full brightness (100%) |
Quick Hex Color Reference Chart
| Color | Hex Value | Description |
| Red | FF0000 | Full red, no green, no blue |
| Green | 00FF00 | No red, full green, no blue |
| Blue | 0000FF | No red, no green, full blue |
| Yellow | FFFF00 | Full red, full green, no blue |
| Cyan | 00FFFF | No red, full green, full blue |
| Magenta | FF00FF | Full red, no green, full blue |
| White | FFFFFF | Full red, full green, full blue |
| Warm Pink | FF66B2 | Full red, some green, some blue |
| Soft Teal | 33FFFF | Hint of red, full green, full blue |
| Orange | FF6600 | Full red, some green, no blue |
How to Set a Color Using Hex
We recommend using the slider for easy programming, but for those who want exact values and are familiar with hex operations:
-
Type the 6-digit hex code (for example,
FF0000for red) into the Hex field. -
Press Set or Apply.
-
Your light will instantly change to the selected color.
Parameter 16 (Display/Hide Channel Endpoints)
The ZEN56 RGBW Dimmer also has additional functionality that will allow each color to be programmed separately and have each color display as a separate endpoint in the interface.
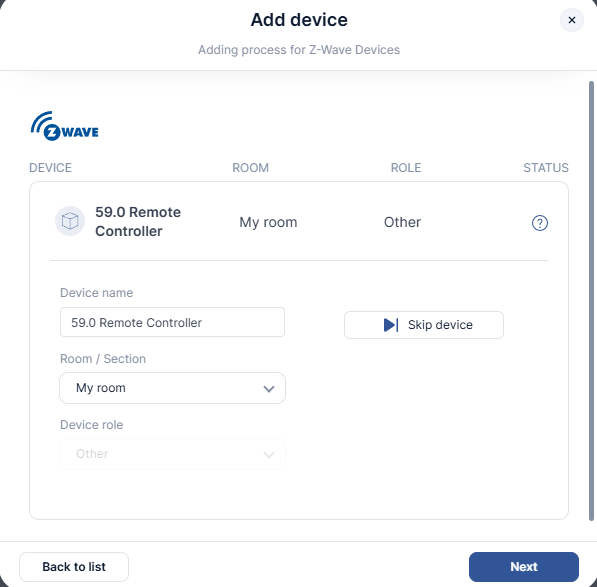
By changing Parameter 16 to value 0, then excluding and re-including the ZEN56, this will create 4 separate multilevel (dimmer) devices for each channel instead of one multicolor control device. This will allow for direct association programming to control each color individually.
When you reinclude the ZEN56 after setting Parameter 16 to Value 0, it is recommended to rename each child device (endpoint) during the configuration process. You can turn on each child device/endpoint to view the color, and rename it accordingly.
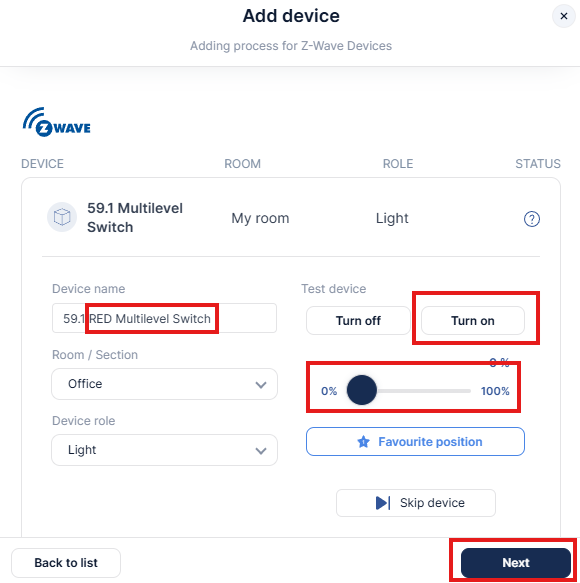
During configuration, the device will display as shown below. Note each channel now has a node ID that matches the device, plus a .1-.4. When you click Next in the screenshot below, it will take you to each individual channel.

The first screenshot shows how the main Remote Controller device displays. The second screenshot shows the renamed and located device. After naming, click Next:

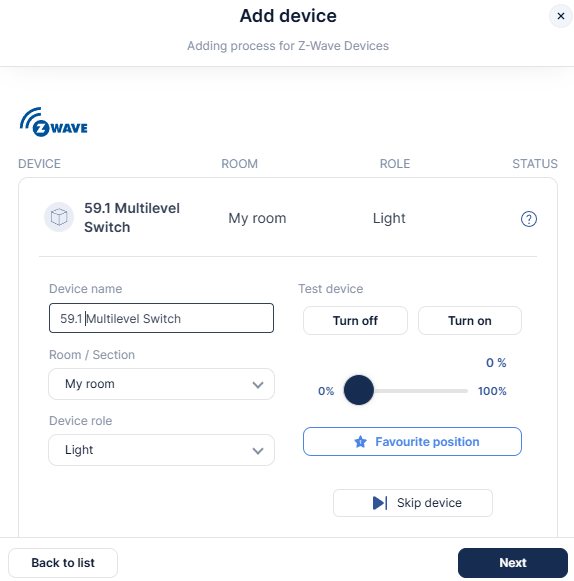
Each channel will then populate one at a time. The first screenshot shows how it displays natively.
Click Turn On. This will display the color for this endpoint. Rename the device accordingly. You can also set your favorite brightness here if you prefer. Click Next, and do the same for all 4 color channels.
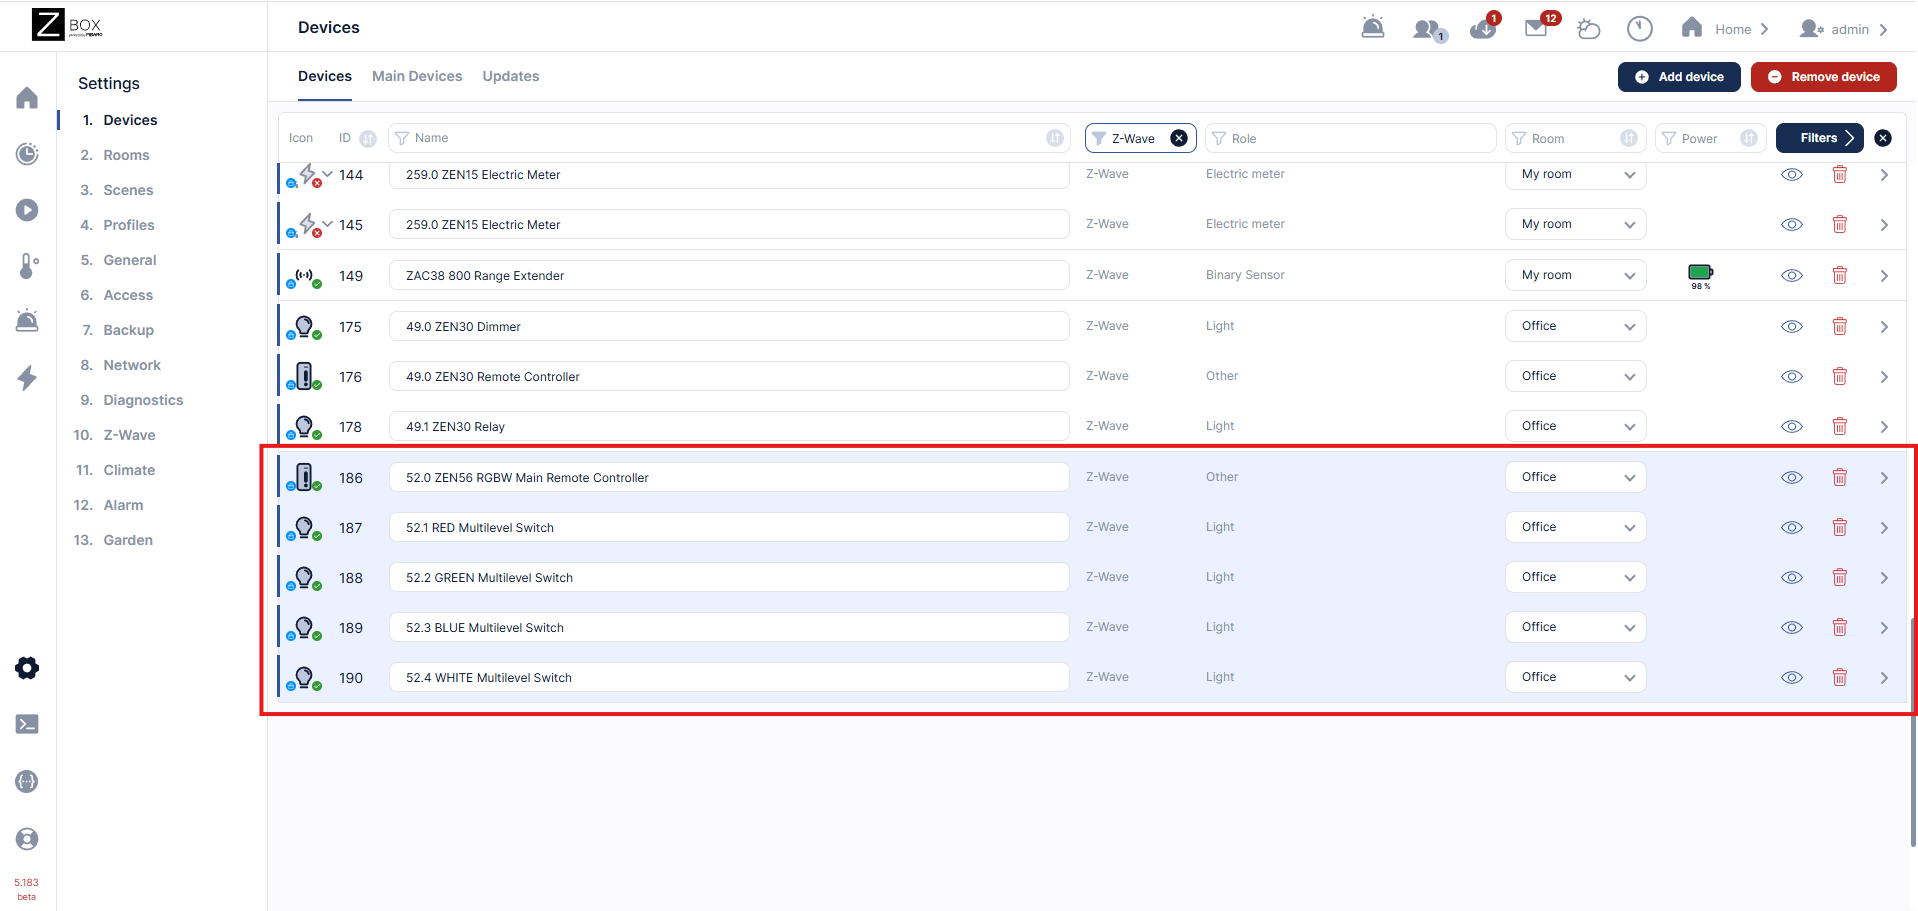
Once you have renamed all channels, you now have the main remote controller device, along with a separate device for each color channel that can be used when programming Direct Association if you want singular color control:
Below, we have an example showing the ZSE40 Motion Sensor triggering the ZEN56 RGBW RED channel to turn on. This creates a useful visual alert!

Please let us know if you have any questions!

