The ZEN56 RGBW Dimmer is officially integrated with Hubitat as of version 2.4.3, so you should have access to all settings out of the box, without a need for a custom driver.
Hubitat does not natively expose Direct Association functionality, so you will need to use rules/scenes when programming the ZEN56. In some cases, a community-developed driver may be available to unlock additional features on Hubitat. These drivers are created and maintained by members of the Hubitat community, not by Zooz. If you are interested in exploring community options, we recommend checking the Hubitat forums for the latest information and user-supported drivers.
NOTE ON CUSTOM DRIVERS: We work with all of the platforms to provide thoughtful integration for our devices. While the most open platforms like Home Assistant or Z-Box allow for full functionality out-of-the-box, other platforms like Hubitat often require dedicated custom code for expanded functionality of Z-Wave devices, even though it's a standardized protocol. If a feature is not exposed in the native integration on the platform, please let Hubitat support and our team know so we can work together to add it based on your feedback. We aim to support as many platforms as possible while balancing development costs and keeping device pricing reasonable. Customer feedback helps guide where we invest in additional platform-specific work.
We recommend using Hubitat's Rule Machine to program the ZEN56, which is Hubitat’s powerful automation engine that can handle complex logic, conditional branching, and multi-step actions including multiple triggers, conditions, and restrictions (AND/OR logic), delays and scheduled actions and more!
Rule Machine Programming
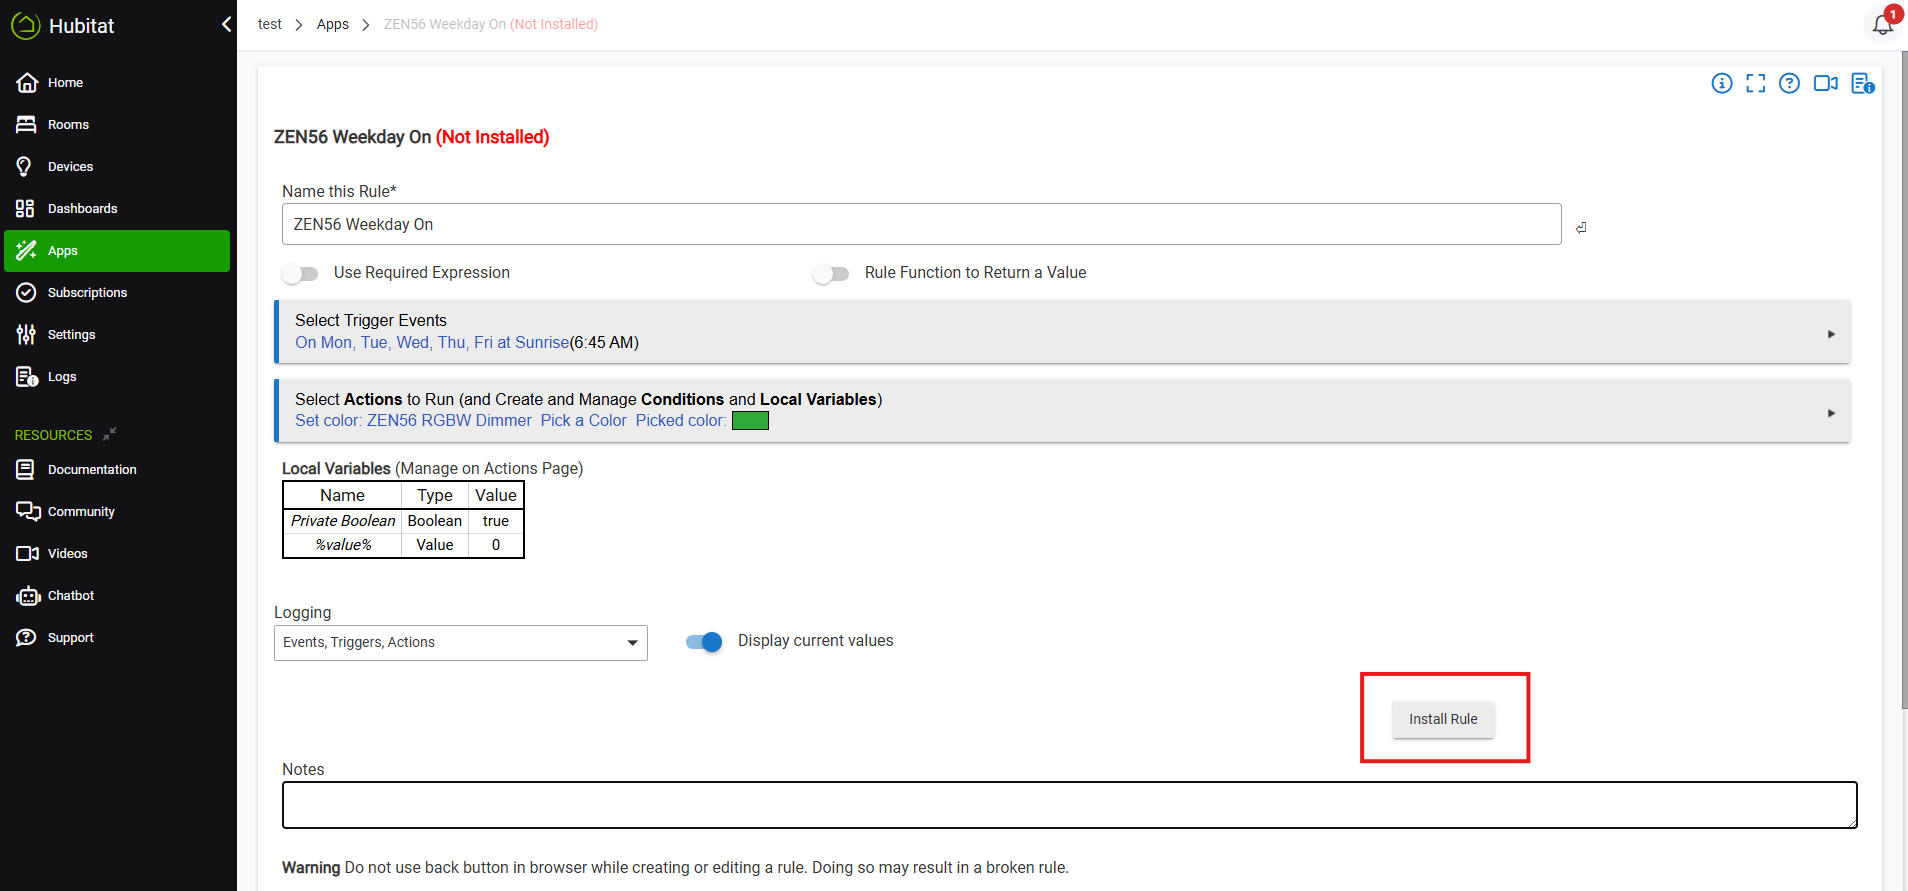
We've included a sample scene from Rule Machine. We're setting our scene to turn the ZEN56 RGBW on at sunrise to green, Monday-Friday.
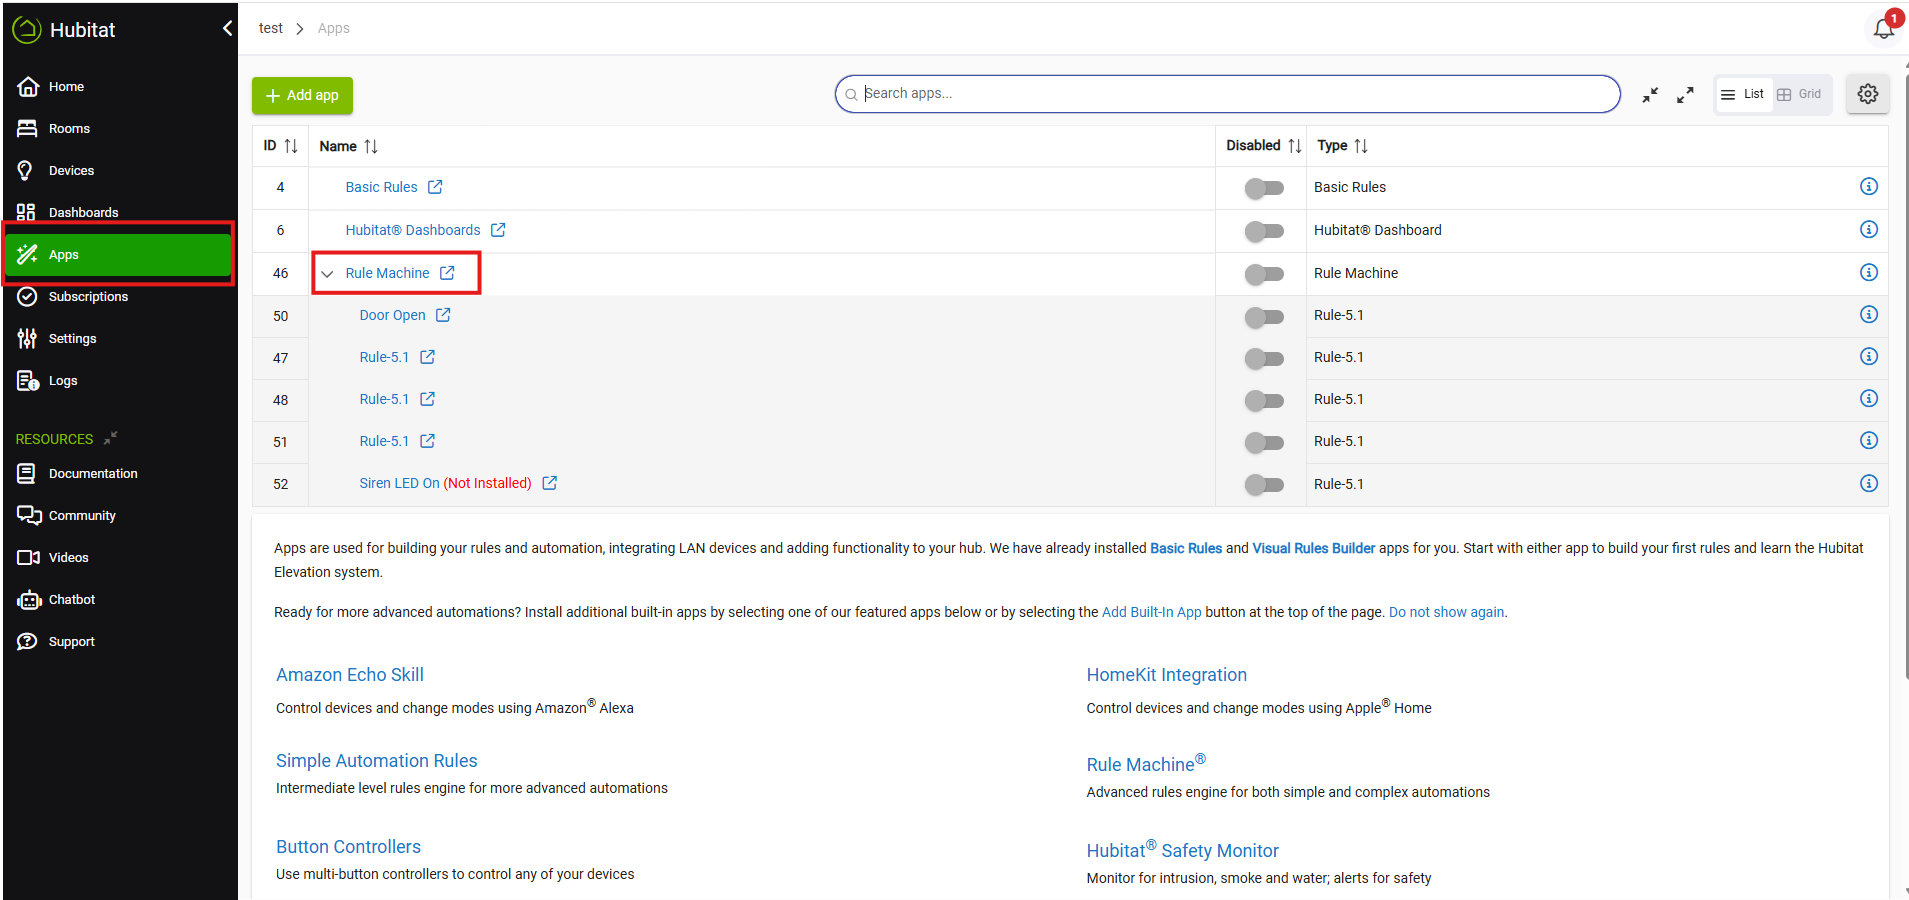
Click on Apps in the side menu > Click on "+ Add Built-in App" in the top right corner (or skip ahead if you already have Rule Machine installed) > Click on Rule Machine.
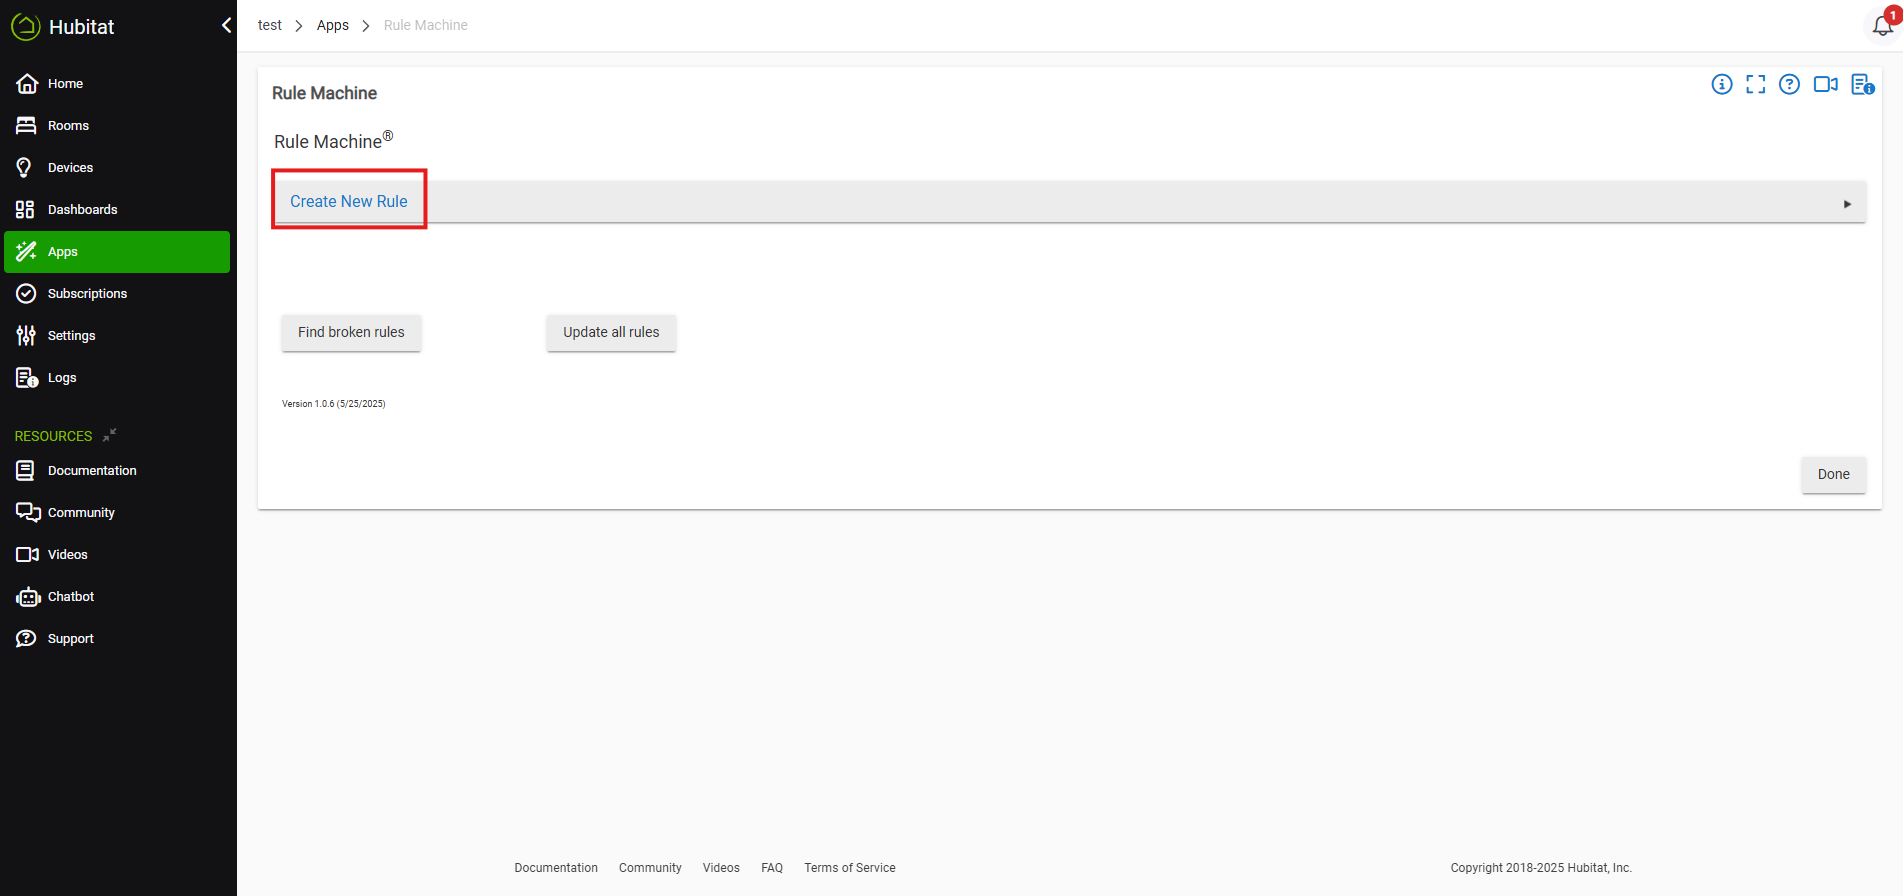
Click Create New Rule.
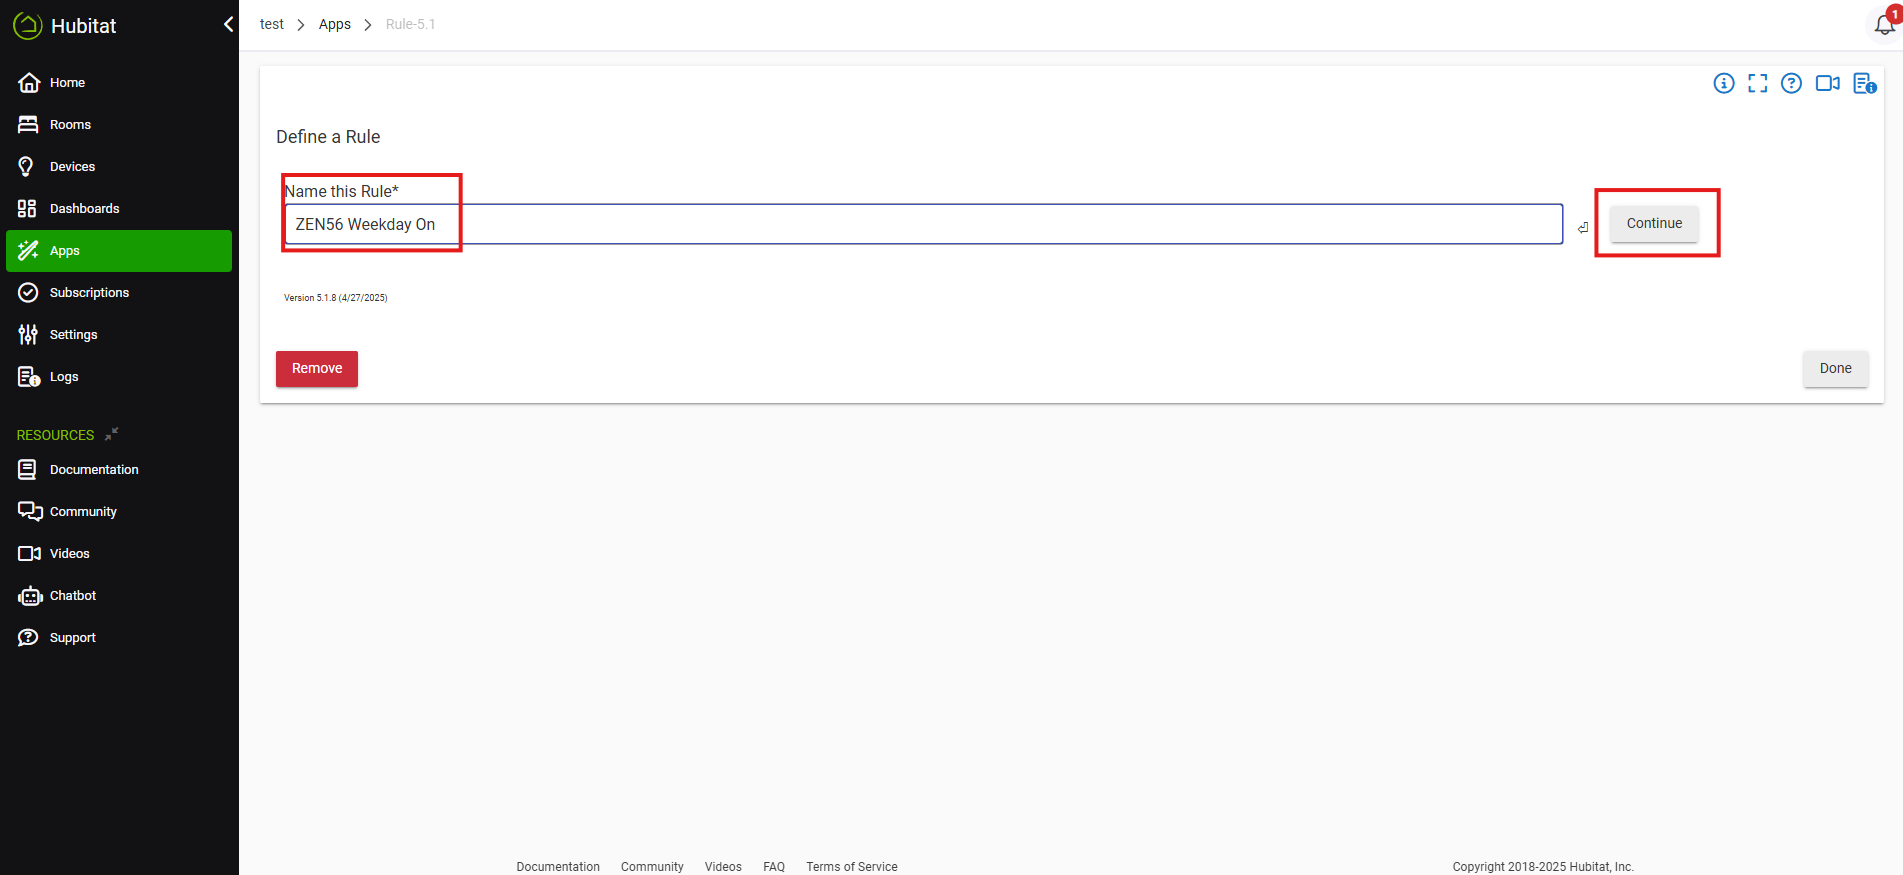
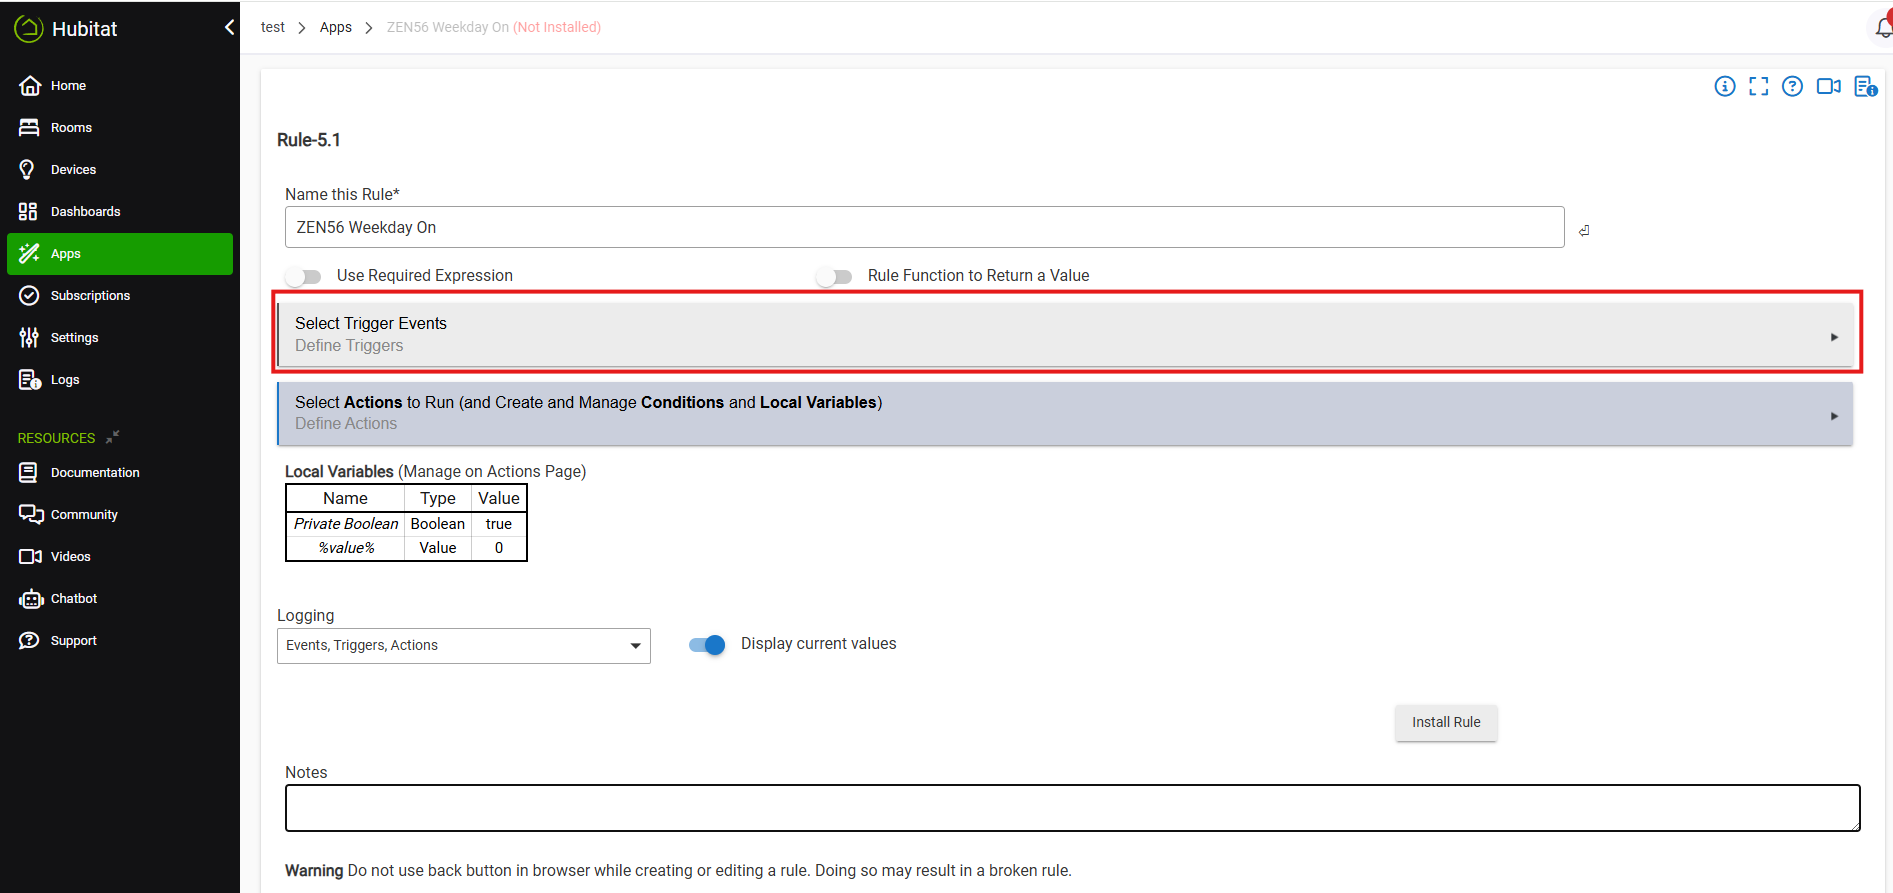
Name your rule. Click Continue.
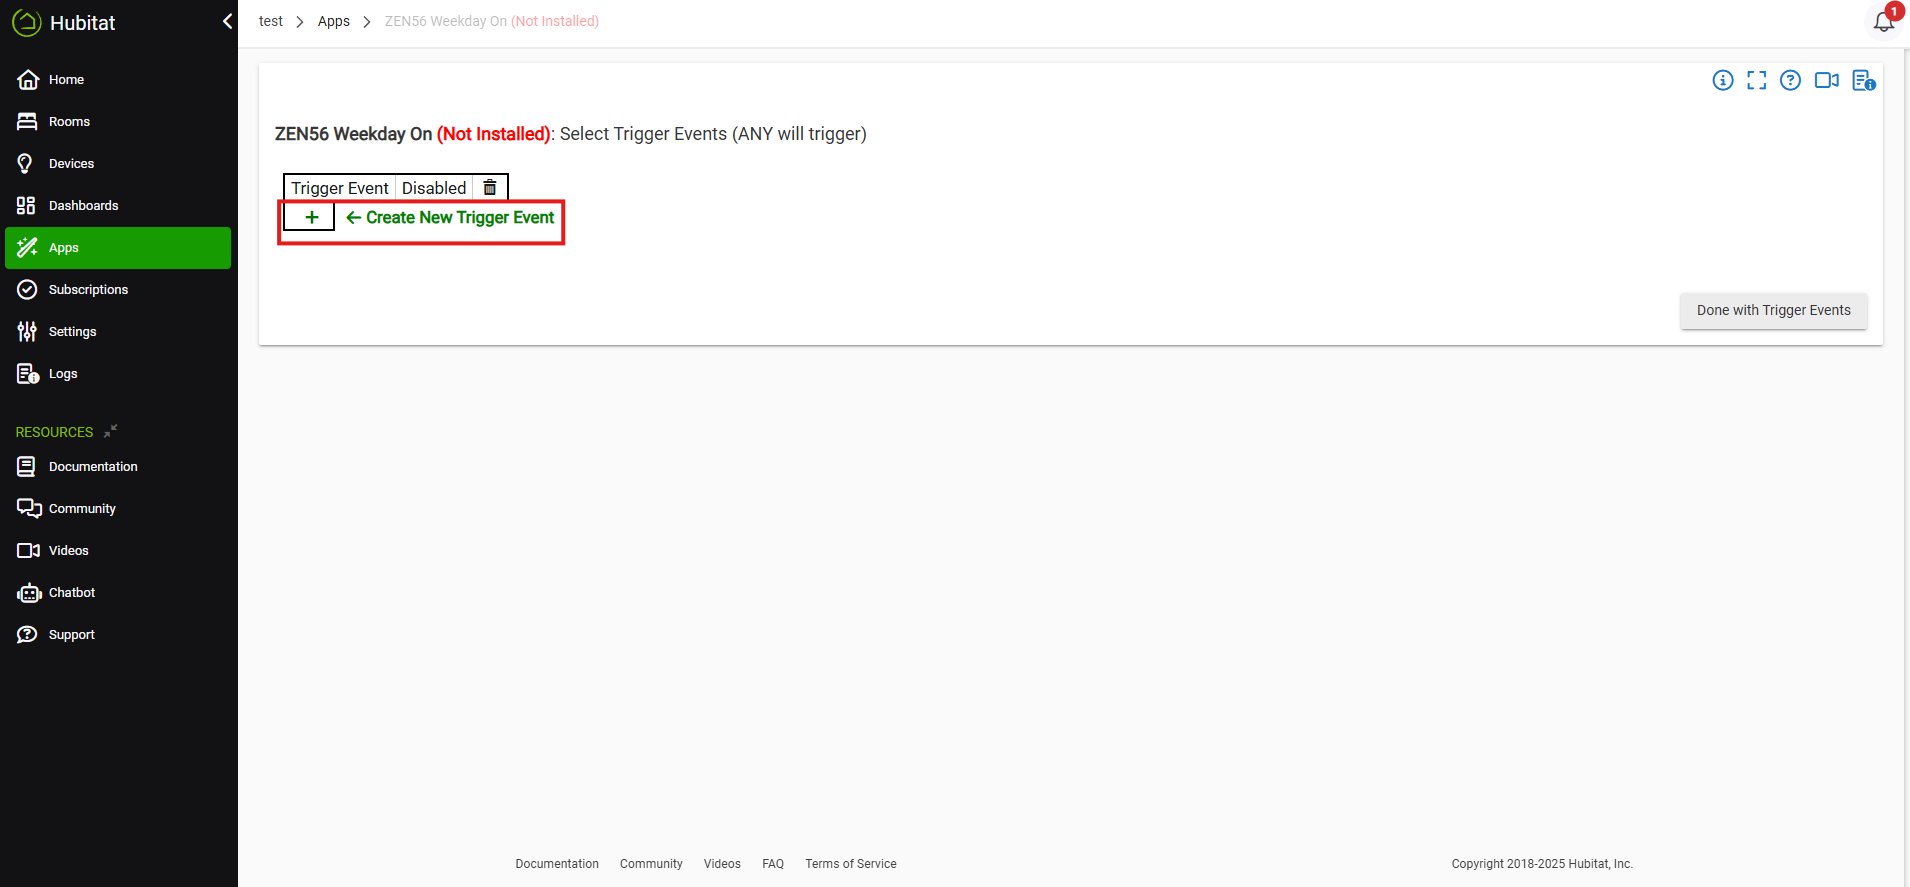
Click Select Trigger Events.
Click the + sign to create a new trigger event.
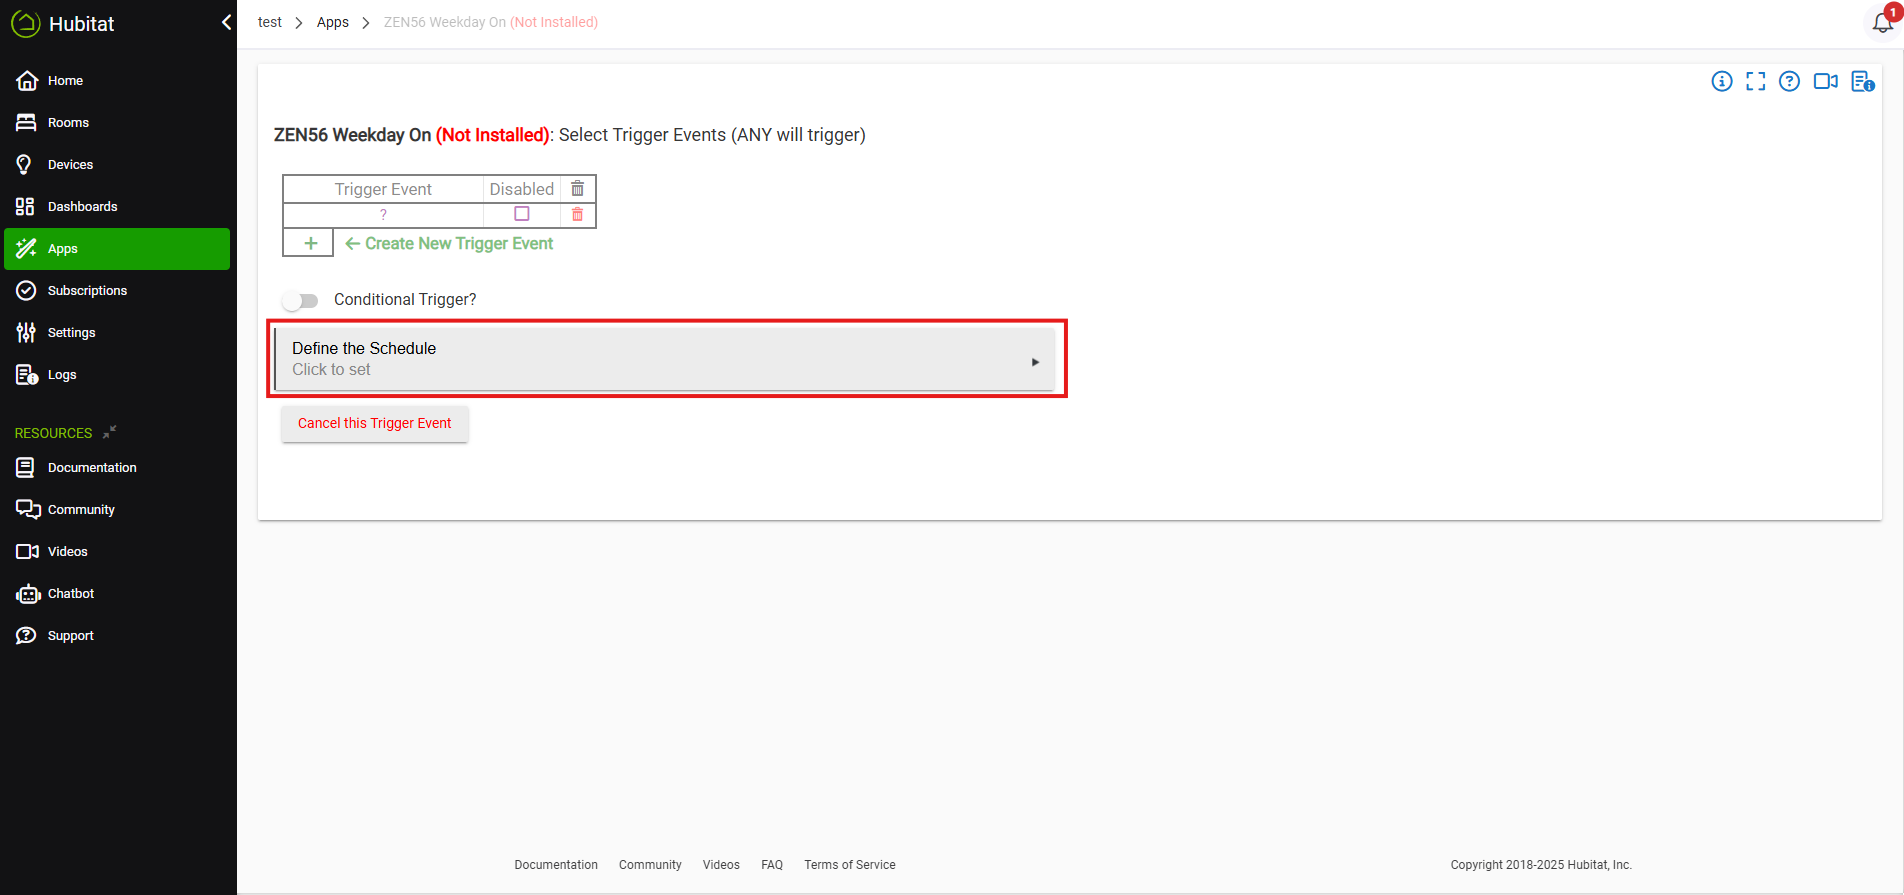
Click Select Capbility for new Trigger Event. In the options, we're selecting Days of the Week Schedule.

Click Define the Schedule.
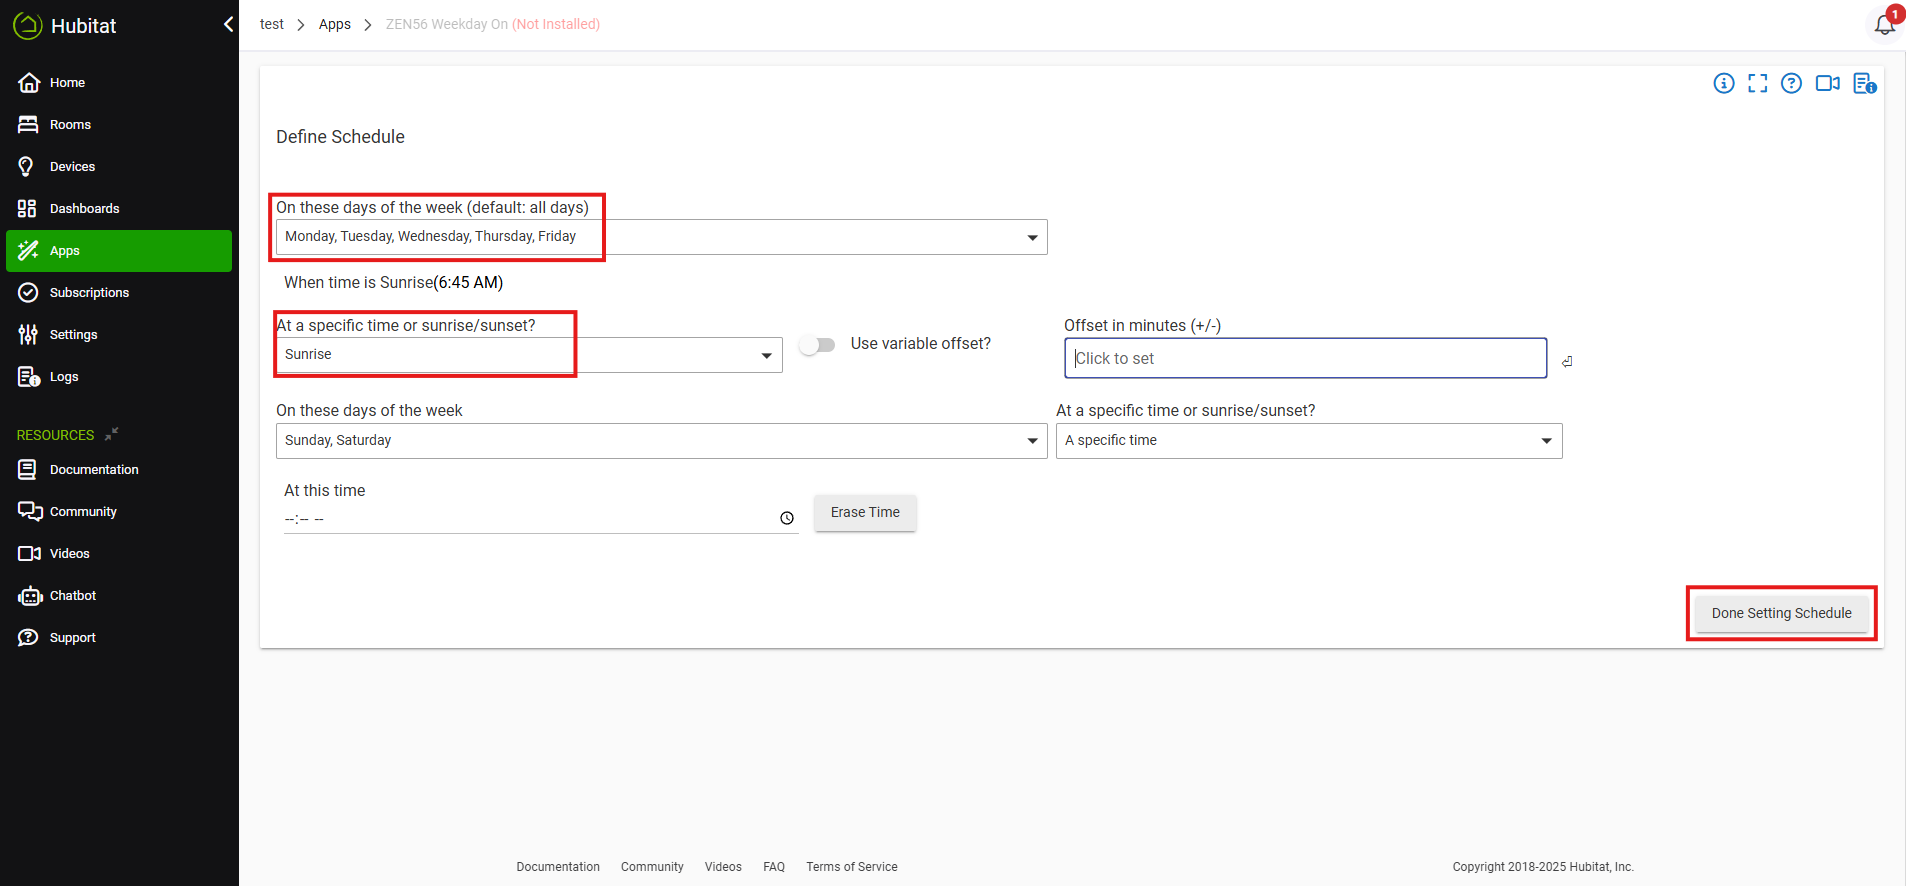
For our scene, we're selecting Monday-Friday, and turning the light on at sunrise. You can set additional conditions. When done, click Done Setting Schedule.
Click Done with the Trigger Event.
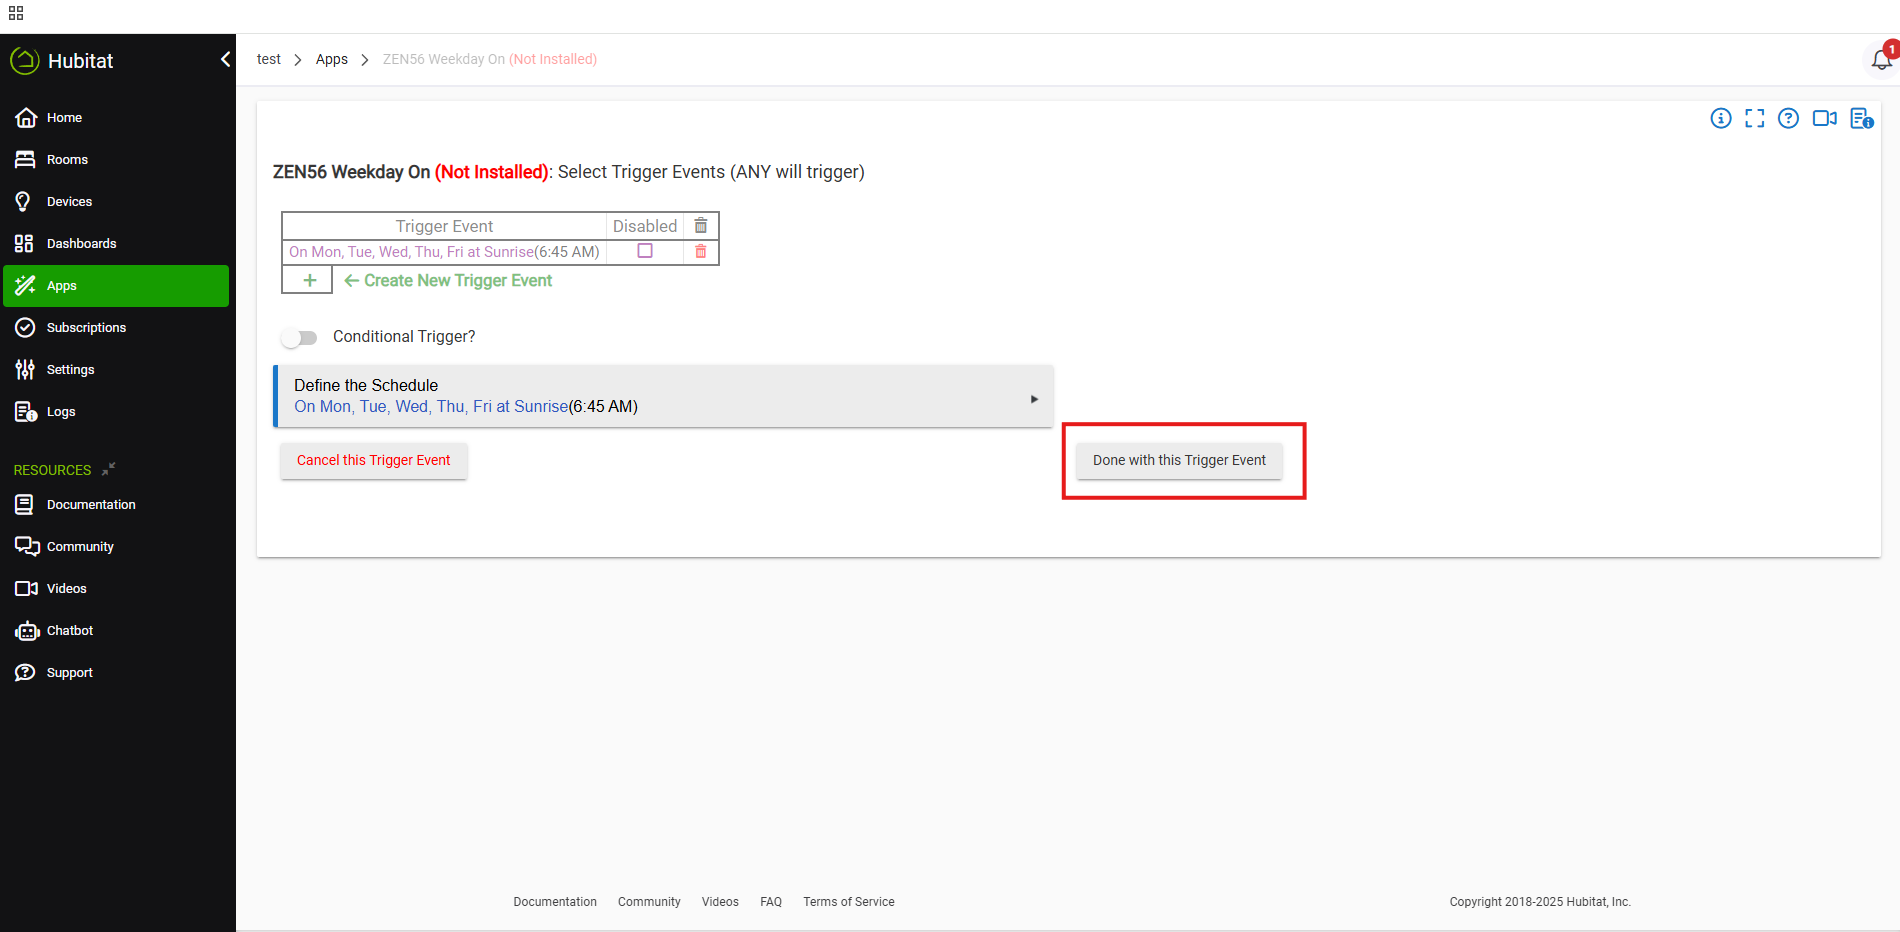
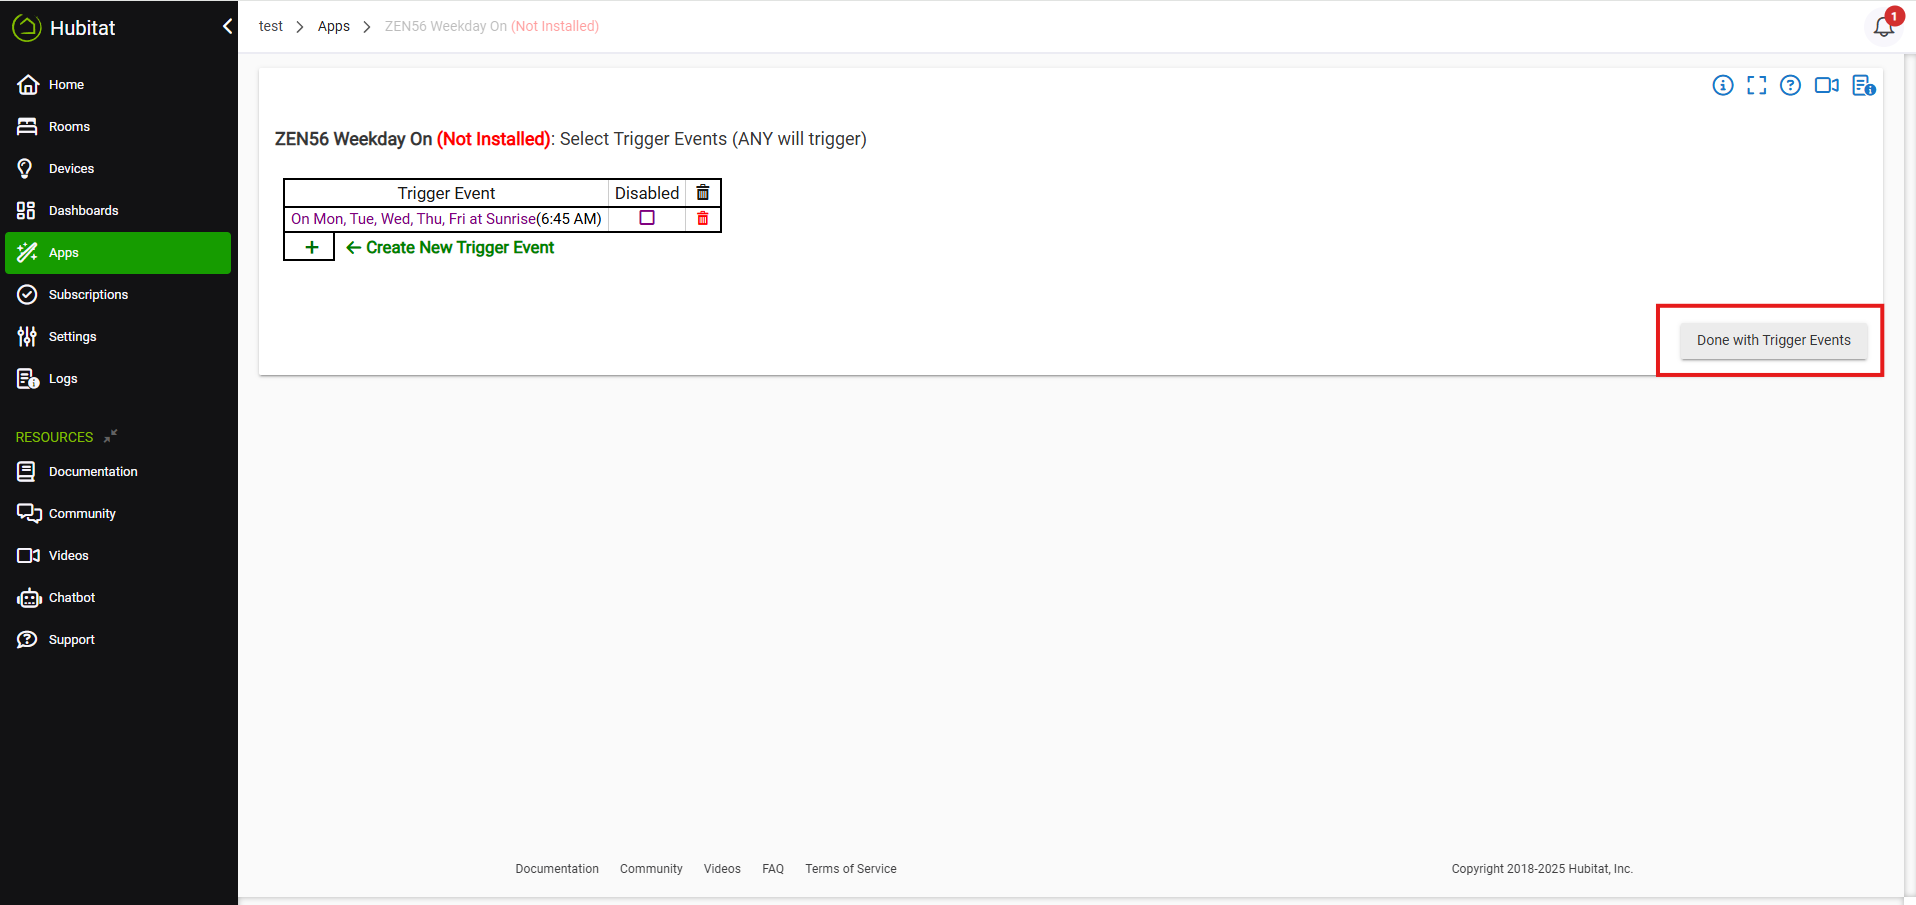
From here, you can add additional triggers or conditions. When you're done editing, click Done with Trigger Events.
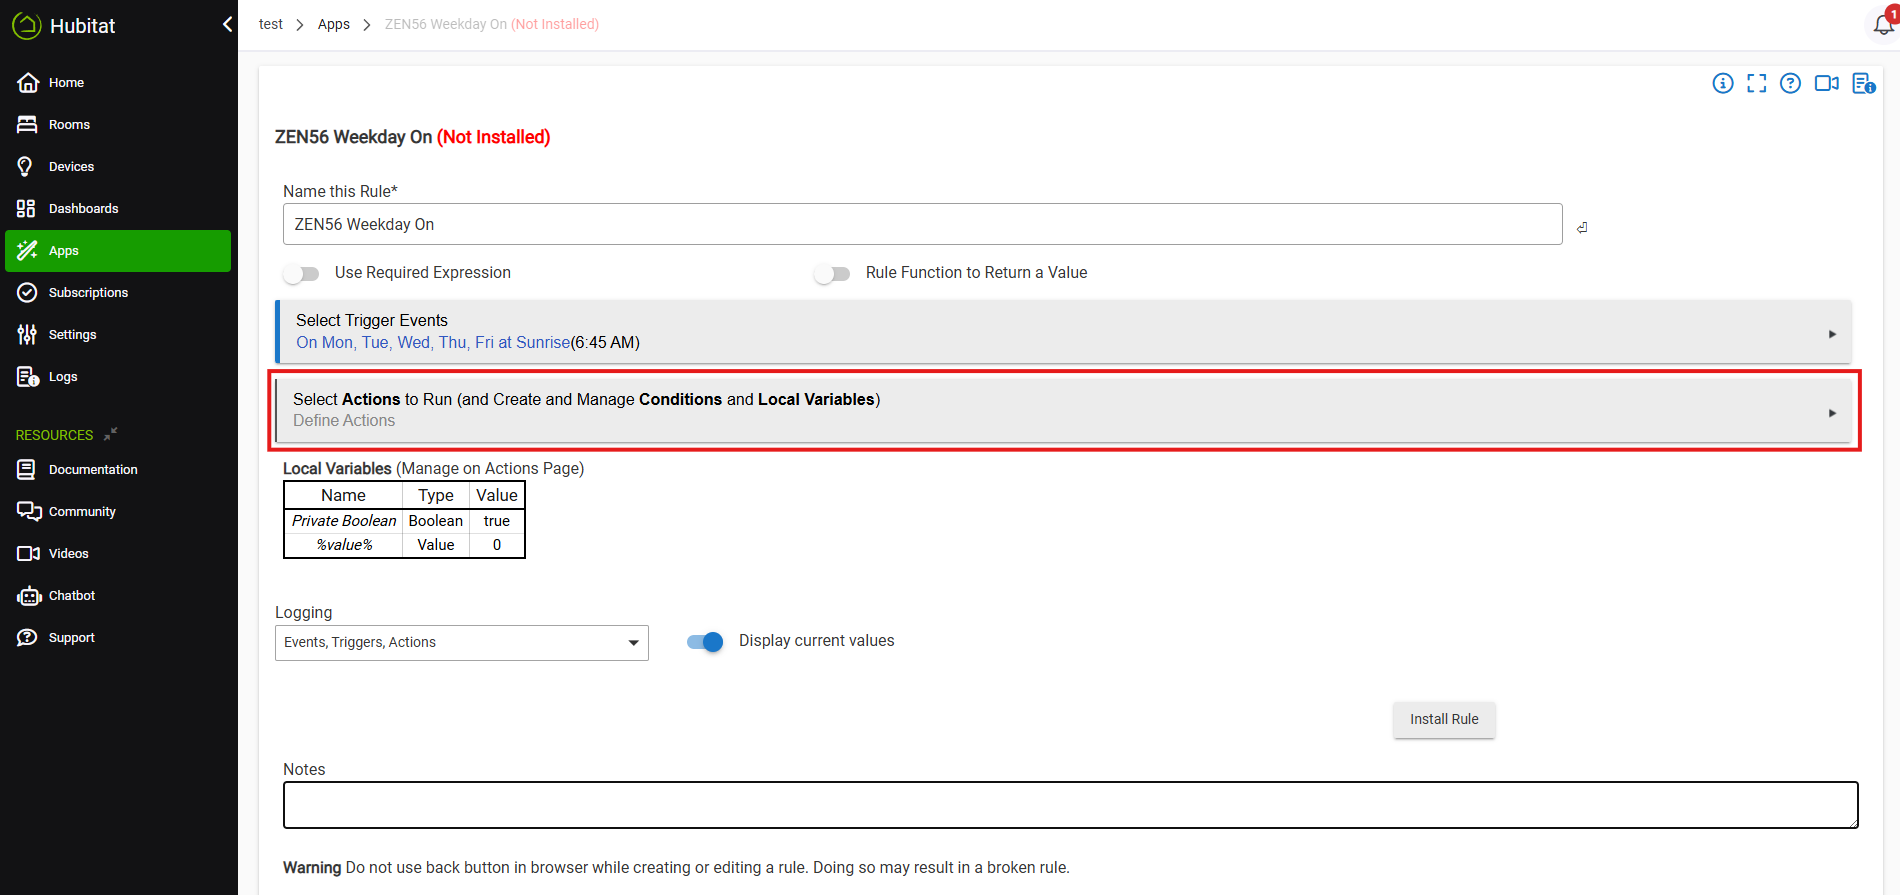
Now, we'll move on to what we want the ZEN56 to do when the trigger occurs. Click Select Actions to Run.
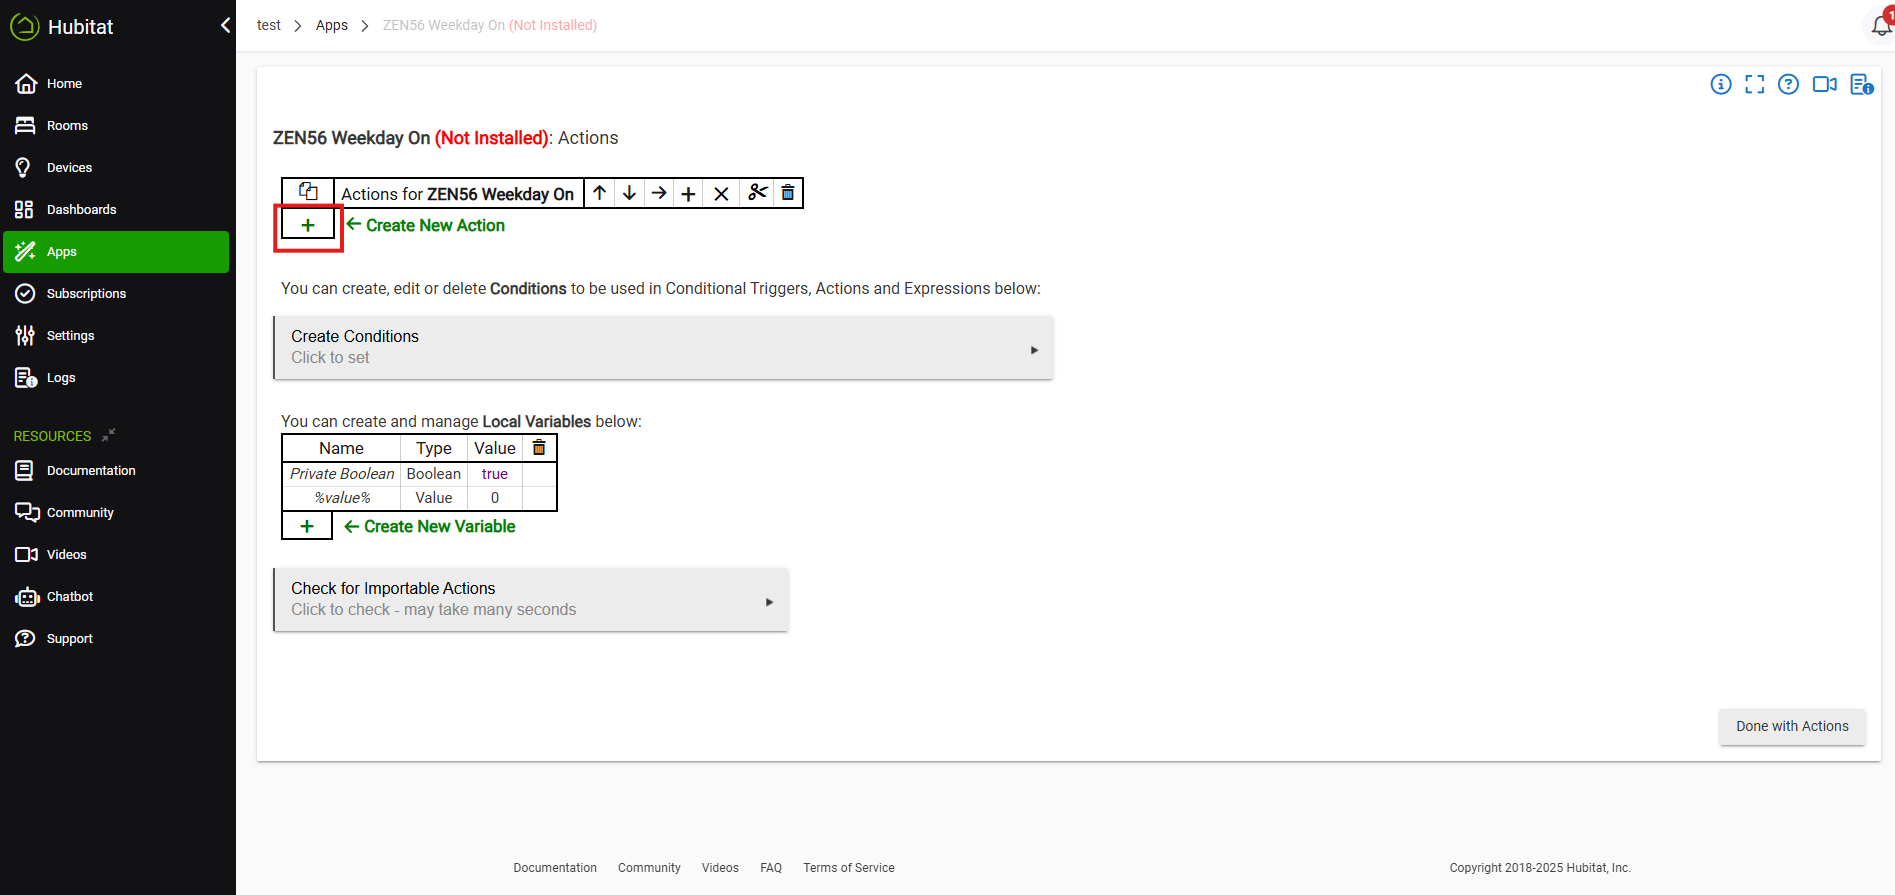
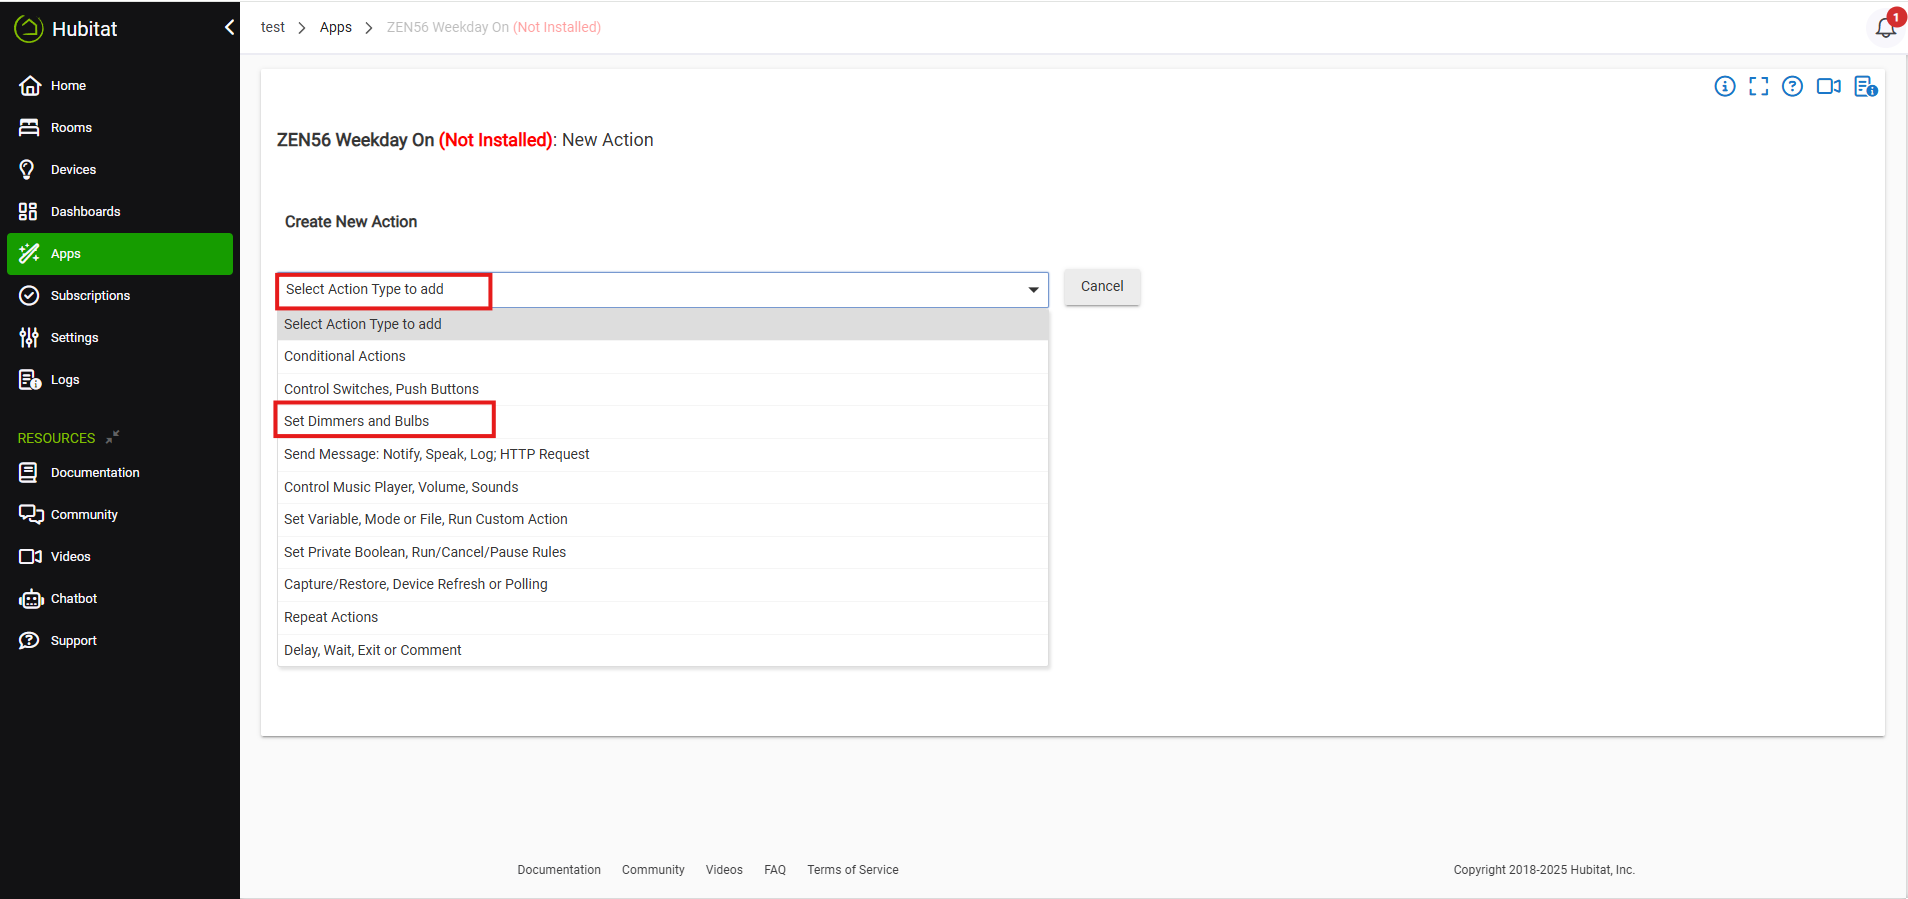
Click the + sign to Create New Action.
Under Create New Action, select Set Dimmers and Bulbs.
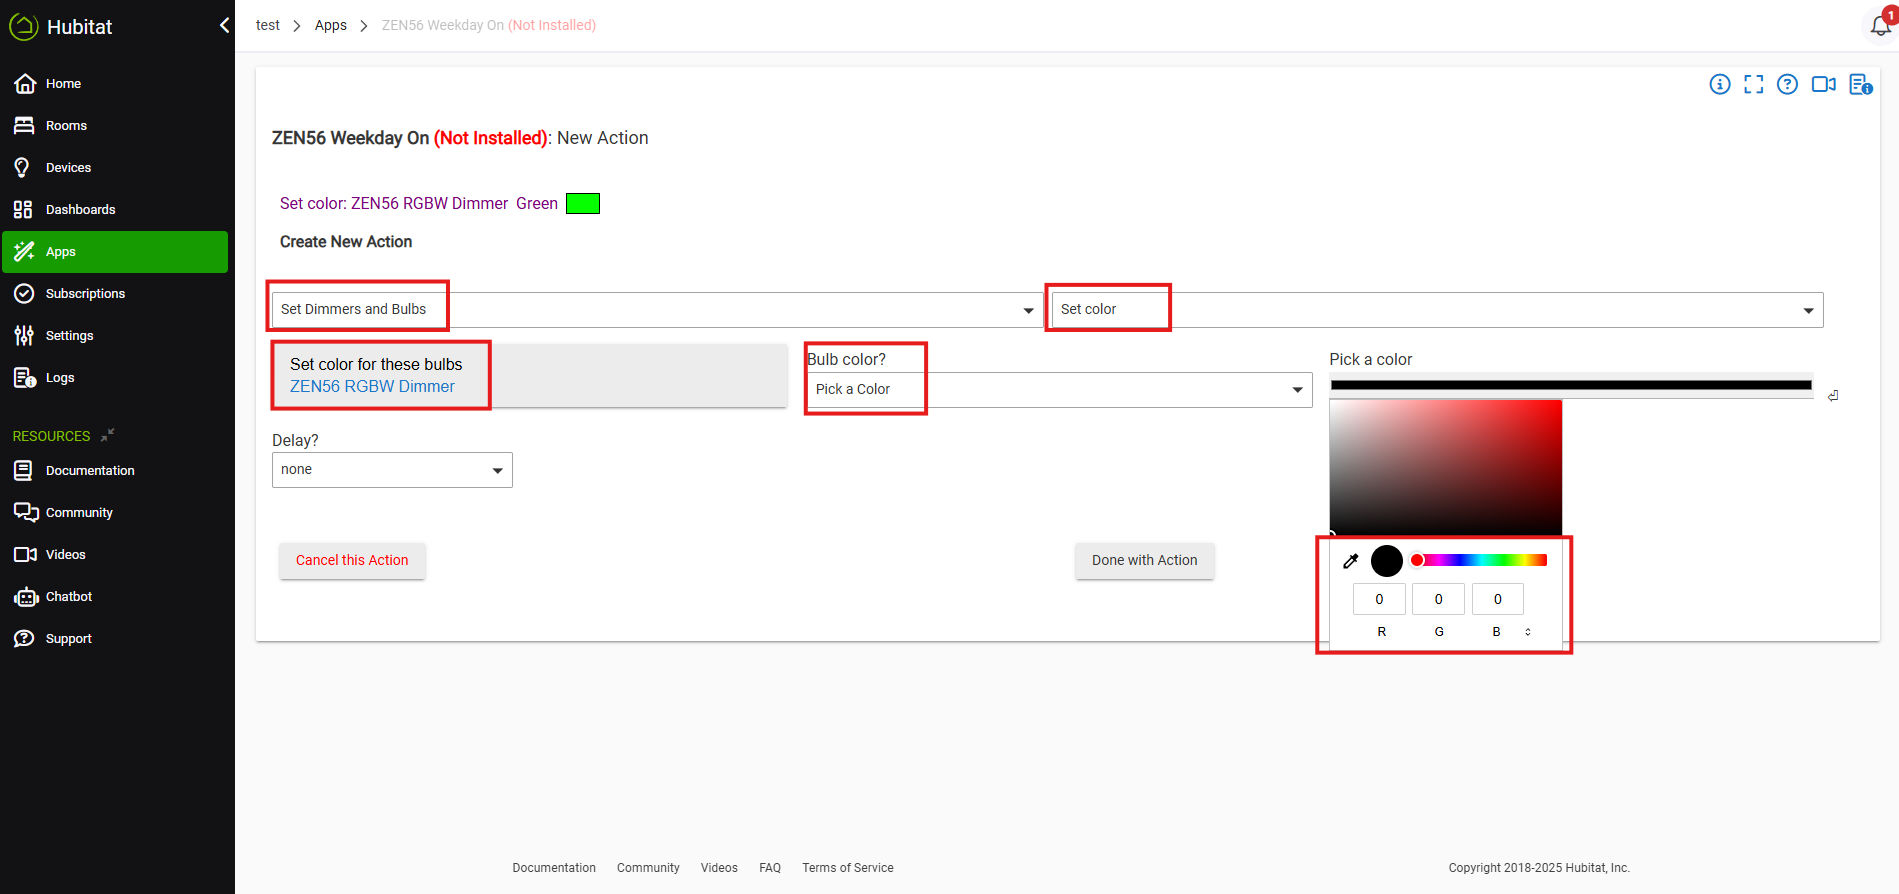
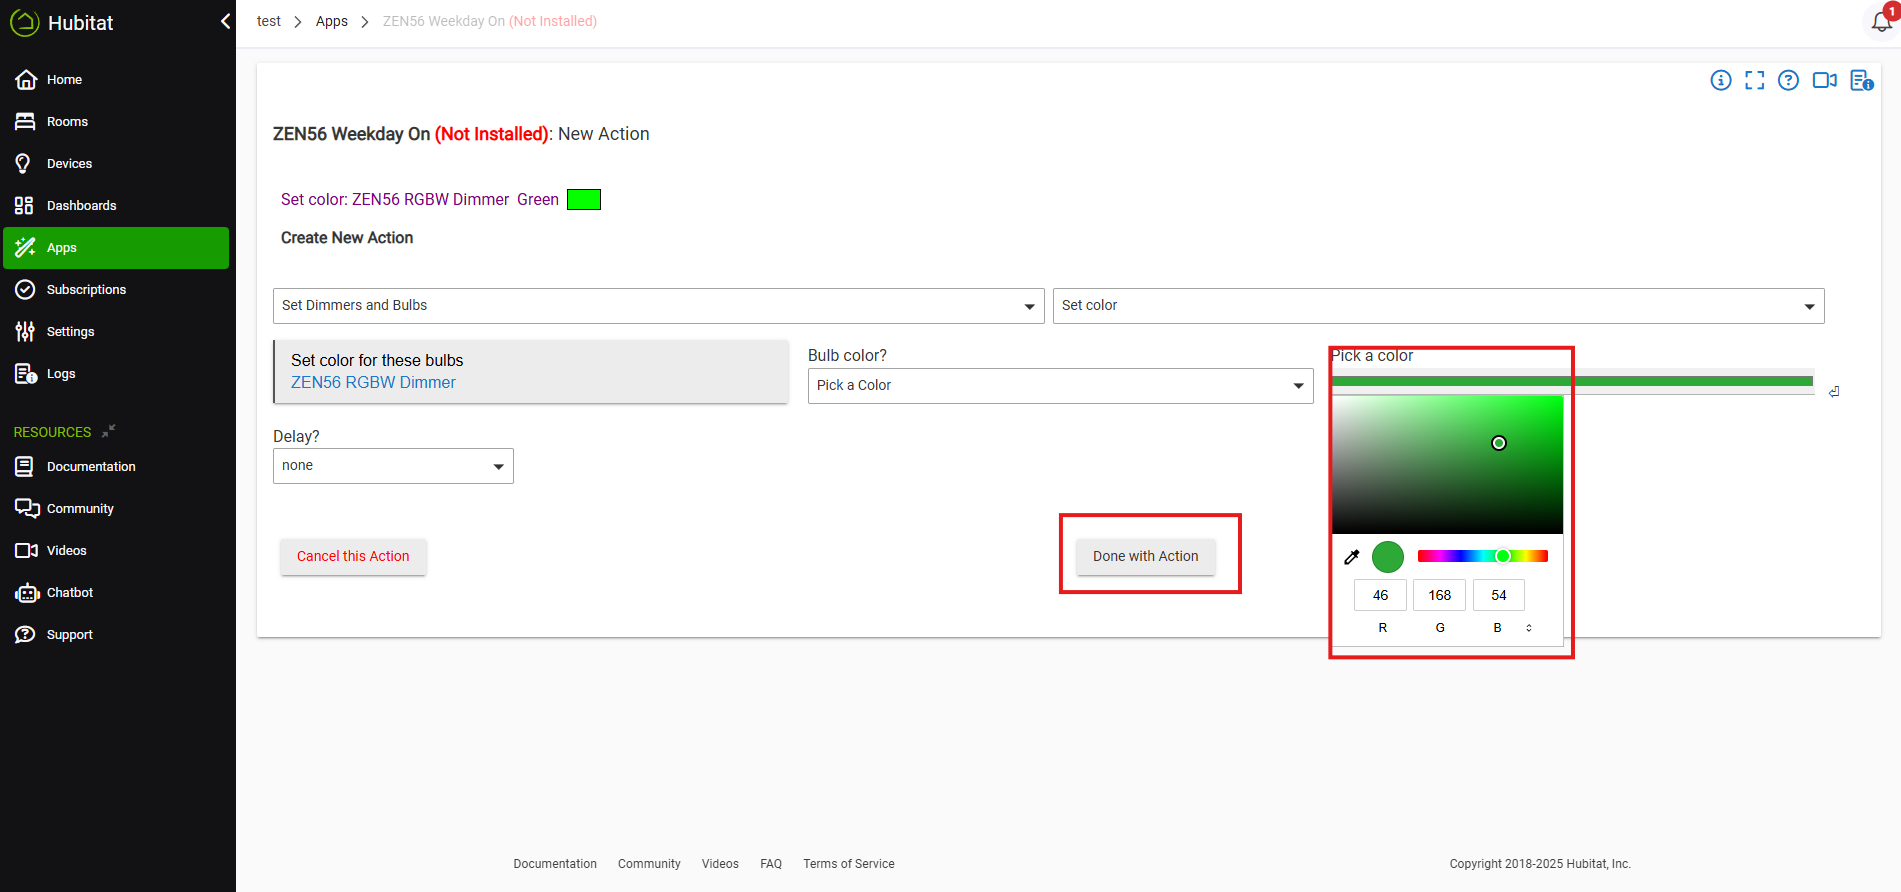
Now you can click Set Color, then Select the ZEN56 RGBW Dimmer. Under Bulb Color, you can pick a preset color option. If you prefer to choose a custom color, you can select the Pick a Color option. The Pick a Color will display a color slider with the RGB channels in separate boxes beneath. When you click on the color options, the RGB boxes will fill in with two values. If you're looking to set multiple ZEN56 to the exact same color, you'll want to record those numbers to set your other RGBW Dimmers to match.
You'll see once we selected our Green, it fills in the R, G, and B boxes for the specific color mix. Click Done with Action when complete.
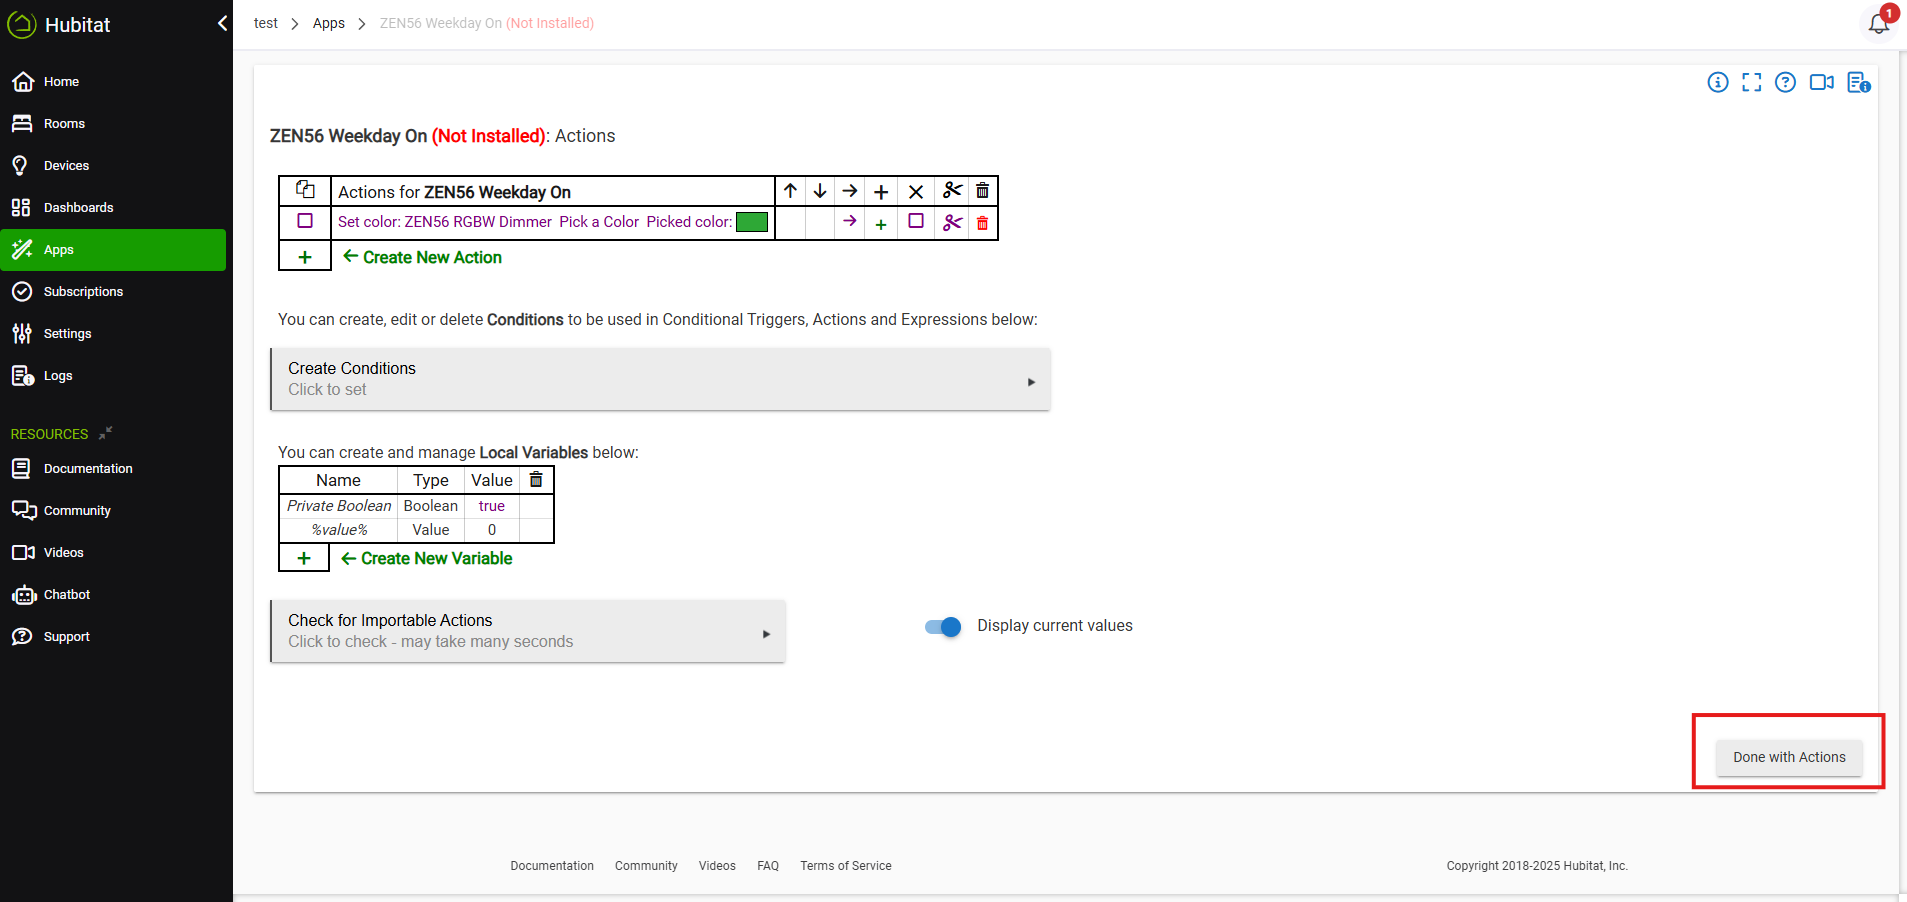
You can create conditions, etc. if desired. When you're done editing the Actions, click Done with Actions.
Review your rule. When you're done making any changes, click Install Rule.