If the LED indicator on the ZEN57 240V XS Relay, is slowly blinking green, then it's properly powered. Check that you can manually toggle the connected load, and then you're ready to include the relay to your HomeSeer network!
Zooz products are officially integrated with the Z-Wave Plus and the Z-Wave JS Front-End of HomeSeer. If you're experiencing issues with accessing the advanced settings of your device or the unit not properly displaying, we would recommend first updating to the Z-Wave Plus or the Z-Wave JS Front-End, then excluding and re-including your device to your network in order for it to be recognized correctly.
Since the ZEN57 is a Z-Wave Long Range supporting device, if you are currently using a 700 or 800 series Long Range Z-Wave stick with HomeSeer and the Z-Wave JS Front End integration, you have the option of including the device either via the standard mesh inclusion or via Z-Wave Long Range. Need help determining which method is best? Check out this article here and more details in this blog post here.
Important Note: A steady, blinking green is the standard state for the device; as long as the unit has power, it will blink green at a steady pace. The device has an internal relay, which can turn on and off with a click of the Z-Wave button. This means that when you are attempting to include or exclude the device, the clicks need to happen as fast as possible; if the clicks are not completed fast enough, the relay will engage instead and the device will not enter inclusion or exclusion mode. You will know you have clicked fast enough when the LED indicator begins flashing rapidly.
Mesh Inclusion Steps
- In the HomeSeer UI: open the "Devices" tab.
- Click + sign at the top right of the page;
- Select "Z-Wave".
- Click "Continue" to put the hub in inclusion mode.
- Click the Z-Wave button on the ZEN57 3 times rapidly (the LED indicator will start flashing). If the LED Indicator does not begin flashing rapidly, you likely did not click quickly enough; please try again, ensuring the clicks are done as rapidly as possible and that the relay does not engage between clicks.
- A window should then appear to allow you to select the supported security level; if S2A is selected, a new window will appear for pin entry.
- Follow the prompts to assign the device to a specific room/area and rename it.
- Double check the information and finalize inclusion by clicking "Continue"
If you encounter any issues including your ZEN57 to HomeSeer, try excluding it first. The process can be done even if the switch was never included and acts as a type of soft Z-Wave reset that generally resolves most inclusion issues.
Long Range Inclusion Steps via Z-Wave JS Front End
- Do not power the device until Smart Start has been initiated in the steps below.
- Enable Z-Wave Long Range (ZWLR) for your Z-Wave interface. On the same page with the keys, look for the region setting > set it to USA (Long Range). You need to have a 700 or 800 series stick with Long Range support in order for ZWLR to work.

- Click Save at the bottom of the page
- Restart the Plugin
- Now you can add devices via Smart Start (the only way you can add ZWLR devices. SmartStart requires that you enter the DSK of the device first, and then the device will be added when it starts its SmartStart inclusion process (normally at power on)
- In the Z-Wave JS Front End, click on the SmartStart icon on the left.
- Enter the full DSK code manually; this is located on the box by the QR code.
- To enter the code manually, click on the hamburger menu on the lower right of the page and then click the + icon. You will see a form like this:
- Fill out the form and make sure you select Z-Wave Long Range for the protocol and check both S2 protocol boxes at the bottom.
- Click Add.
- It will now be waiting for the device to add > power on the ZEN57.
- Devices enter SmartStart mode when they are powered on. You will see a dialog pop up when the device is added.
- Devices will start to add with node 256. If the node is 256 or higher, you know it was added with Long Range enabled. You will also see a different color icon in the Z-Wave JS UI device list.
- Once added it can be controlled like any other device (exception: no Direct Association programming available for ZWLR nodes).
- Note that ZWLR devices are on their own network and will not participate in Z-Wave routing, beaming, or the mesh network. ZWLR is a star topography network with each node only communicating with the hub itself. ZWLR devices do not repeat the signal for any other Z-Wave devices.
- If devices are not adding, make sure the interface is set for LR. Click on the control panel icon on the left to get to the device list. You should see 2 icons next to your interface:
Inclusion Issues
If your switch won't pair to HomeSeer, check out the troubleshooting steps here.
ZEN57 Display
Please note that the ZEN57 will display as <unknown> until the Z-Wave JS library is updated. Device performance is not impacted in any way, and you can still use the device, access all of the settings, and program it as usual.
ZEN57 Row
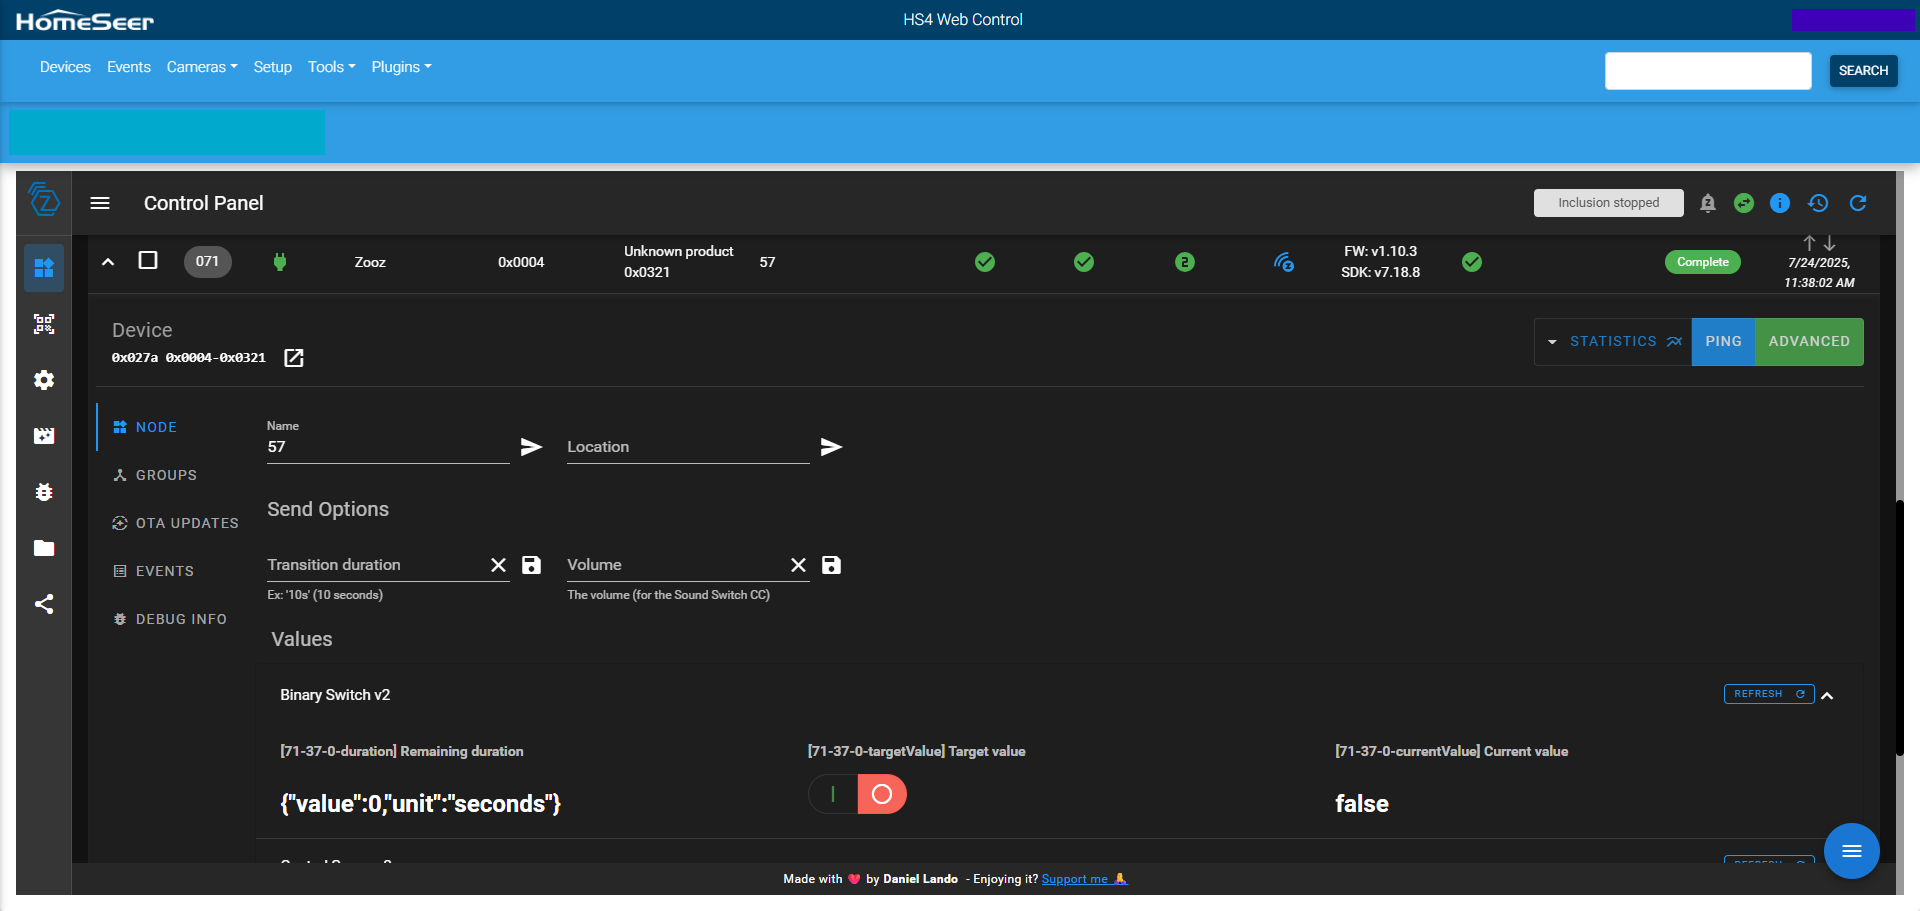
In the HomeSeer Z-Wave JS Front End, the device row summarizes key information and controls for a specific Z-Wave device. Each row typically includes:
-
Node ID: The unique identifier for the device on the Z-Wave network.
-
Name: The user-assigned or default name of the device.
-
Device Type: Describes the function (e.g., dimmer, switch, sensor).
-
Status: Shows current state (e.g., on/off, battery level, etc.).
-
Last Update: Timestamp of the last communication or status change.
-
Command Buttons: Quick controls to turn the device on/off, refresh, or remove it.
-
Interview Status: Indicates if the device was fully interviewed (green check) or incomplete.
-
Node Health: Signal quality or communication strength indicator.
-
More Options (⋮): Provides access to advanced settings, associations, or re-interview.
This row serves as a quick dashboard for managing and monitoring individual devices.
ZEN57 Control Panel
In the HomeSeer Z-Wave JS Front End, the Control Panel > Node section provides detailed tools and information for managing an individual Z-Wave device (node). It includes:
-
Basic Information: Displays Node ID, status, name, location, manufacturer, and product info.
-
Interview Status: Indicates whether the node interview completed successfully.
-
Node Statistics: Shows metrics like RTT, route changes, and successful/failed communications.
-
Actions: Buttons for re-interviewing the node, removing failed nodes, pinging, refreshing info, or restarting the node.
-
Neighbors: Lists neighboring nodes used in mesh routing.
-
Command Classes: Displays all supported Z-Wave command classes for the device.
-
Node Values: Shows real-time data for all exposed values (e.g., switch state, energy usage).
-
Advanced Options: May include NVM backups, firmware updates, and raw data access depending on controller support.
This section is primarily used for diagnostics, advanced configuration, and troubleshooting of individual Z-Wave devices.
ZEN57 Parameters (Advanced Settings)
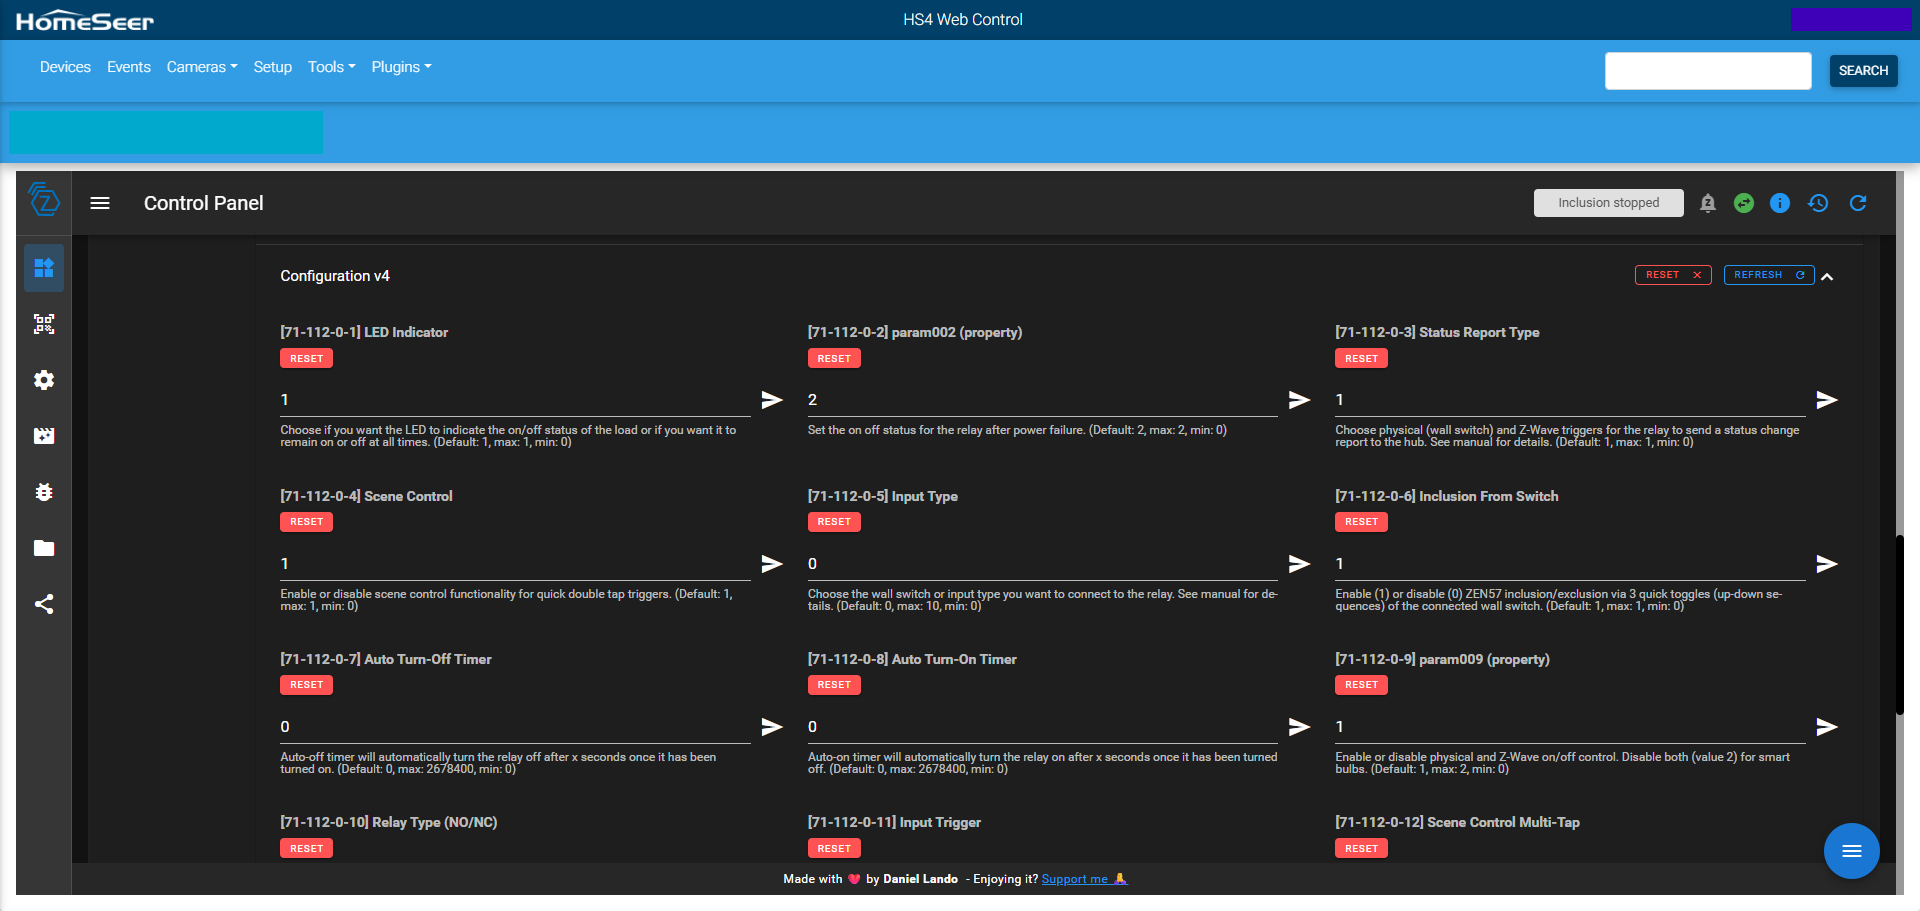
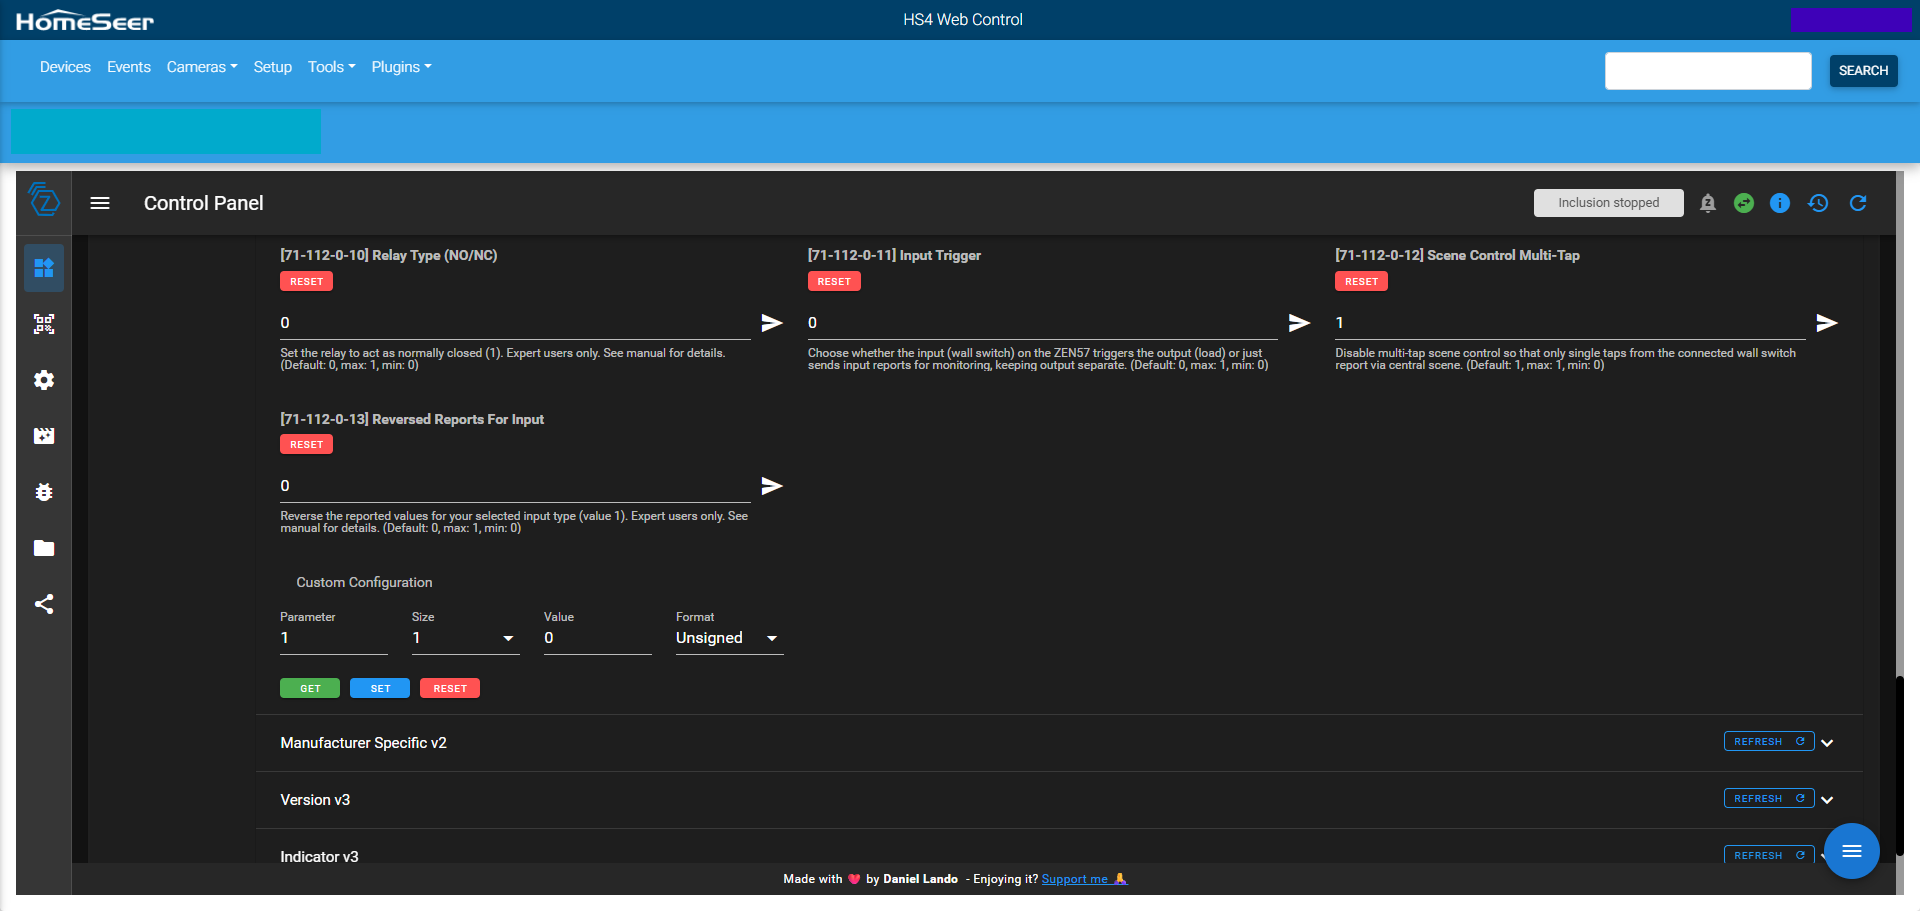
In the HomeSeer Z-Wave JS Front End, the Control Panel > Configuration section allows you to view and change a device’s configurable parameters. Key features include:
-
Parameter List: Displays all available configuration parameters exposed by the device.
-
Current Values: Shows the device’s current settings for each parameter.
-
Descriptions: Includes names, help text, and value ranges or options (if defined by the manufacturer).
-
Input Fields: Lets you change parameter values using dropdowns, sliders, or manual entry depending on the parameter type.
-
Save Button: Applies changes to the selected parameter(s).
This section is used to fine-tune device behavior, such as LED indicators, sensor sensitivity, or auto-off timers, according to your preferences or specific installation needs.
ZEN57 Device Info
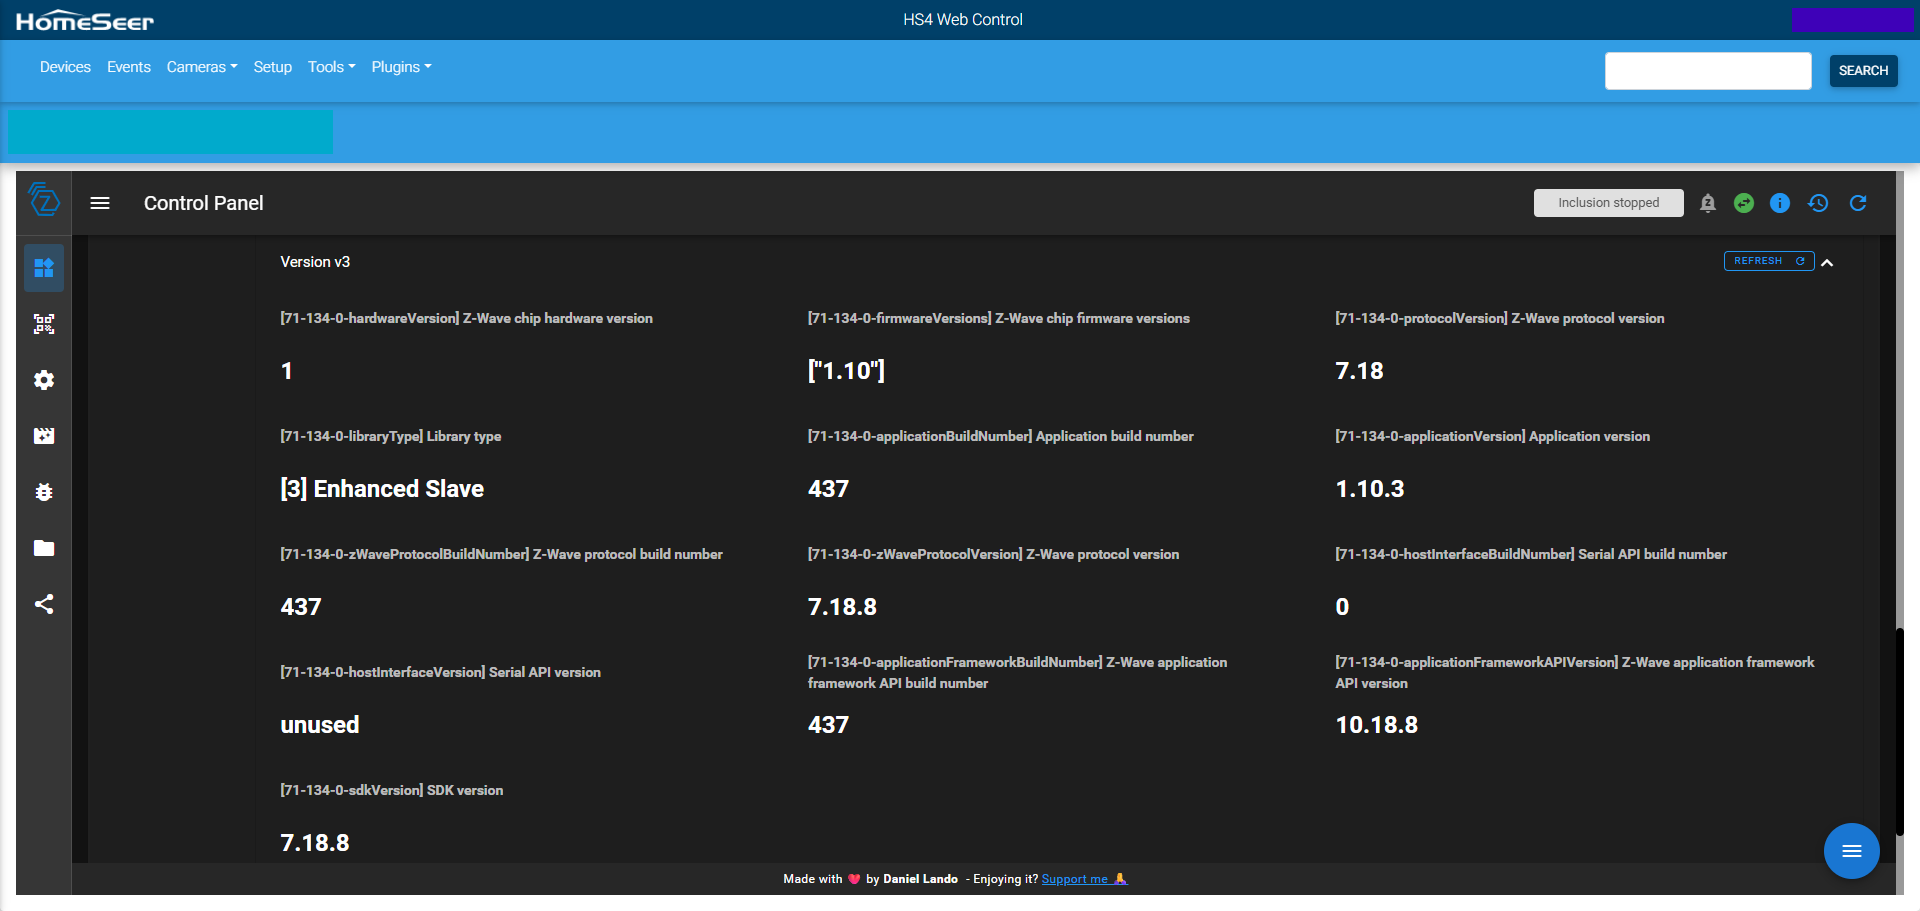
In the HomeSeer Z-Wave JS Front End, the Control Panel section displaying firmware, SDK version, etc. is typically part of the Node Info or Basic Information area for a selected device. It includes:
-
Firmware Version: Shows the Z-Wave firmware currently installed on the device.
-
Z-Wave Library Type: Indicates the type of Z-Wave implementation (e.g., Static Controller, Enhanced Slave).
-
SDK Version: Displays the Z-Wave SDK version used to build the device's firmware.
-
Application Version: Sometimes listed separately to identify the application layer version on the device.
-
Hardware Version: Indicates the device’s hardware revision (if reported).
This information is useful for verifying compatibility, diagnosing issues, or checking if a firmware update is available for the device.
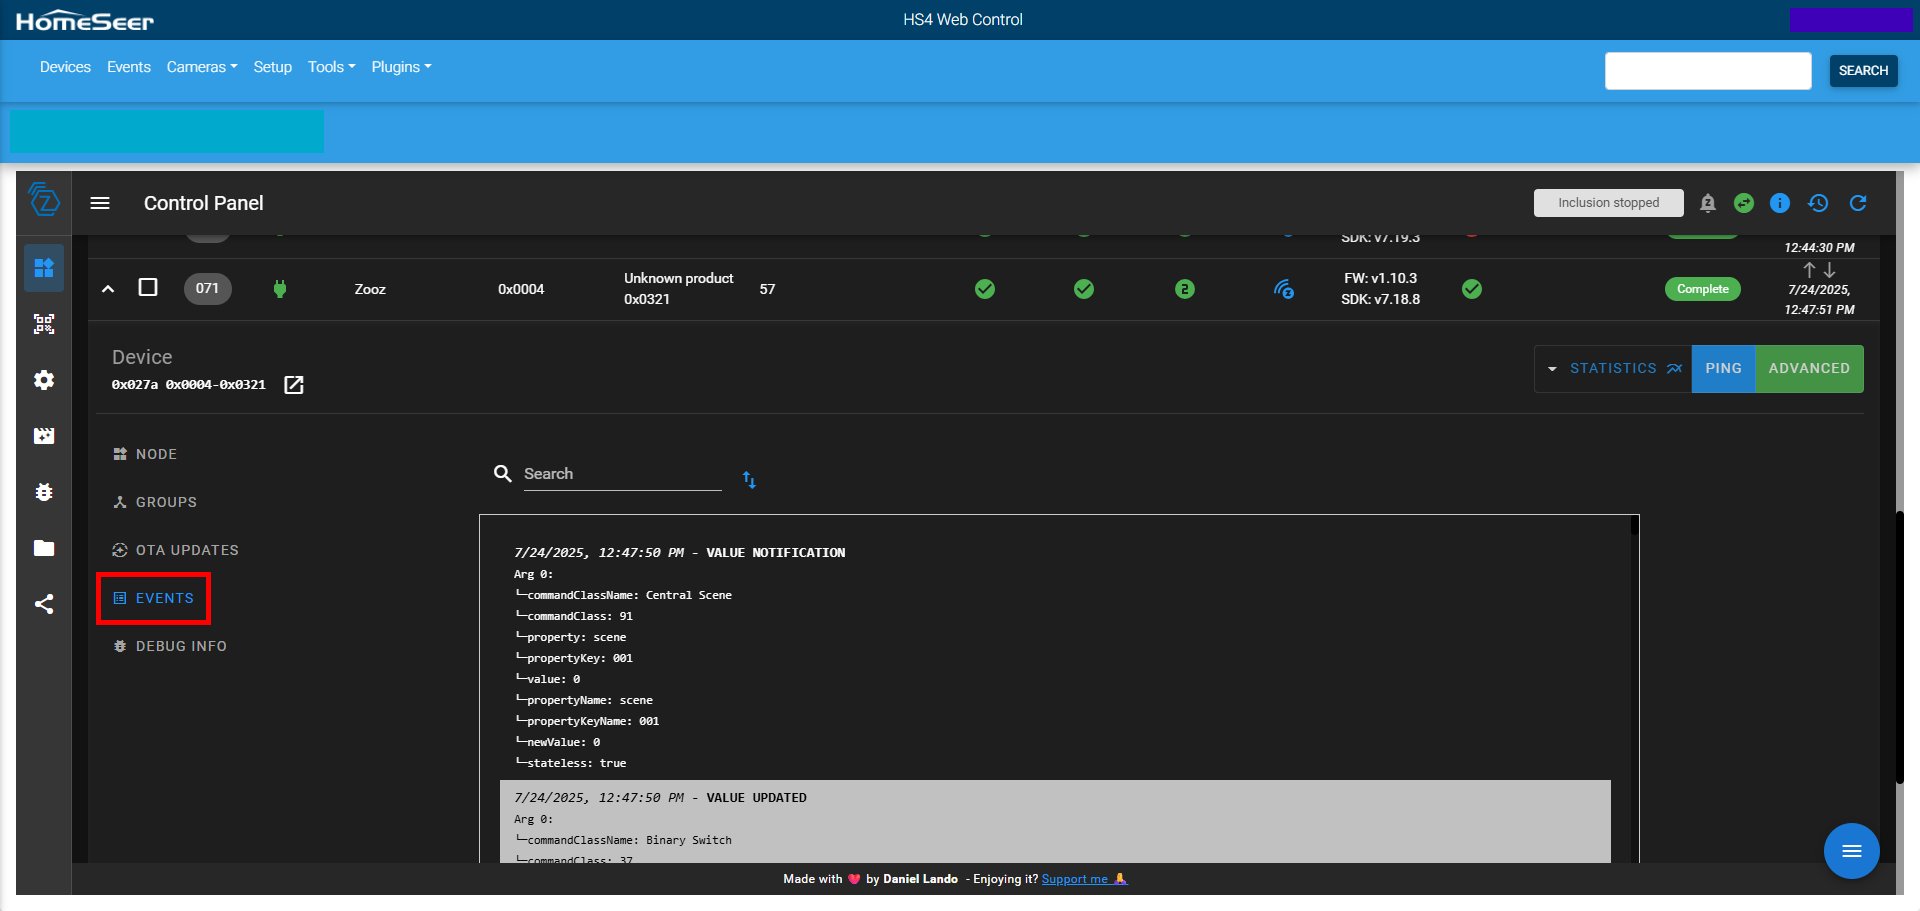
ZEN57 Events
In the HomeSeer Z-Wave JS Front End, the Control Panel > Events section displays a log of recent activity and communication between the selected Z-Wave device (node) and the system. It includes:
-
Timestamps: When each event occurred.
-
Event Type: Describes the nature of the event (e.g., value change, command sent, interview completed).
-
Details: Shows additional context, such as specific value updates, command class interactions, or routing messages.
This section is useful for debugging, monitoring device behavior, and verifying communication with the hub in real time.
Feel free to send us a message if you need assistance!


