Your ZEN57 240V XS Relay can be quickly added to Home Assistant! We recommend using the new JS Z-Wave integration for optimal results
With the new ZWaveJS integration of Home Assistant, your smart home setup becomes more seamless, robust, and future-ready. We strongly recommend upgrading to this integration to ensure your Zooz devices are recognized and function correctly.
The latest Z-Wave JS UI now supports Z-Wave Long Range (ZWLR), significantly extending the reach and reliability of your network. Even better, you now have the flexibility to use both traditional Z-Wave mesh and ZWLR devices on the same hub—giving you the best of both worlds. And with SmartStart QR code scanning now supported, device inclusion has never been quicker or easier.
When deciding which method to use, we recommend reading more about Z-Wave Long Range and how it differs from the Z-Wave mesh, as well as when to choose mesh vs ZWLR in the following two articles:
Z-Wave Long Range FAQ's
All About Z-Wave Long Range
Mesh or ZWLR is established at the time of inclusion; if you wish to change a currently included device from mesh to ZWLR or vice versa, this can only be done by excluding the device and re-including with the proper method.
Important Note: A steady, blinking green is the standard state for the device; as long as the unit has power, it will blink green at a steady pace. The device has an internal relay, which can turn on and off with a click of the Z-Wave button. This means that when you are attempting to include or exclude the device, the clicks need to happen as fast as possible; if the clicks are not completed fast enough, the relay will engage instead and the device will not enter inclusion or exclusion mode. You will know you have clicked fast enough when the LED indicator begins flashing rapidly.
Standard Mesh Inclusion
- Power the relay on. The LED indicator will be a slow, blinking green.
- In Home Assistant: click on Add a Z-Wave Device.
- When Home Assistant displays the following message: "Your Z-Wave controller is now in inclusion mode. Follow the directions that came with your device to trigger pairing on the device," click the Z-Wave button 3 times as quickly as possible (the LED indicator will start flashing green rapidly). If it does not start flashing rapidly, you did not click the Z-Wave button quickly enough; please try again as quickly as possible.
- If asked to enter the security PIN, enter the PIN located on the back of the relay, next to the Z-Wave Plus logo.
- The LED indicator will rapidly blink green to signal communication, and turn green for 2 seconds if inclusion is successful or turn red for 2 seconds if inclusion fails.
- Home Assistant will confirm that the relay was added, and it will be immediately visible in your device list. Within a short time, seconds to minutes, the entities should also be created.
Z-Wave Long Range Inclusion
The Z-Wave JS UI integration of Home Assistant now supports Z-Wave Long Range (ZWLR) and with the latest app update (minimum 2025.5), QR code scanning for SmartStart is now supported. You will need to ensure you are using a Z-Wave stick that supports ZWLR.
Ensure the device you want to include is NOT powered on at this time. SmartStart will only work if the device is not powered on until step 6.
1. From the menu, click Settings.
2. Choose Devices and Services.
3. From the devices page click Add Device.

4. Scan the QR Code from your ZWLR device.
5. Choose Direct Long Range.

6. Power on your device.
7. The device is now added with ZWLR.

Inclusion Troubleshooting
If Home Assistant is having trouble recognizing the device, check out the troubleshooting steps here.
Device Display
Please note that the ZEN57 will display as <unknown> until the Z-Wave JS library is updated. Device performance is not impacted in any way, and you can still use the device, access all of the settings, and program it as usual.
Device Row
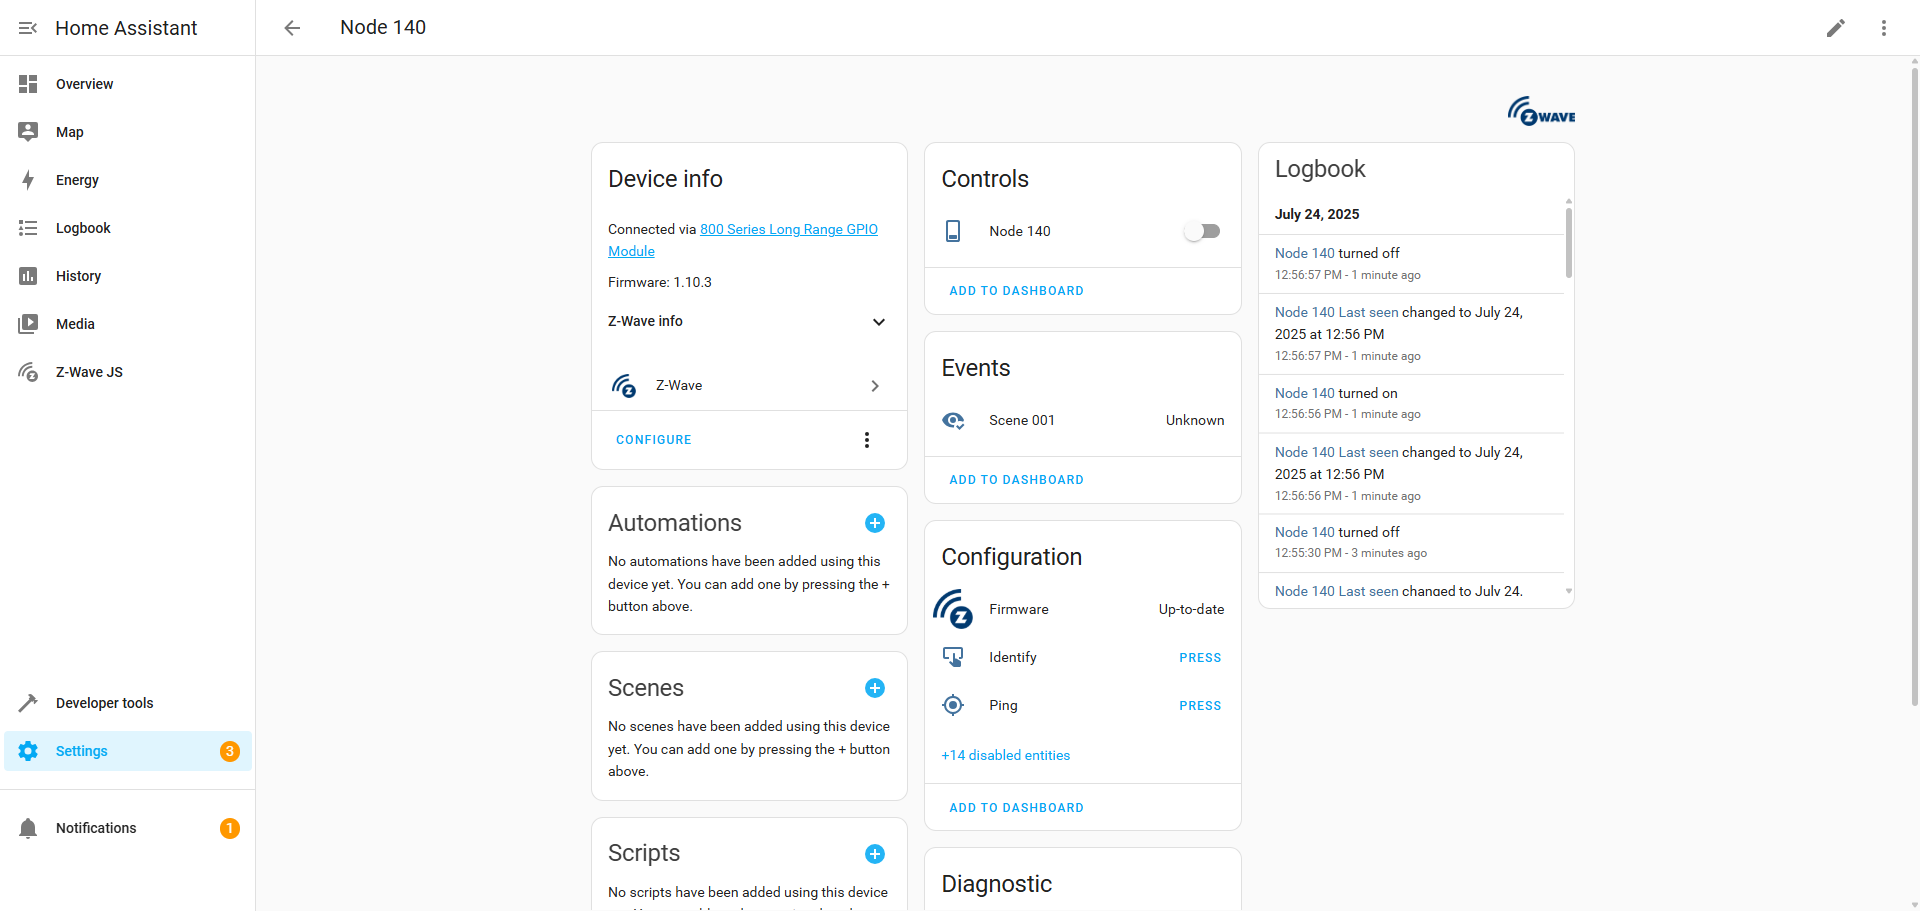
ZEN57 Page Overview
Device Info (covered in more detail below)
Shows basic connection and identification details for the Z-Wave device:
Controls
Lets you directly control the device (e.g., turn it on/off) from this screen.
Logbook
Displays a time-stamped list of recent events involving this device (e.g., turned on/off, last seen, etc.).
Events
Lists any Z-Wave scenes or event triggers associated with this device (e.g., Scene 001). Useful for automations.
Configuration
Allows advanced actions:
-
Firmware: Check for updates
-
Identify: Helps you locate the device (if supported)
-
Ping: Test if the device is responsive
-
Shows additional disabled entities (e.g., power, energy sensors)
Automations
Quick access to create automations that use this device (none added yet in your screenshot).
Scenes
Lets you add this device to a predefined scene (like "Movie Night" or "Away Mode"). None added yet.
Scripts
Allows you to include this device in a custom script (grouped actions). No scripts configured yet.
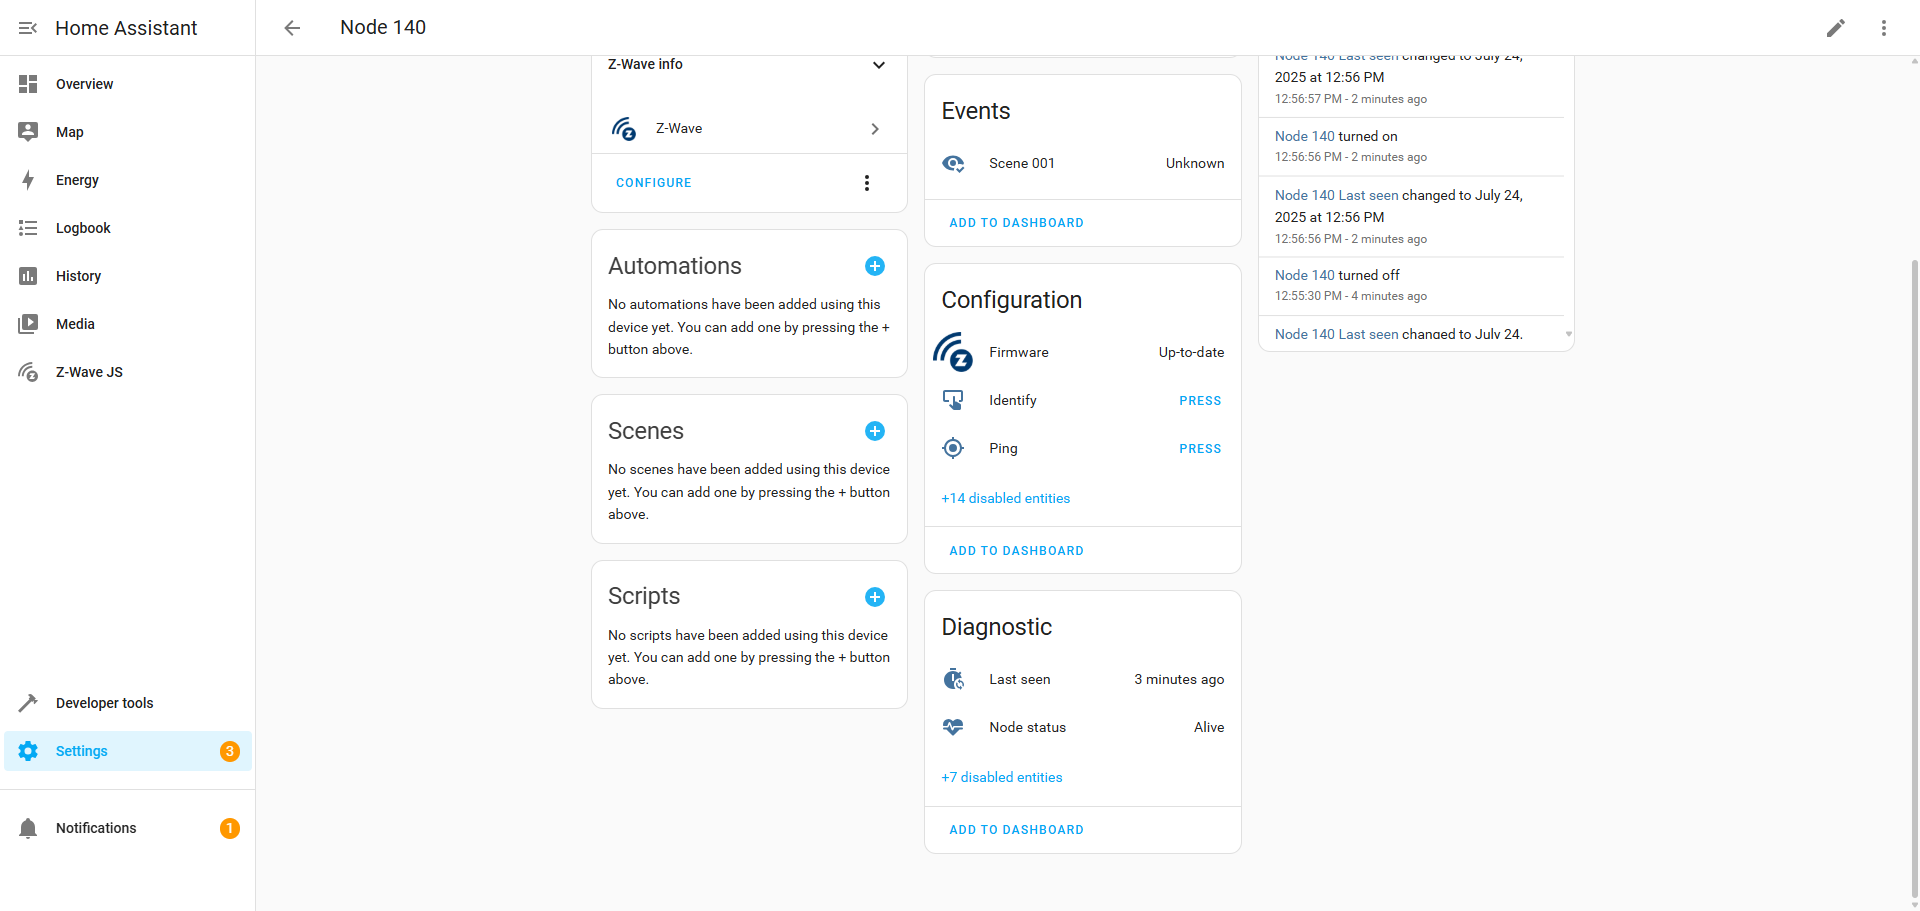
Diagnostic
Typically shows tools for deeper troubleshooting and logs (e.g., device statistics, logs, or Z-Wave diagnostics).
ZEN57 Device Info
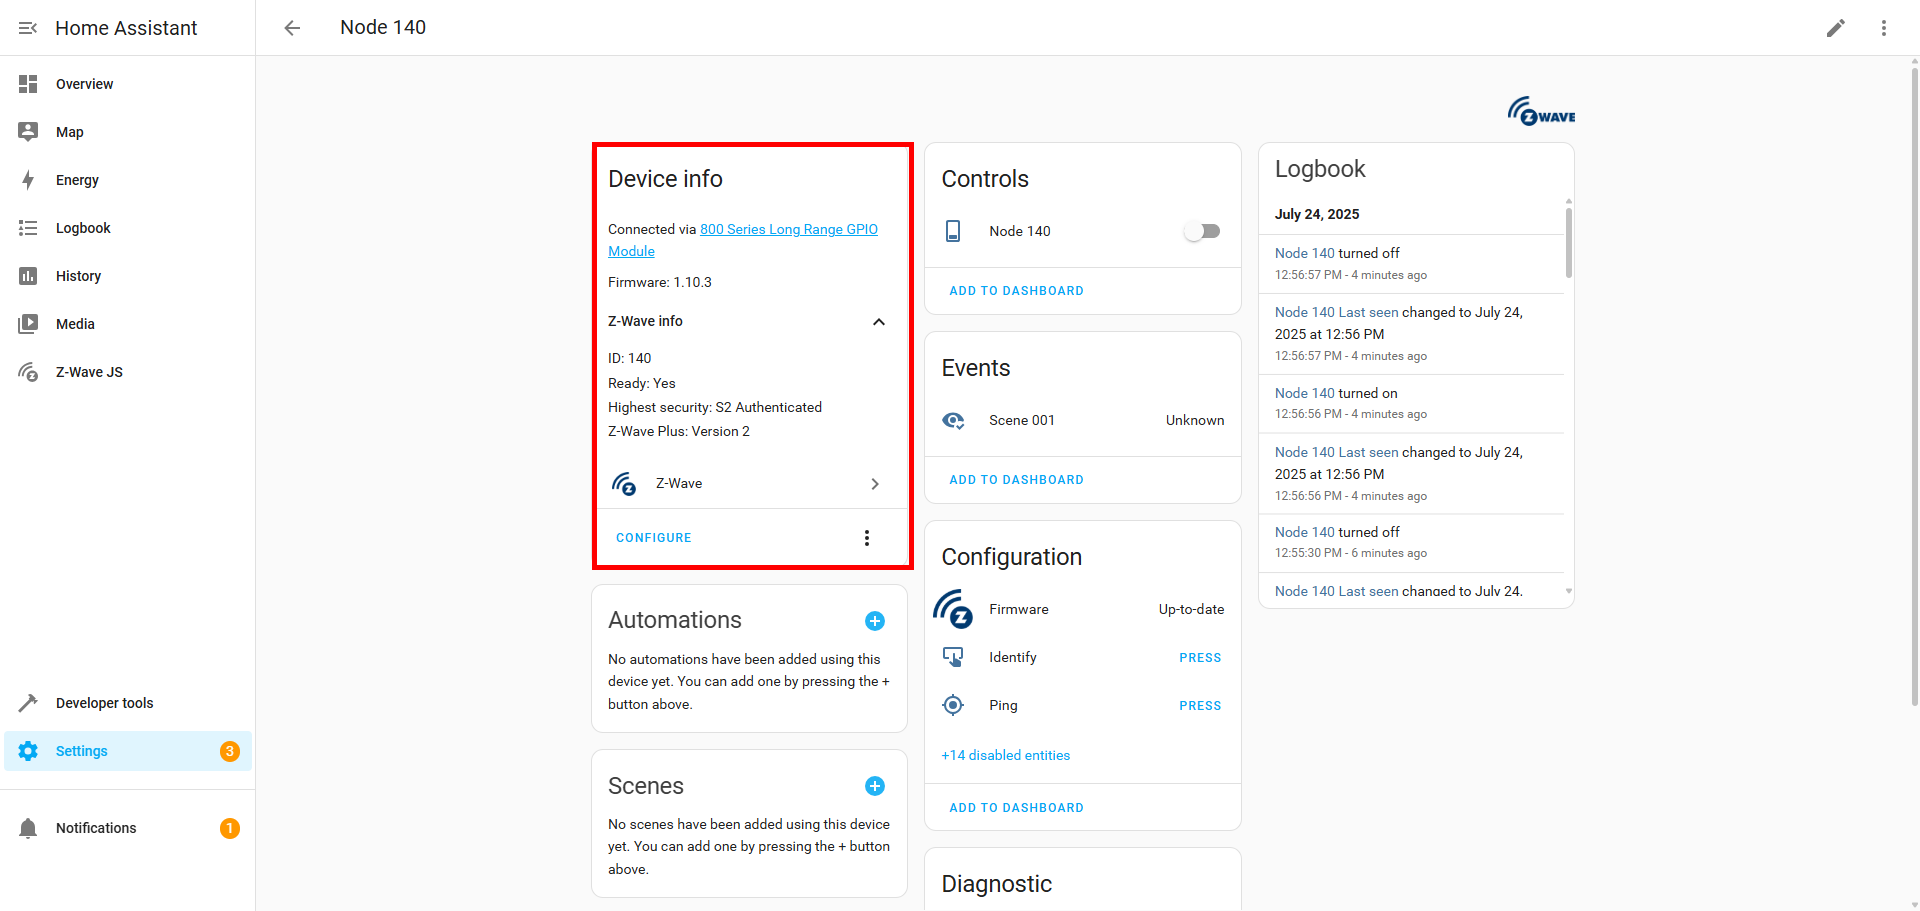
The Device Info section in Home Assistant — highlighted in red — gives you detailed technical information about the specific Z-Wave device. Here's a breakdown of what each line means:
Device Info (Overview Block)
-
Connected via 800 Series Long Range GPIO Module
→ Shows which Z-Wave controller or stick the device is connected to. -
Firmware 1.10.3
→ Indicates the version of the firmware running on the Z-Wave device itself. Useful for troubleshooting or checking if an update is available.
Z-Wave Info (Expandable Section)
-
ID: 140
→ This is the Node ID assigned to the device in your Z-Wave network. It’s how Home Assistant identifies this device within the Z-Wave mesh.
-
Ready: Yes
→ Indicates that the device is fully initialized and ready for control and automation. -
Highest security: S2 Authenticated
→ Shows the security level used during the inclusion process -
Z-Wave Plus: Version 2
→ Indicates that this is a Z-Wave Plus V2 device (aka 700 or 800 series), which supports improved range, power efficiency, and features like SmartStart and Z-Wave Long Range.
Bottom Icons
-
Z-Wave icon → Quick link to open Z-Wave-specific options or logs.
-
Configure → Shortcut to device-specific configuration, like parameters, associations, or re-inclusion.
Use Cases for This Section
-
Confirming the device is properly connected and secured.
-
Checking firmware or Z-Wave version.
-
Troubleshooting communication issues (e.g., if the device is not "Ready").
-
Verifying if you're using Z-Wave Long Range or mesh.
-
Accessing configuration settings quickly.
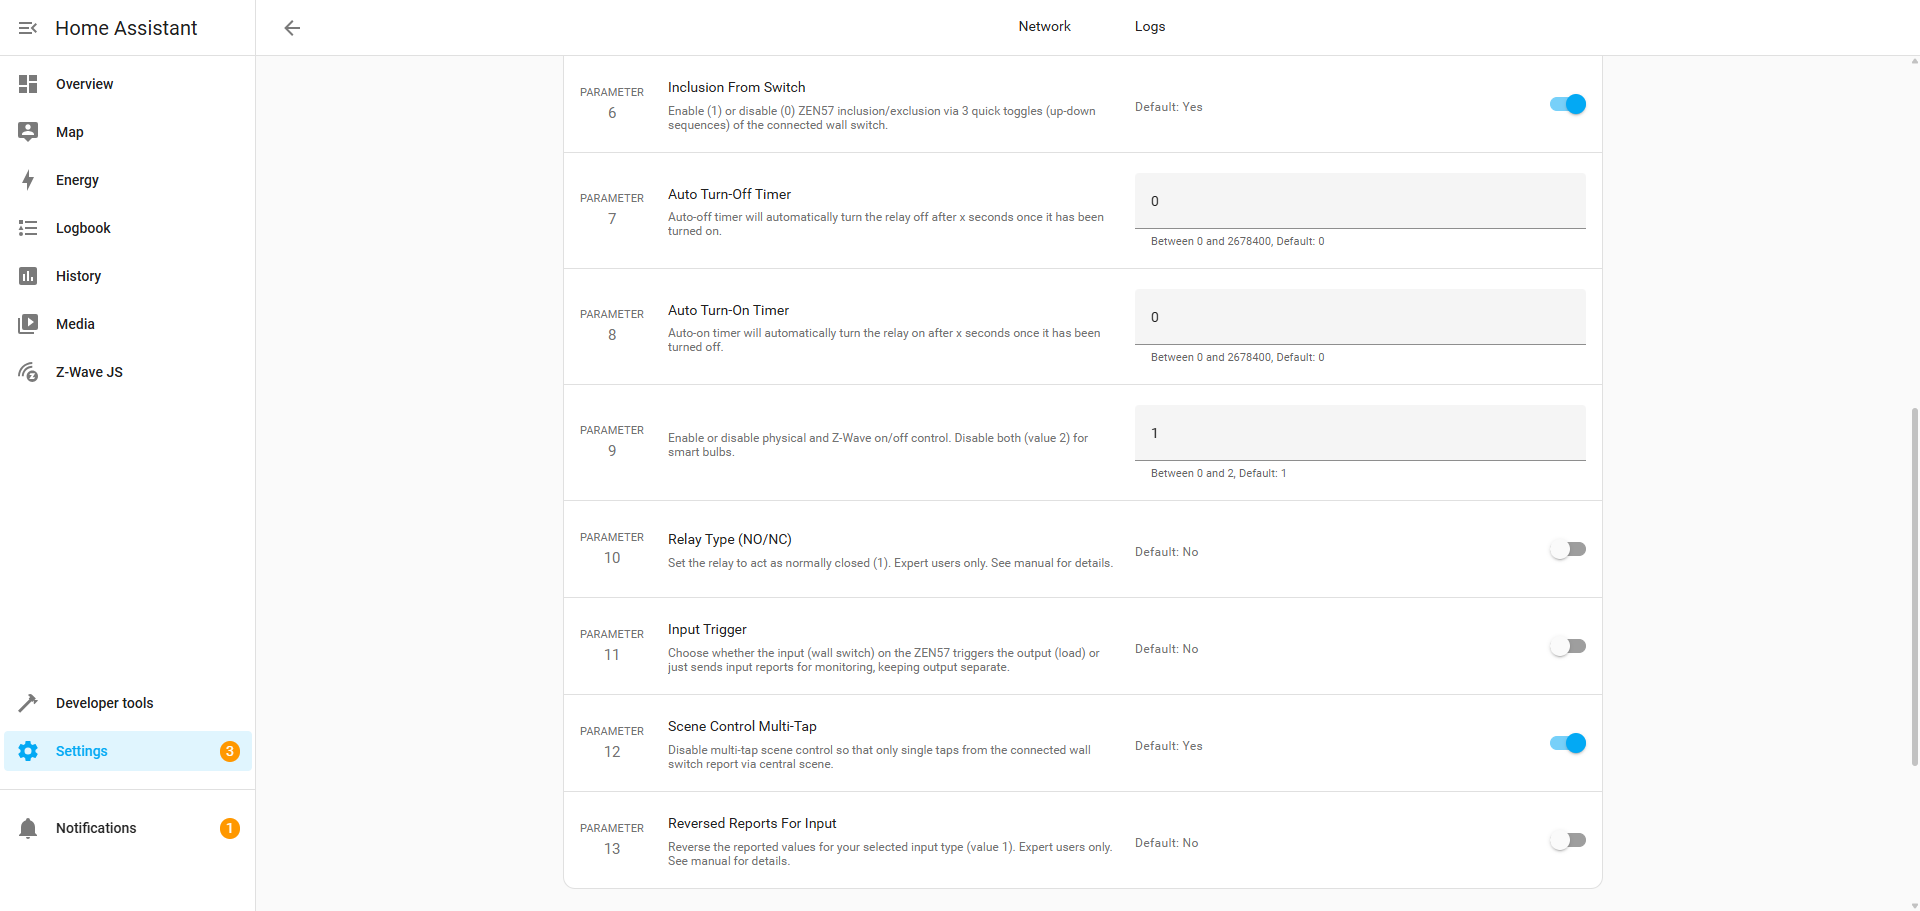
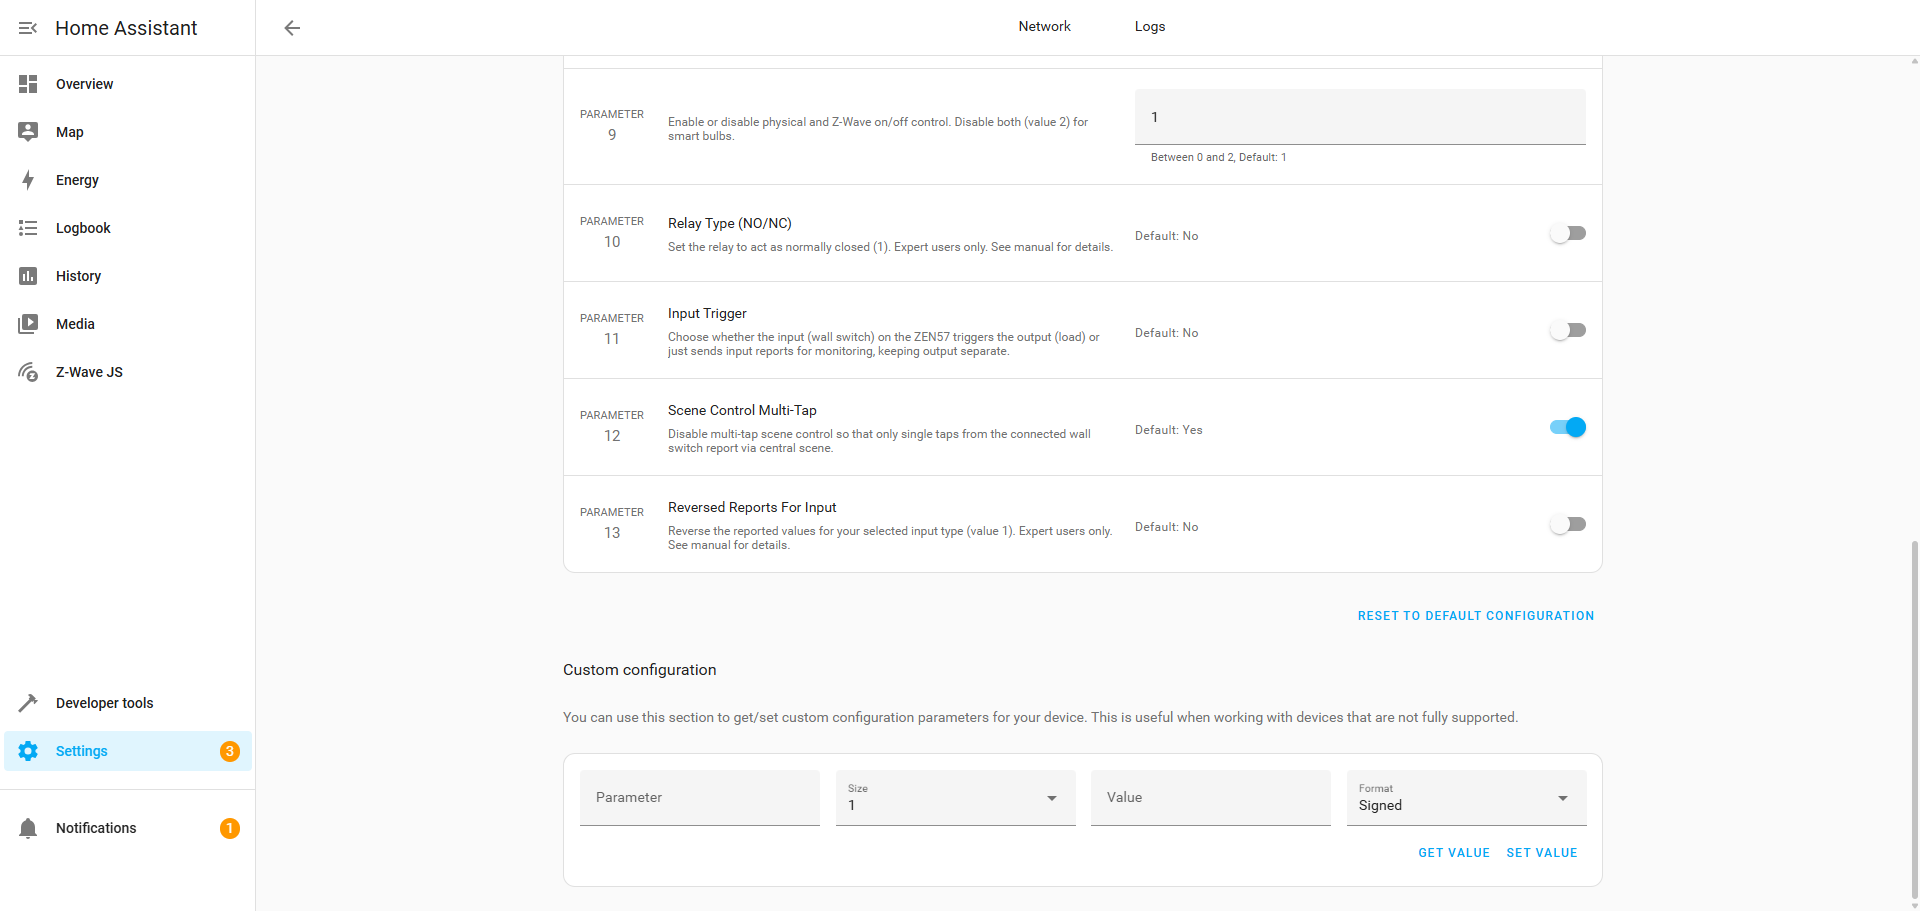
ZEN57 Parameters (Advanced Settings)
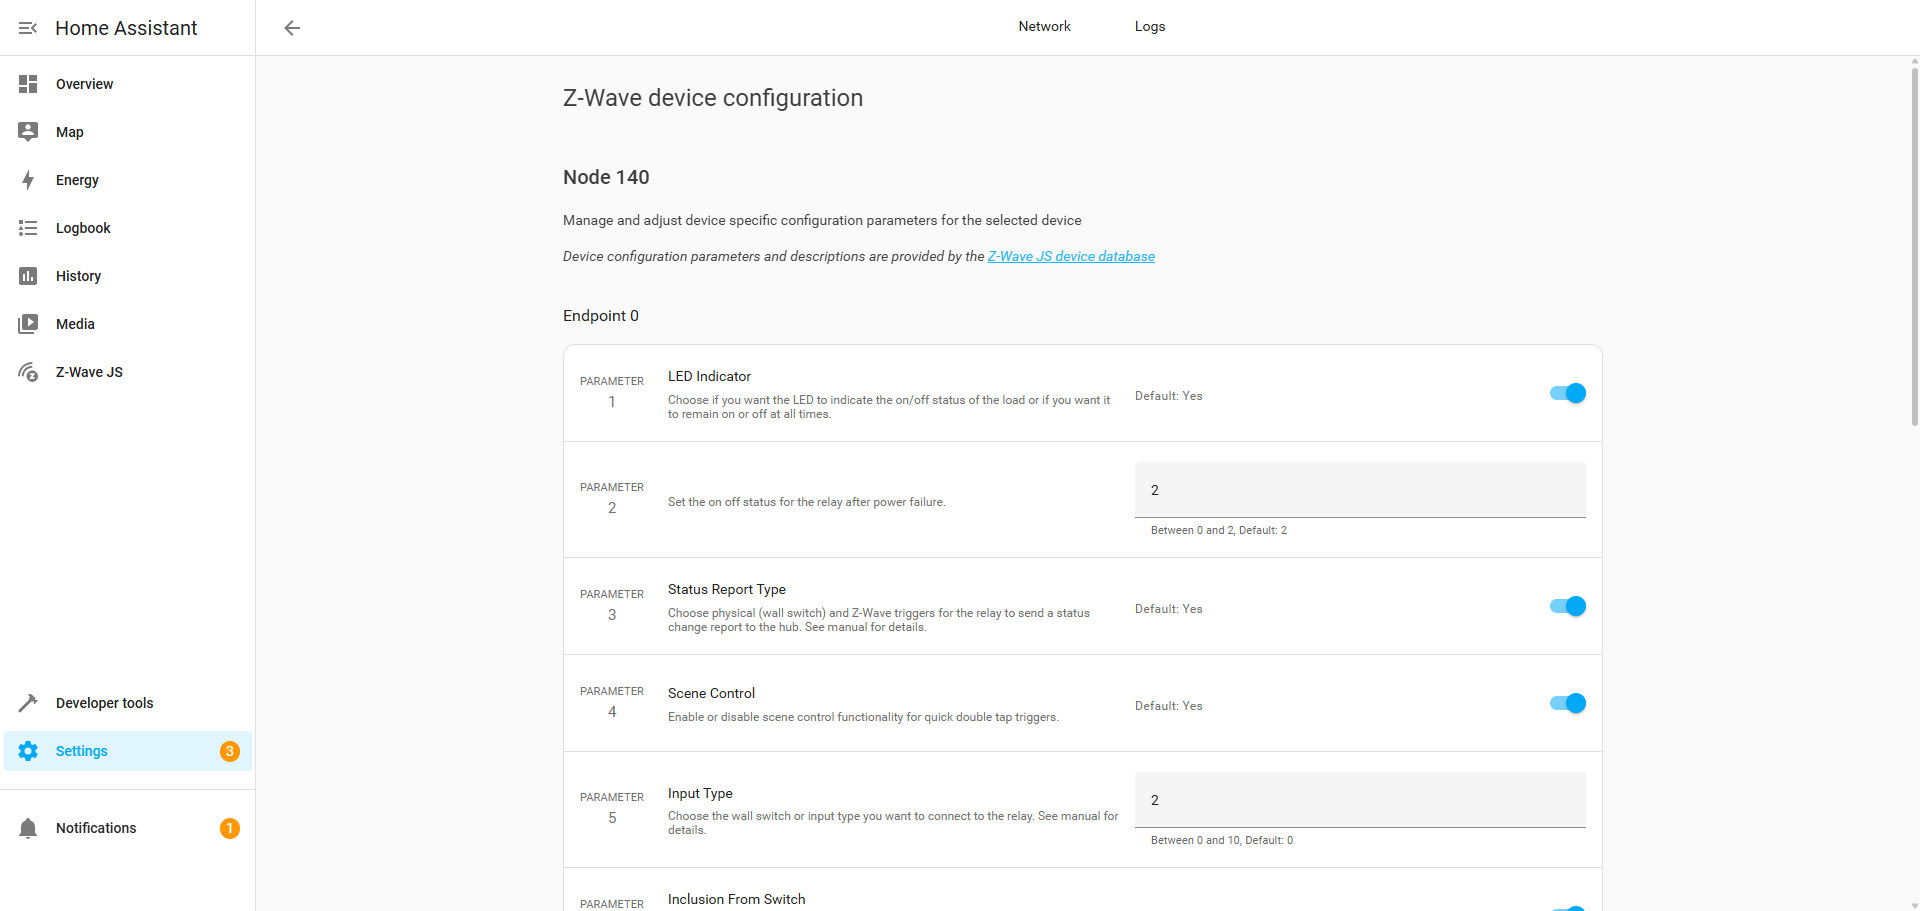
This screen in Home Assistant is the Z-Wave Device Configuration panel. It allows you to view and change device-specific parameters that control how the Z-Wave device behaves. These settings are stored on the device itself (not just in Home Assistant).
We'll be happy to help; just reach out to us!


