
Direct association establishes a direct connection between two Z-Wave devices, where one serves as the trigger and the other as the recipient of that trigger. Essentially, one Z-Wave device transmits a message directly to another, bypassing the hub. These commands are typically straightforward and unconditional, such as "on/off" or "dim/brighten." Communication occurs unilaterally, without providing feedback to the initiating device. The controlling device solely issues commands to the associated devices in what's known as an "association group." Although a connection exists between the two devices, it operates exclusively in one direction, with the controlling device unaffected by the controlled one (the only exception to this is the unique solution we've developed for our 800 series light switches. You can read more about that here).
IMPORTANT NOTES
-
Direct Association is only available on Home Assistant when using the Z-Wave JS UI integration. It is not available on the standard Z-Wave JS integration.
-
Direct Association can only be used when the devices are included to the hub using the standard Z-Wave mesh protocol. Z-Wave Long Range by nature does not allow for device-to-device associations
Programming a Basic Association
Direct Association programming can be a little confusing if you're not familiar with how Z-Wave JS UI references the associations. Some important notes about the association fields:
-
Endpoint (Source): This is the "brain" of the device sending the command.
-
For a single channel device, like a simple switch or dimmer, this is always the Root Endpoint.
-
However, for multi-channel devices (like the ZEN30 Double Switch), you must specify which physical part is doing the talking: Endpoint 1 would refer to the Dimmer, while Endpoint 2 would refer to the Relay on the ZEN30 for example.
-
-
Group: This is the "type" of message being sent. Your sending and receiving devices must support the same groups for the association to work. See the device manual for the supported groups for your device. Here are some basic groups that all of our dimmers support:
-
Lifeline (Group 1): Always reserved for the Controller (your Z-Wave stick) to report status.
-
Basic Set (Group 2): Sends a simple "Turn On" or "Turn Off" command.
-
Multilevel Set (Group 3): Sends specific brightness percentages (dimming).
-
-
Node (Target): The specific device ID you want to receive the command.
-
Target Endpoint: The specific sub-component on the receiving device that should react. This is only applicable for multichannel devices that have more than one endpoint. If you're sending the message to a single channel device like a switch, you would leave it as none, since this will address the device as a whole.
1. In the control panel, ensure the two devices you are associating are included with the exact same level of security, and that both are included via the mesh network. The highlighted sections shows matching security levels and both are included via the mesh (blue Z-Wave icon under protocol).
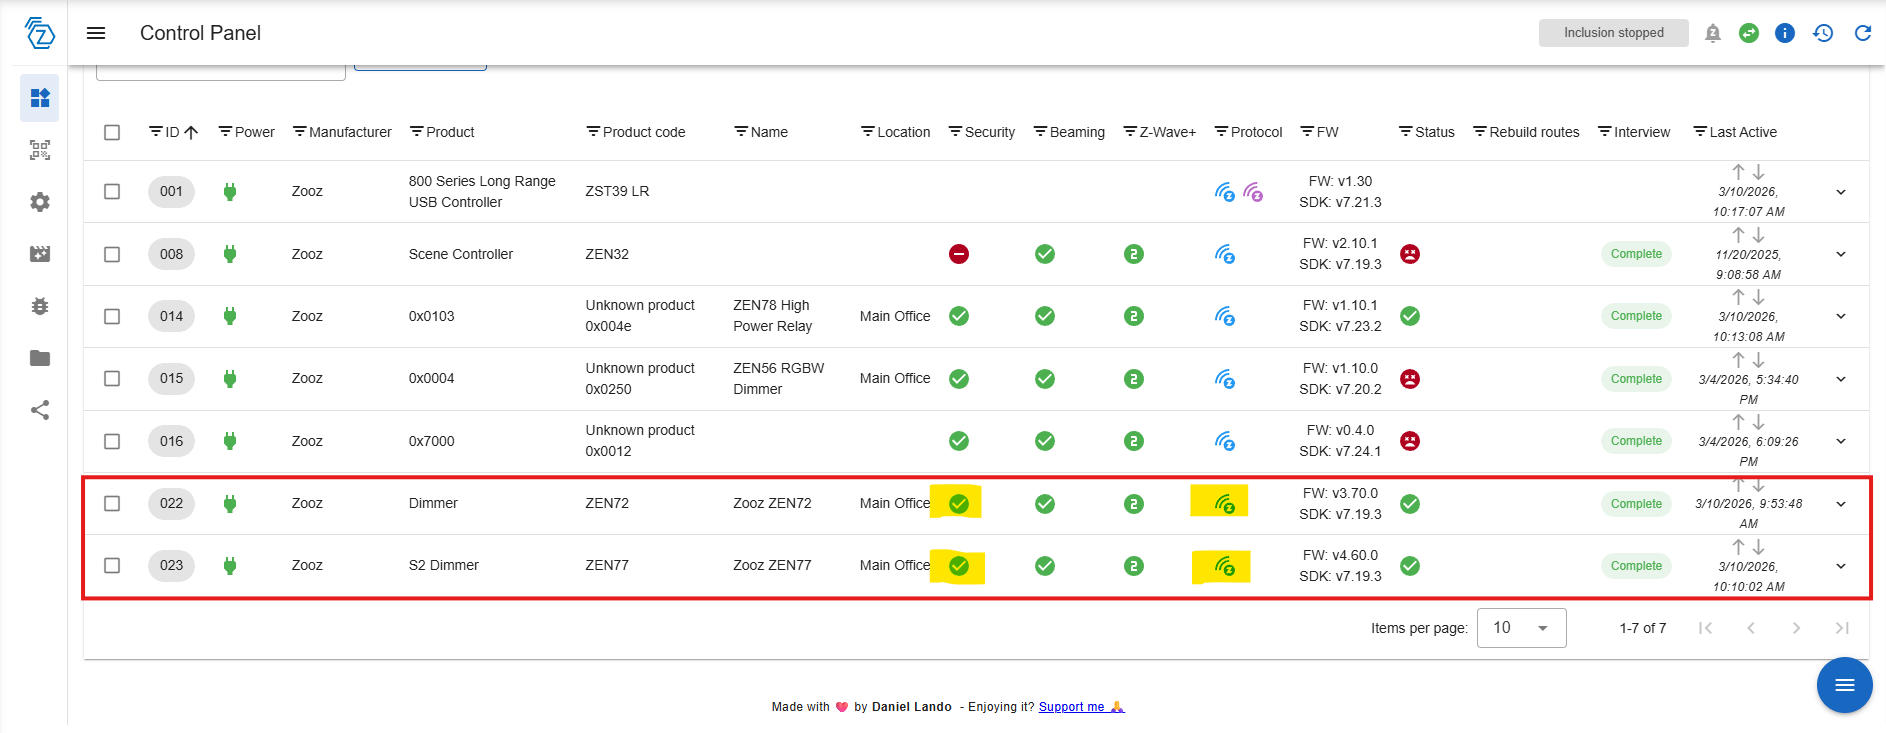
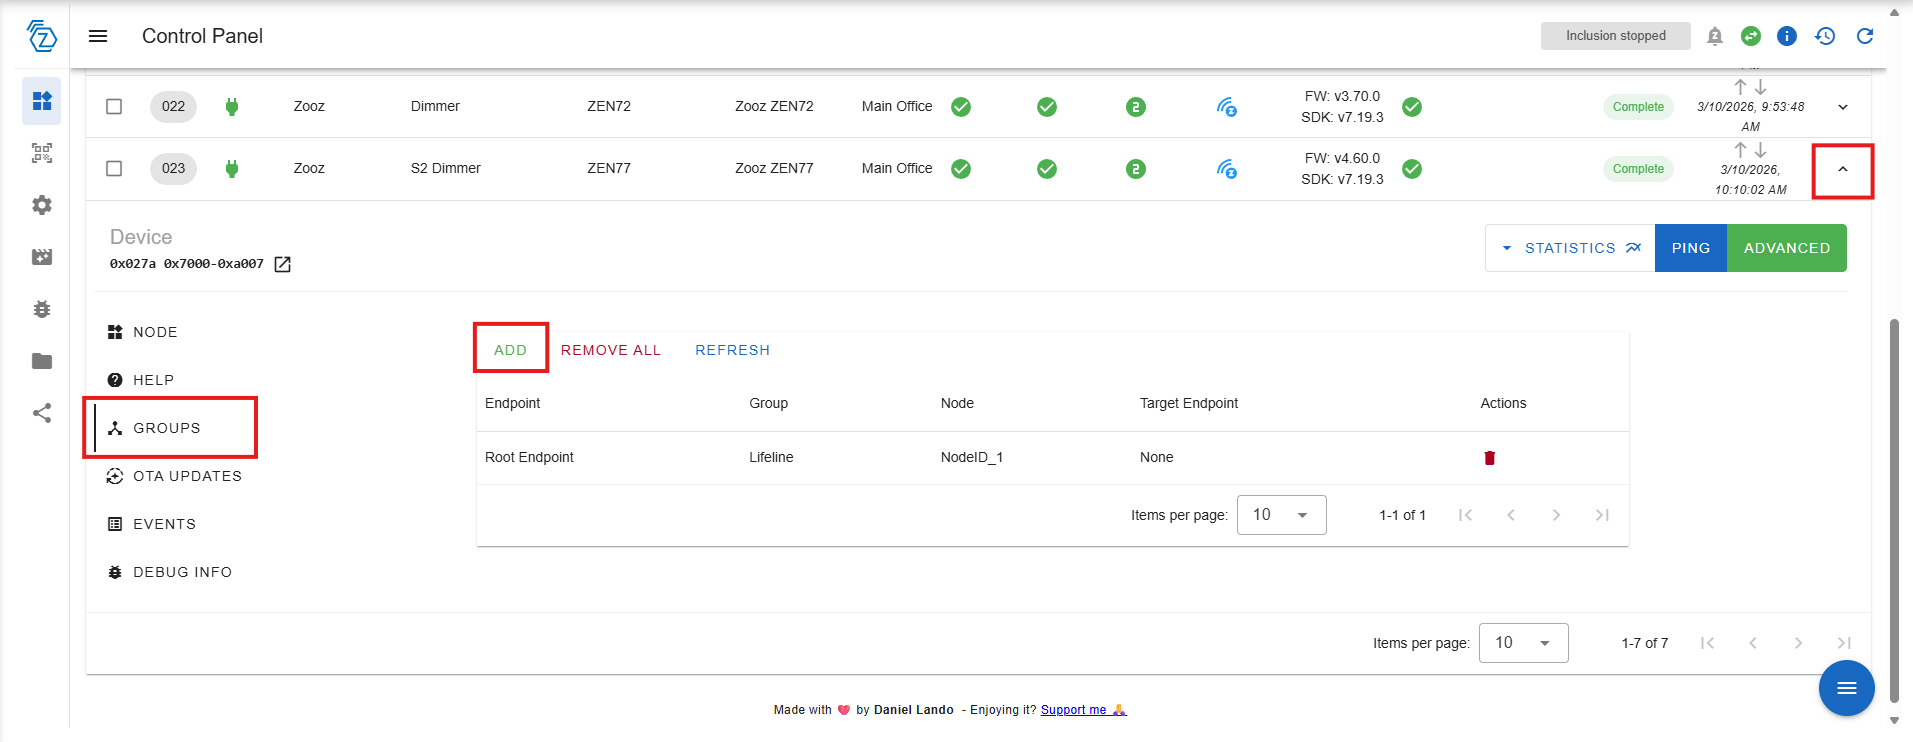
2. Click the drop down arrow on the right for the controlling device (sending the message). In our example, this is the ZEN77.
Click Groups > Add.
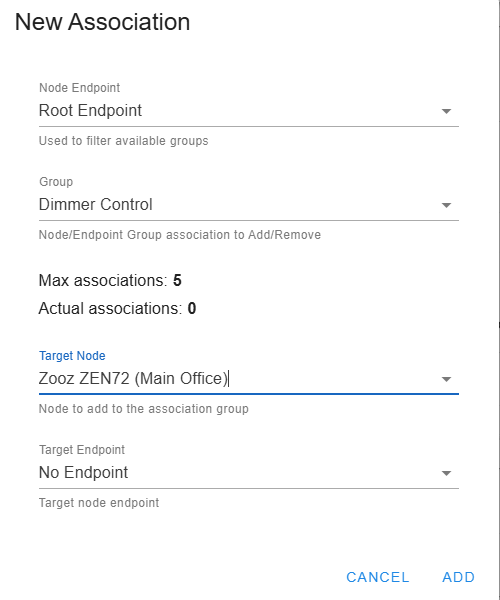
3. This will open the New Association window.
- Node Endpoint: Root Endpoint. We are selecting Root since there are no other endpoints for this ZEN77 device. If you were utilizing a device with multiple endpoints, like the ZEN30 Double Switch, you would need to select the correct endpoint (such as Endpoint 1 for the dimmer paddle).
- Group: Dimmer Control. This will send the dimming level changes.
- Target Node: ZEN72 Dimmer. This is the node you are sending the changes to.
- Target Endpoint: No Endpoint. Since the ZEN72 is a single channel device, there is no specific endpoint. This stays as No Endpoint.
Click Add when done.
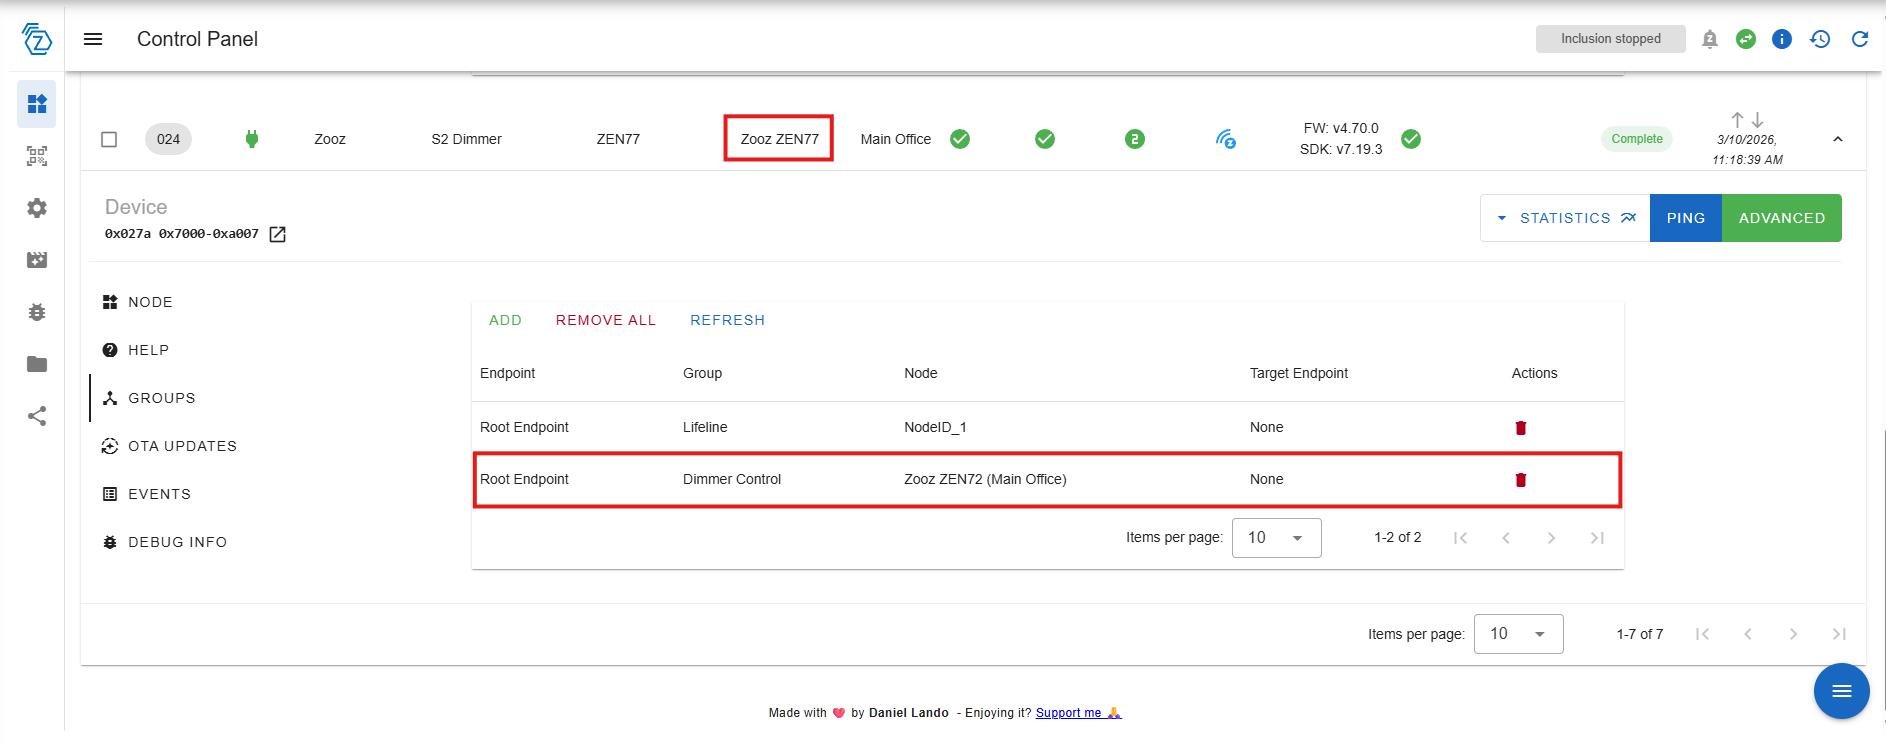
When you open the ZEN77 groups, you will now see the ZEN72 node association.
Please don't hesitate to reach out with any questions!

