
The ZSE50 Siren & Chime is more than just an alarm—it’s a customizable alert system that can fit seamlessly into your smart home. With Home Assistant (Z-Wave JS or JS UI), you can program the device to trigger the right sounds at the right time, from security alerts to everyday notifications. This guide will cover everything you need to know: how to set up and program the ZSE50 in Home Assistant, which audio formats it supports, how many sound files you can store, and the steps to upload, assign, or remove them. By the end, you’ll be ready to personalize your siren and chime for both security and convenience.
Supported File Types & Recommendations
The ZSE50 Siren & Chime can play audio saved in .mp3 or .wav format. For smooth playback and faster uploads, we recommend:
-
.mp3 files at a bitrate of 128 kbps or 192 kbps – this gives you clear sound without making the files too large.
-
Keeping each file under 1 MB – short chimes or alerts usually end up in the few hundred KB range, which helps you store more sounds on the device and avoids long upload times.
Following these guidelines will make sure your sounds work well and don’t take up unnecessary space.
-
Max number of playback sounds: 50
-
Internal file storage: 16 MB
-
Supported file types: .mp3, .wav
Important note: The flash drive is 16MB - this may limit the number of files. If you are uploading smaller files that total less than 16MB, then the limit is 50 files. If you're loading larger files, the number of accepted files will be lower (limited to 16MB).
Here are the default sounds uploaded to the siren in case you'd like download them again (in mp3 format):
Transferring Files to the Siren
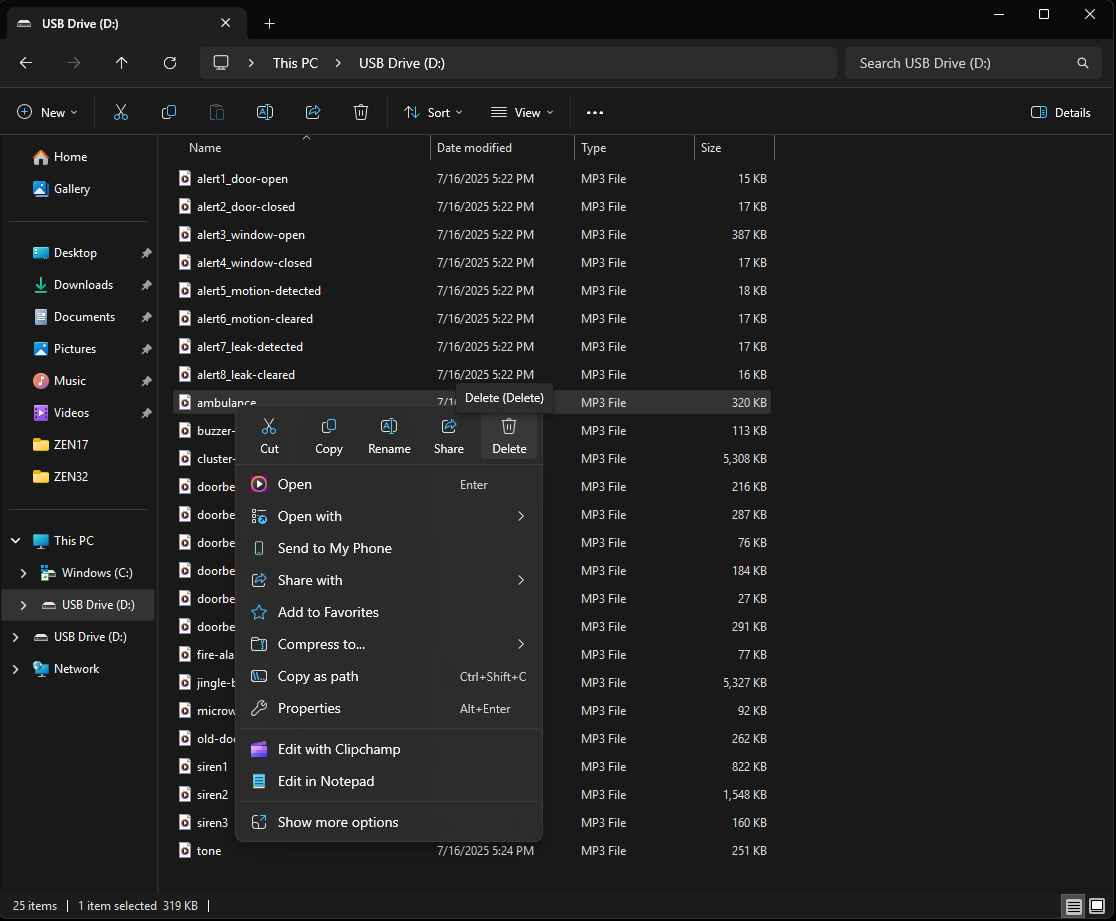
Once you have your files, follow the simple steps below to transfer the desired files to your siren. Once the siren is plugged in, it will be treated as an external USB drive and files can be managed like on any other drive on your computer, including adding new files and deleting them.
-
Connect the Siren to your PC using the provided USB-A to Micro-USB cable.
-
Once connected, the Siren’s USB drive folder will automatically appear on your screen.
-
Open the folder on your PC where your sound files are stored.
-
Use one of the following methods to transfer files to the Siren’s USB drive:
-
Drag and drop the files into the Siren’s USB drive folder.
-
Copy and paste using keyboard shortcuts (CTRL + C to copy, CTRL + V to paste).
-
Important Notes
-
The files below are the pre-loaded 25 sounds, and will be values 1-25 when setting the default playback tone in Parameter 4.
-
We recommend ensuring your sensor is updated to firmware 1.20, as this introduces fixed, addressable locations for each tone. Adding or removing sound files will no longer alter the sequence of existing tones. This update ensures that scenes remain consistent and unchanged when new files are loaded.

To delete a file:
-
Option 1: Right-click the file, then select Delete.
-
Option 2: Click once to highlight the file, then press the Delete key on your keyboard.
Managing Sound Files
You can remove any of the pre-loaded sounds to make room for your custom files. Some important notes when you are deleting or uploading your new files:
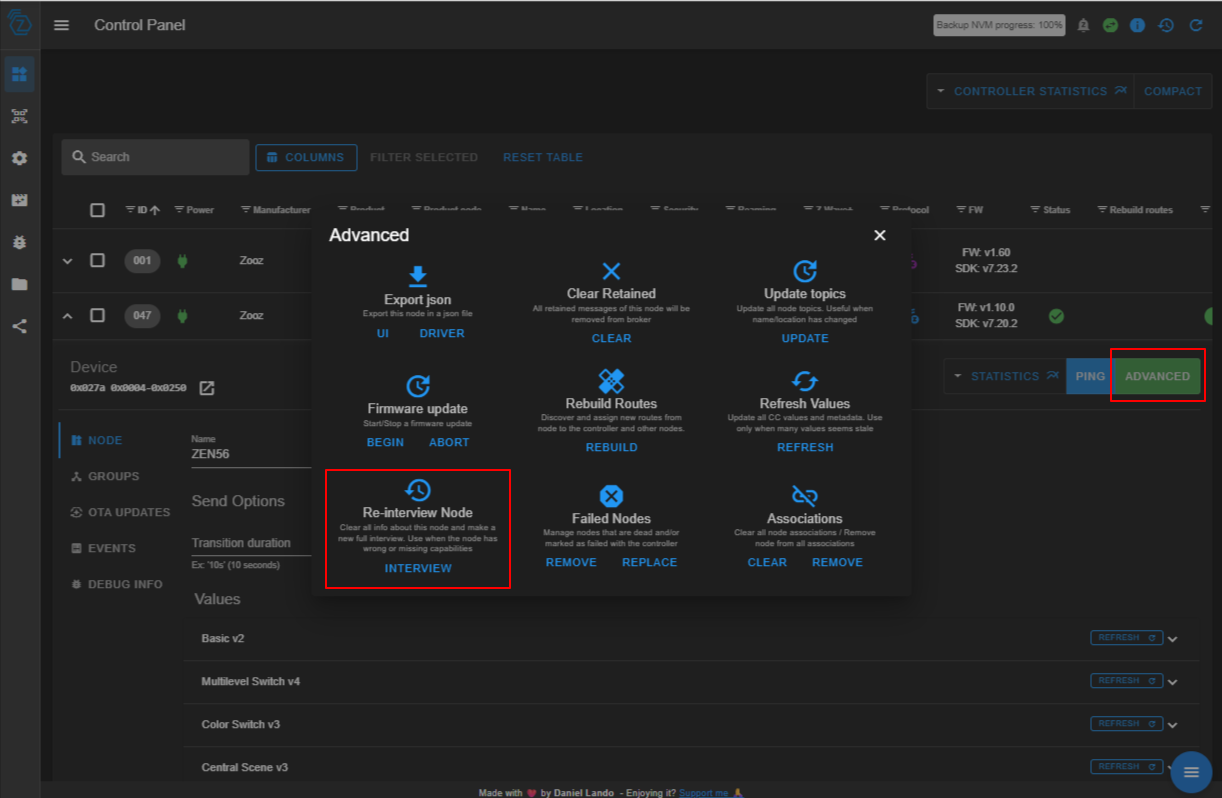
- The Siren must be re-configured when you make any changes to the sound files on the device (adding, deleting, etc.). Home Assistant has a re-interview or a configure option available, depending on which integration you're using.
- Z-Wave JS:
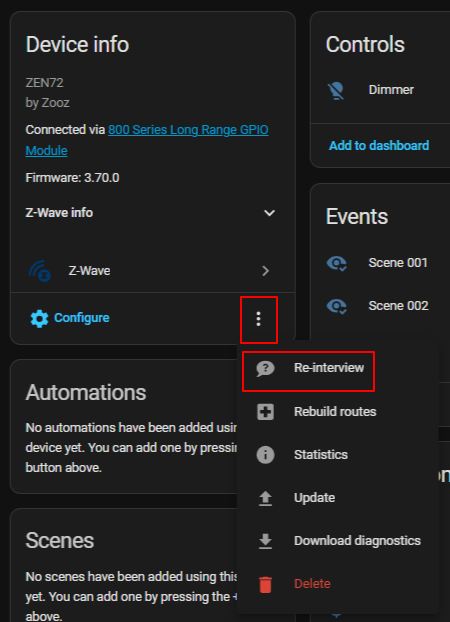
Z-Wave JS UI (Home Assistant):
Programming the Siren
We've included the instructions below for programming the siren using the recommended Z-Wave JS integration.
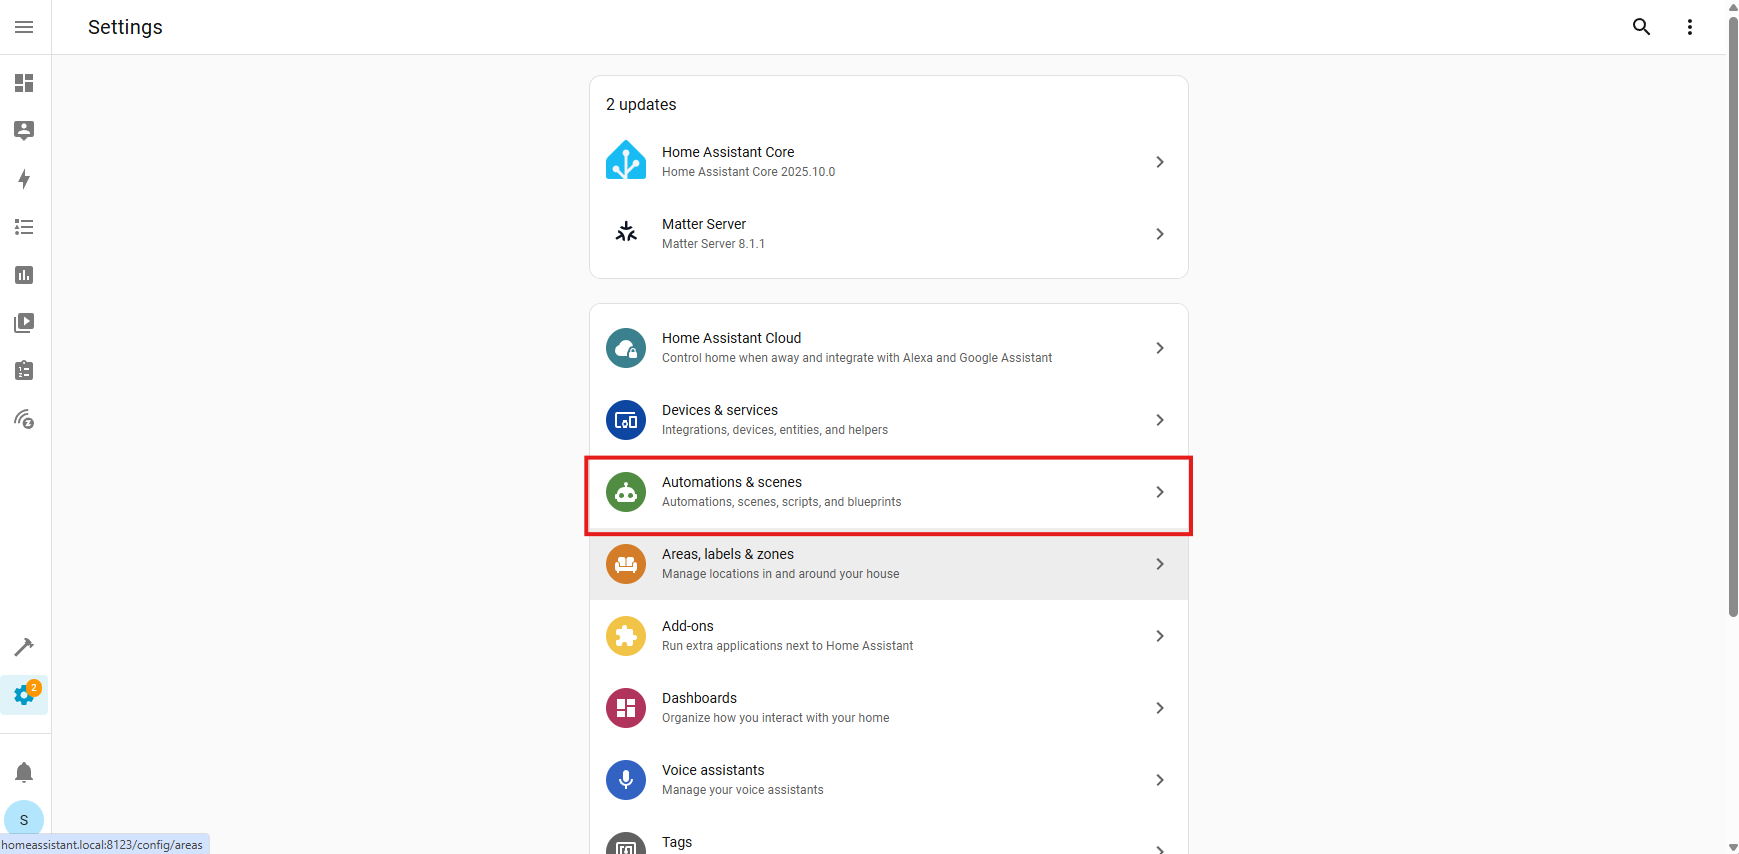
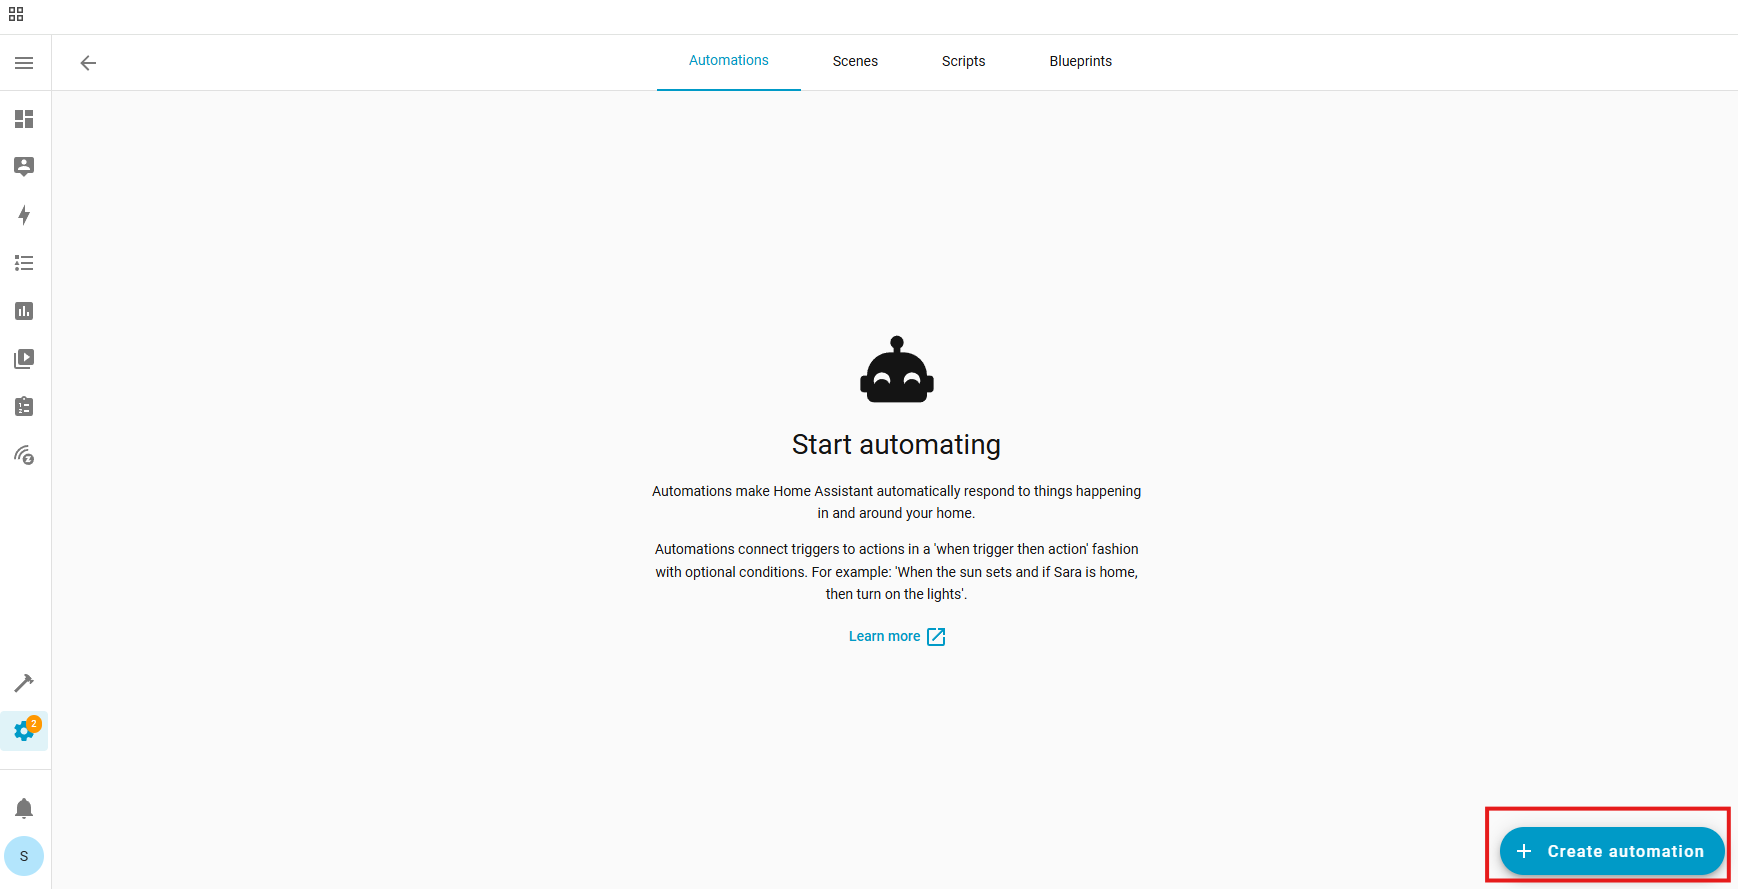
1. From Settings, select Automations & scenes:
2. Select Create automation:
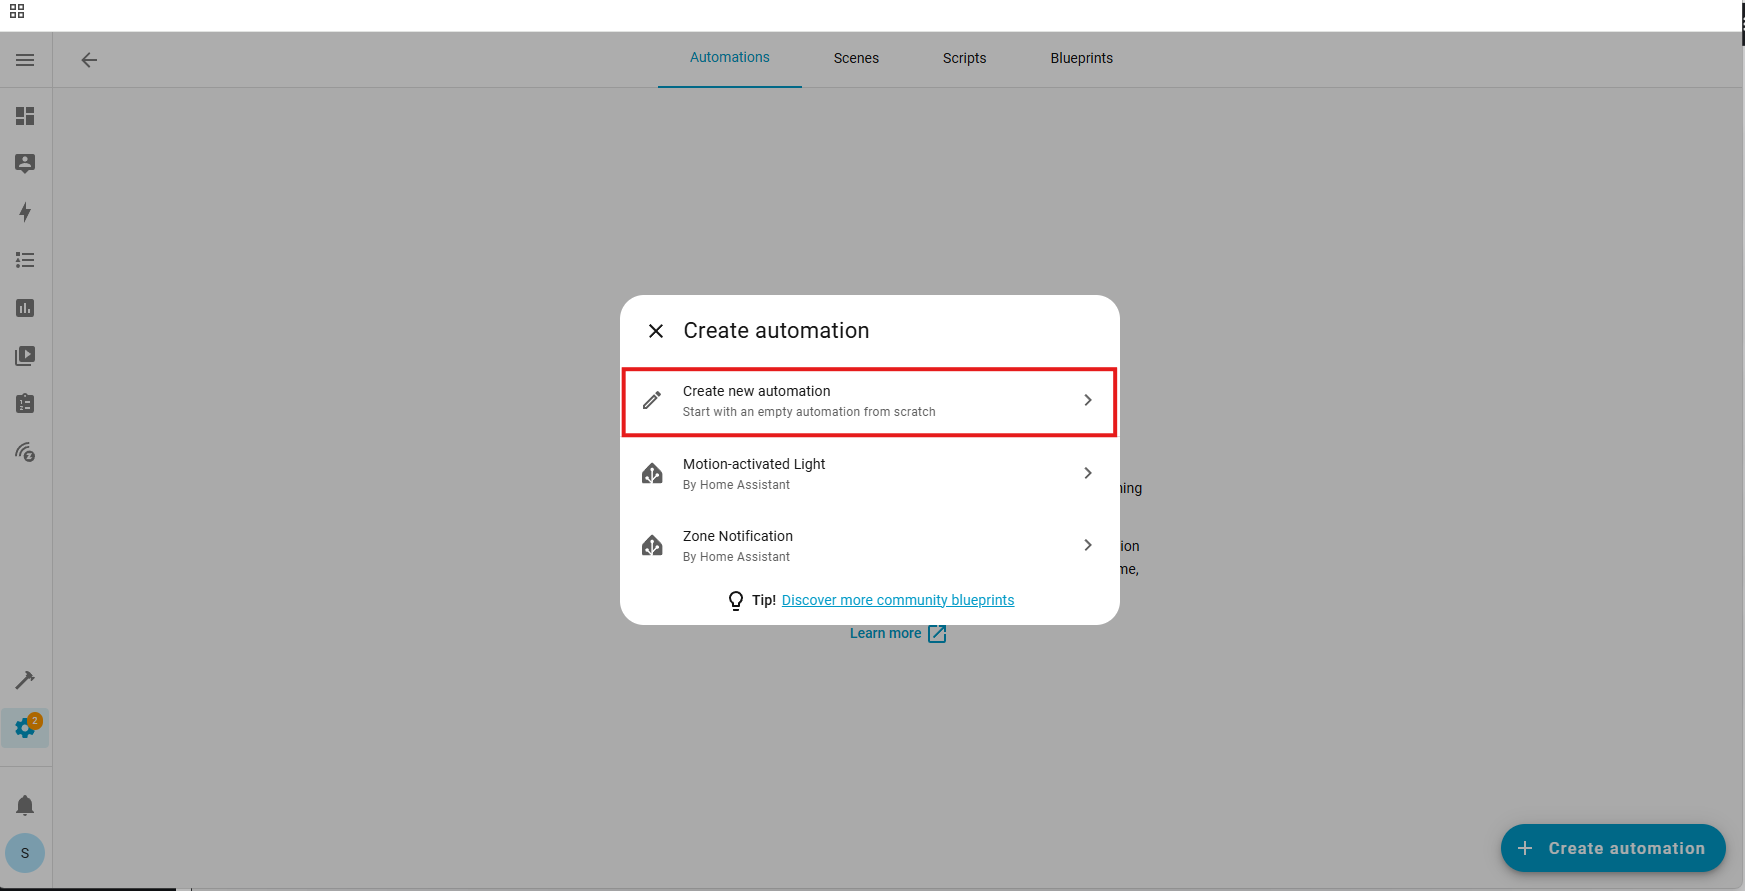
3. Select Create new automation:
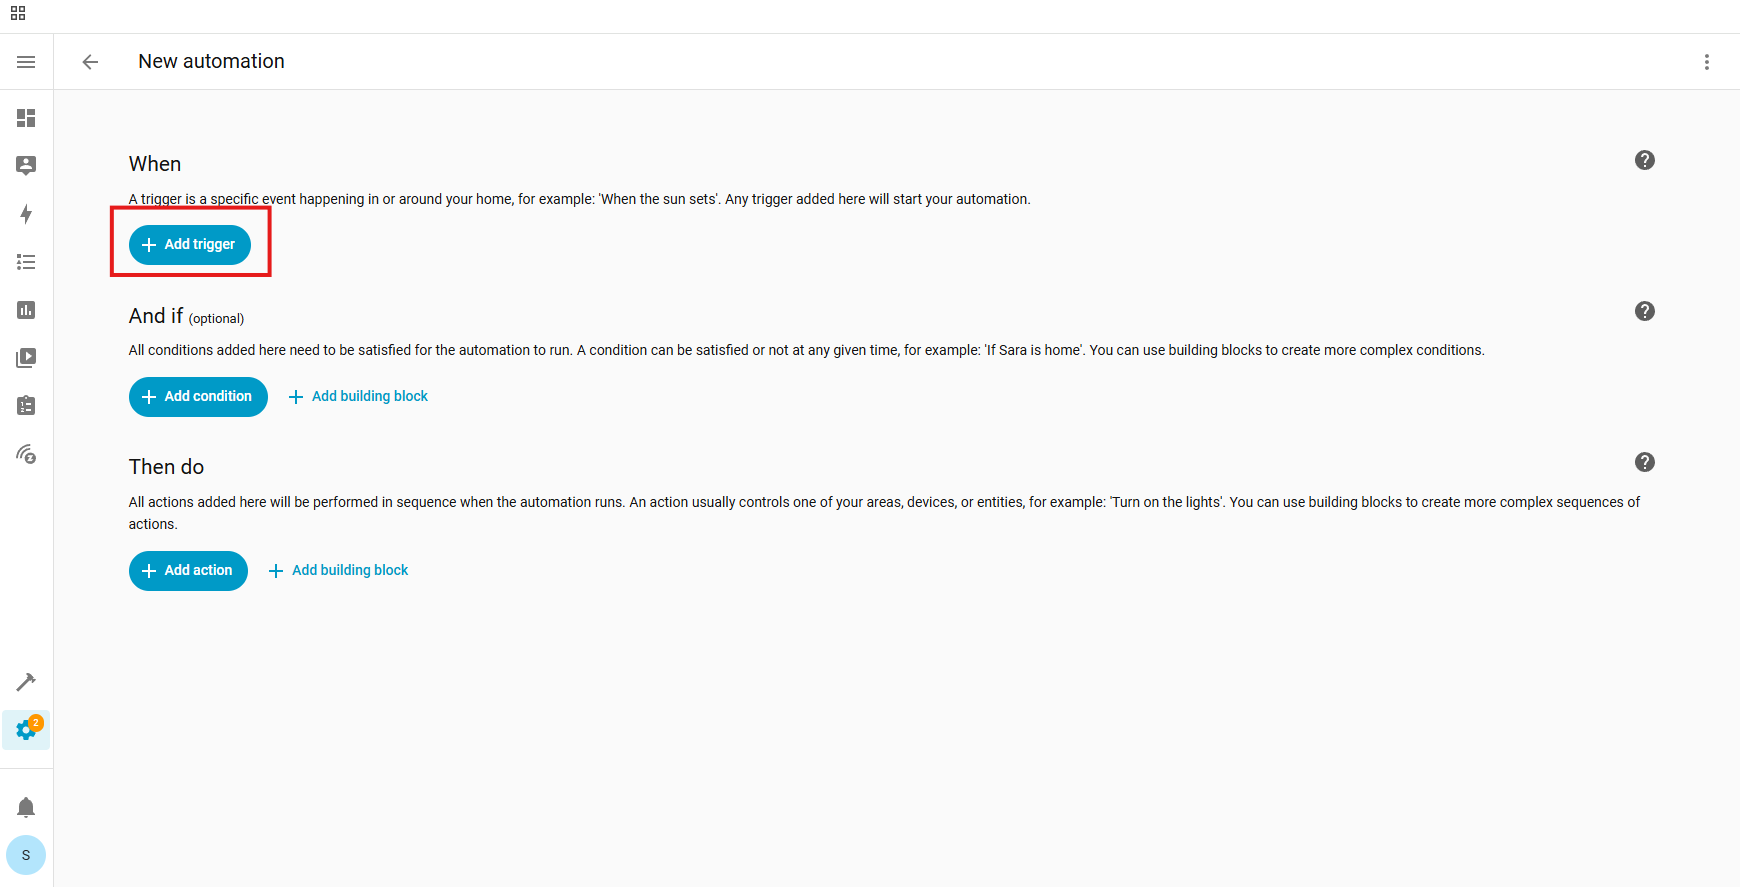
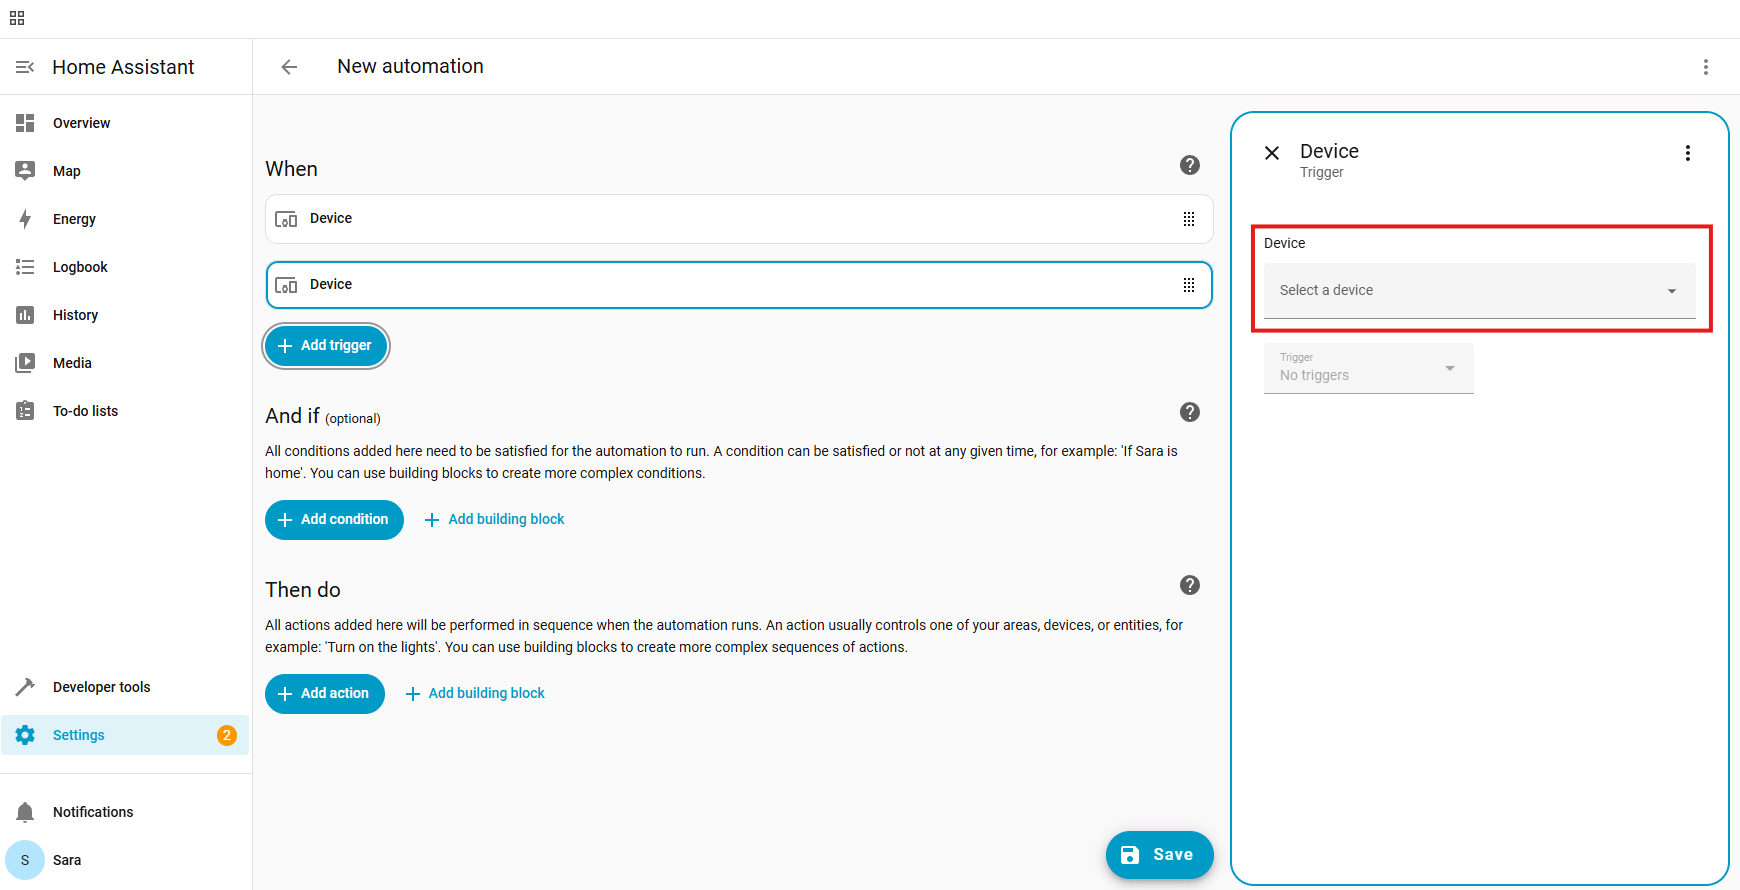
4. Click on +Add trigger. This is the event that you want to use that will trigger the siren to alert:
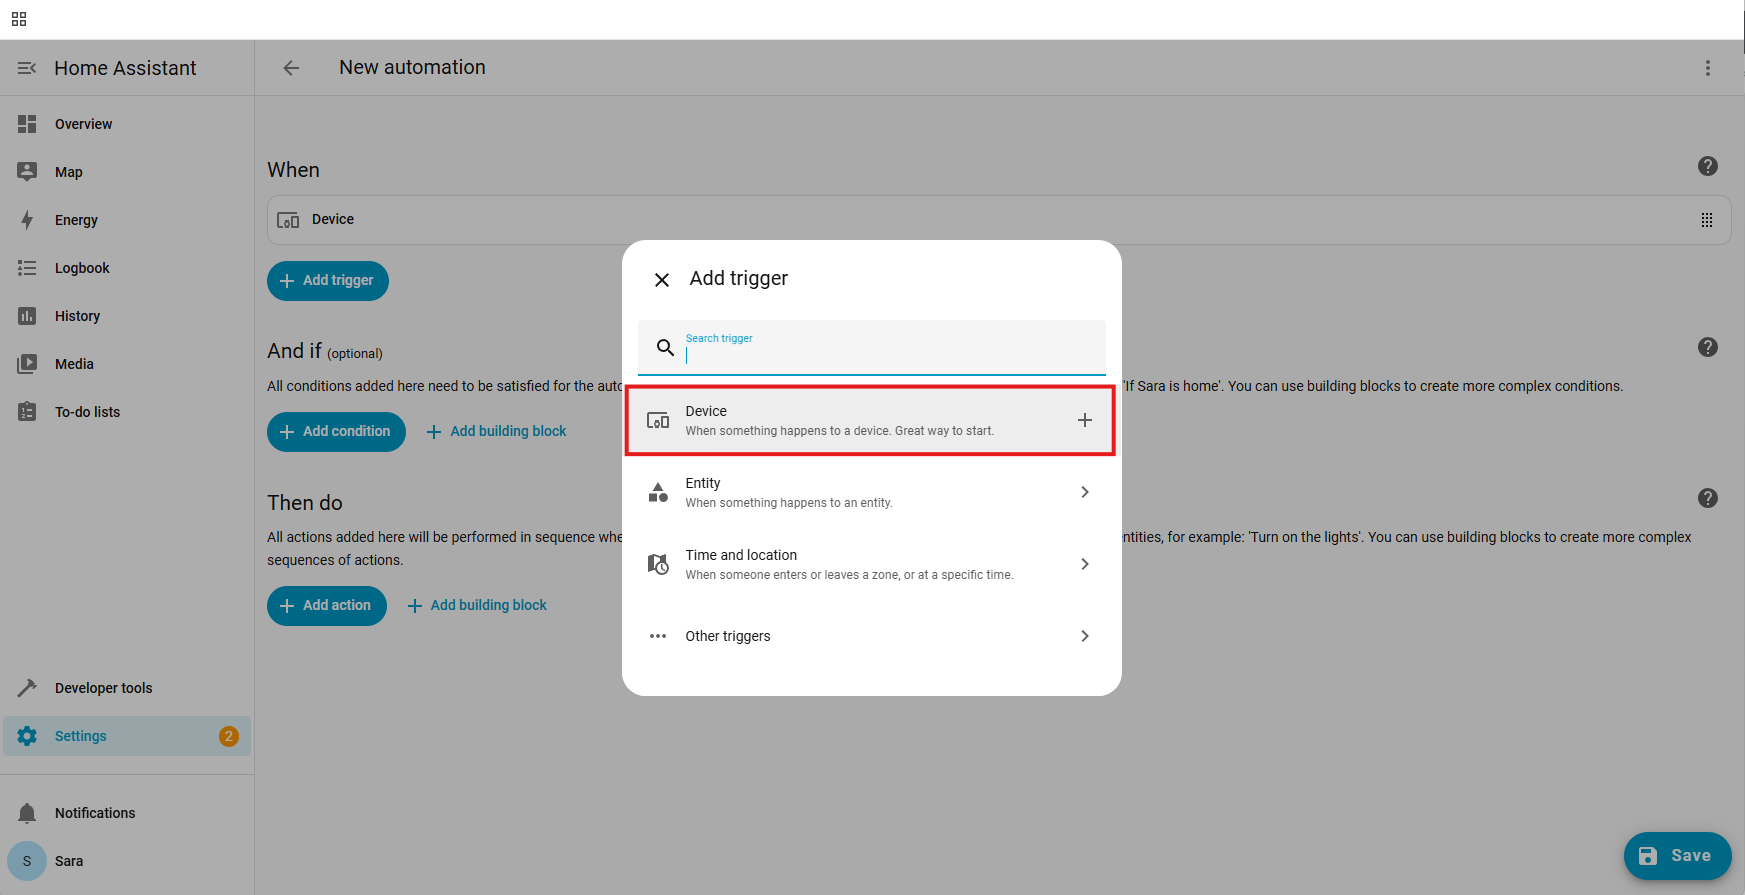
5. In our example, we will be using a device as a trigger, so we are selecting Device:
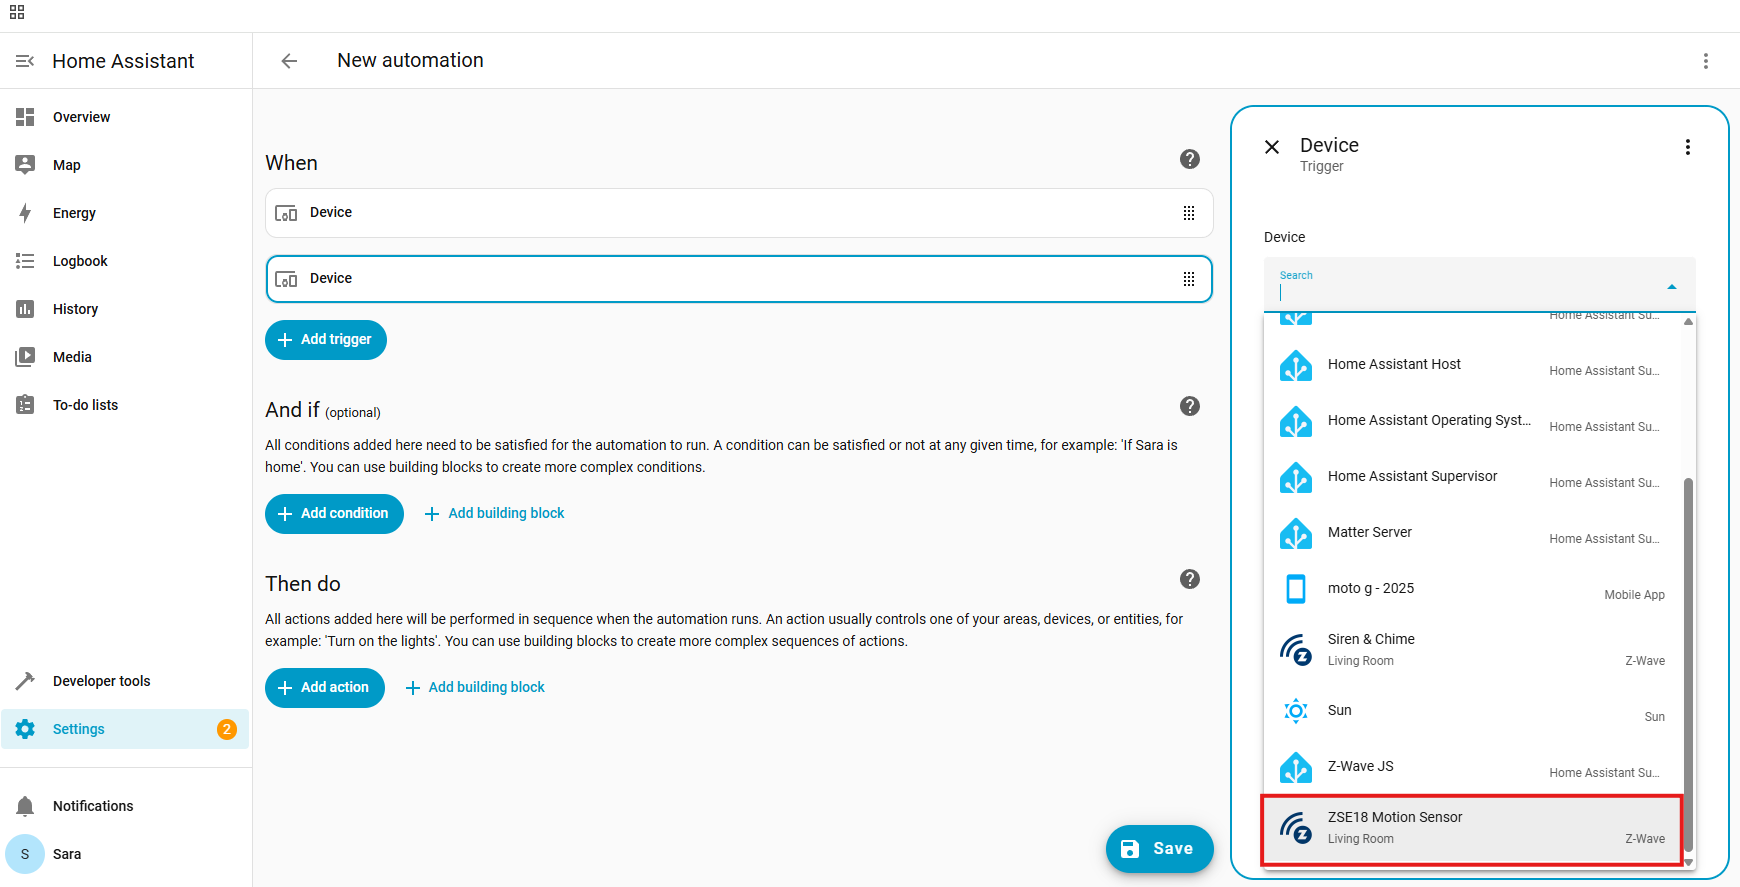
6. Click Device; this will bring up a dropdown menu of available devices:
7. Select your trigger device. In our example, we will be using the ZSE18 Motion Sensor:
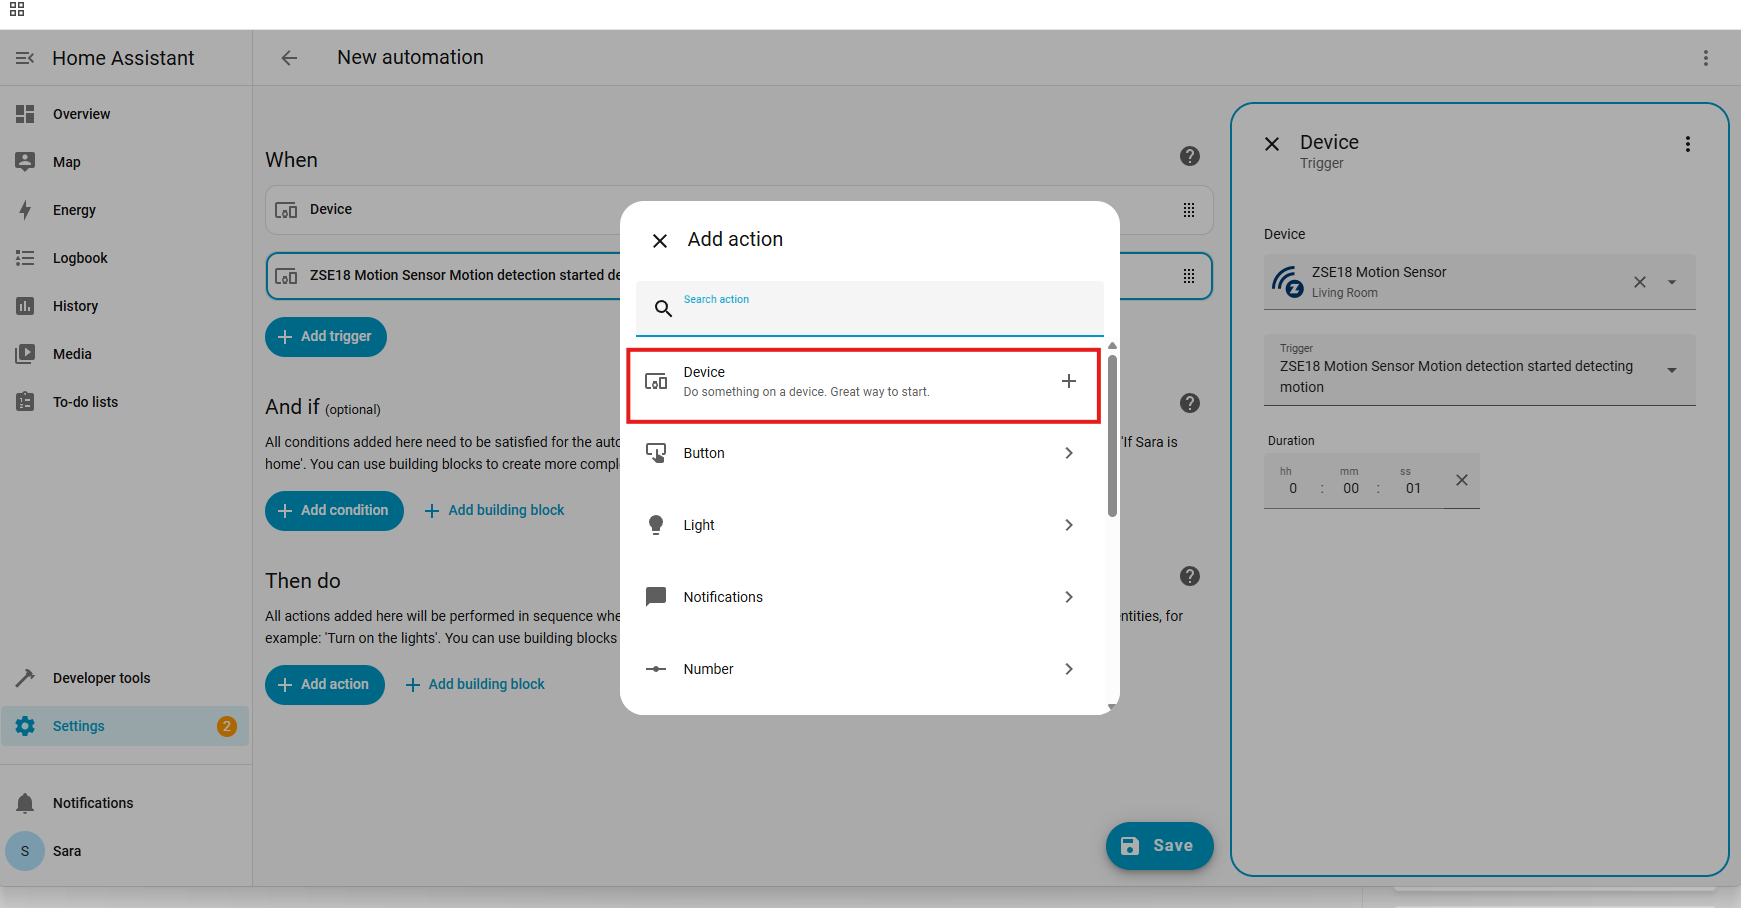
8. We are using Motion Detected in this example. In the second drop down box, select the trigger. In this instance, it is ZSE18 Motion Sensor Motion detection started detecting motion:

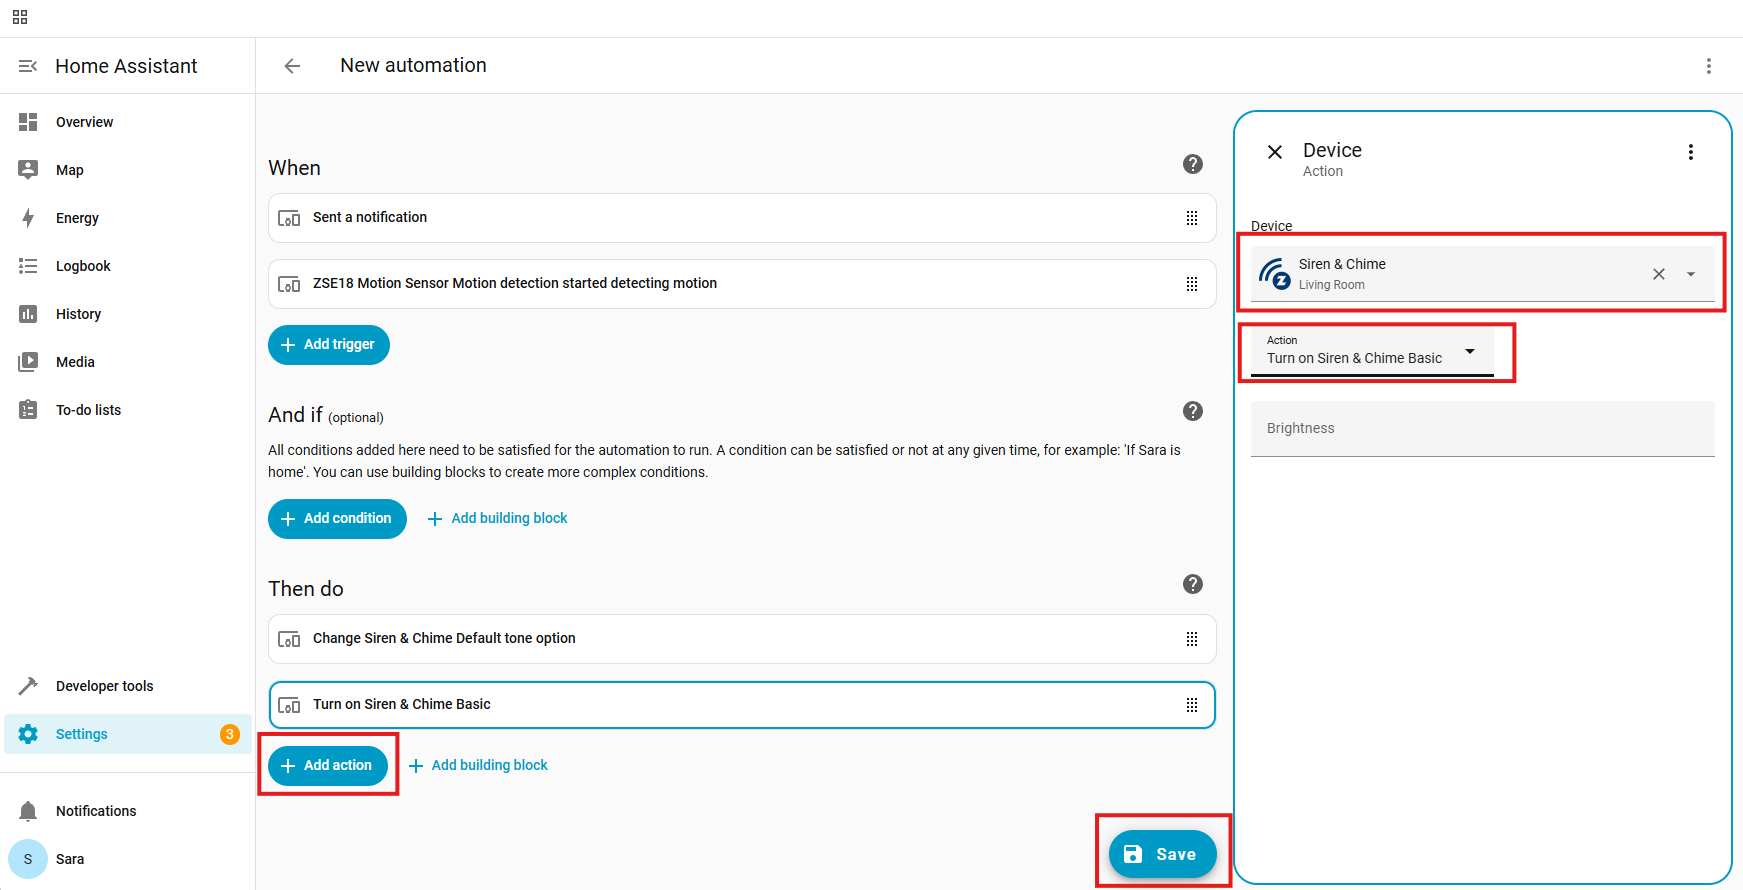
9. Once you select your device and trigger (and any optional conditions for your automation), click +Add action:

10. Since we are using the ZSE50 Siren & Chime as our action, select Device from the action options:
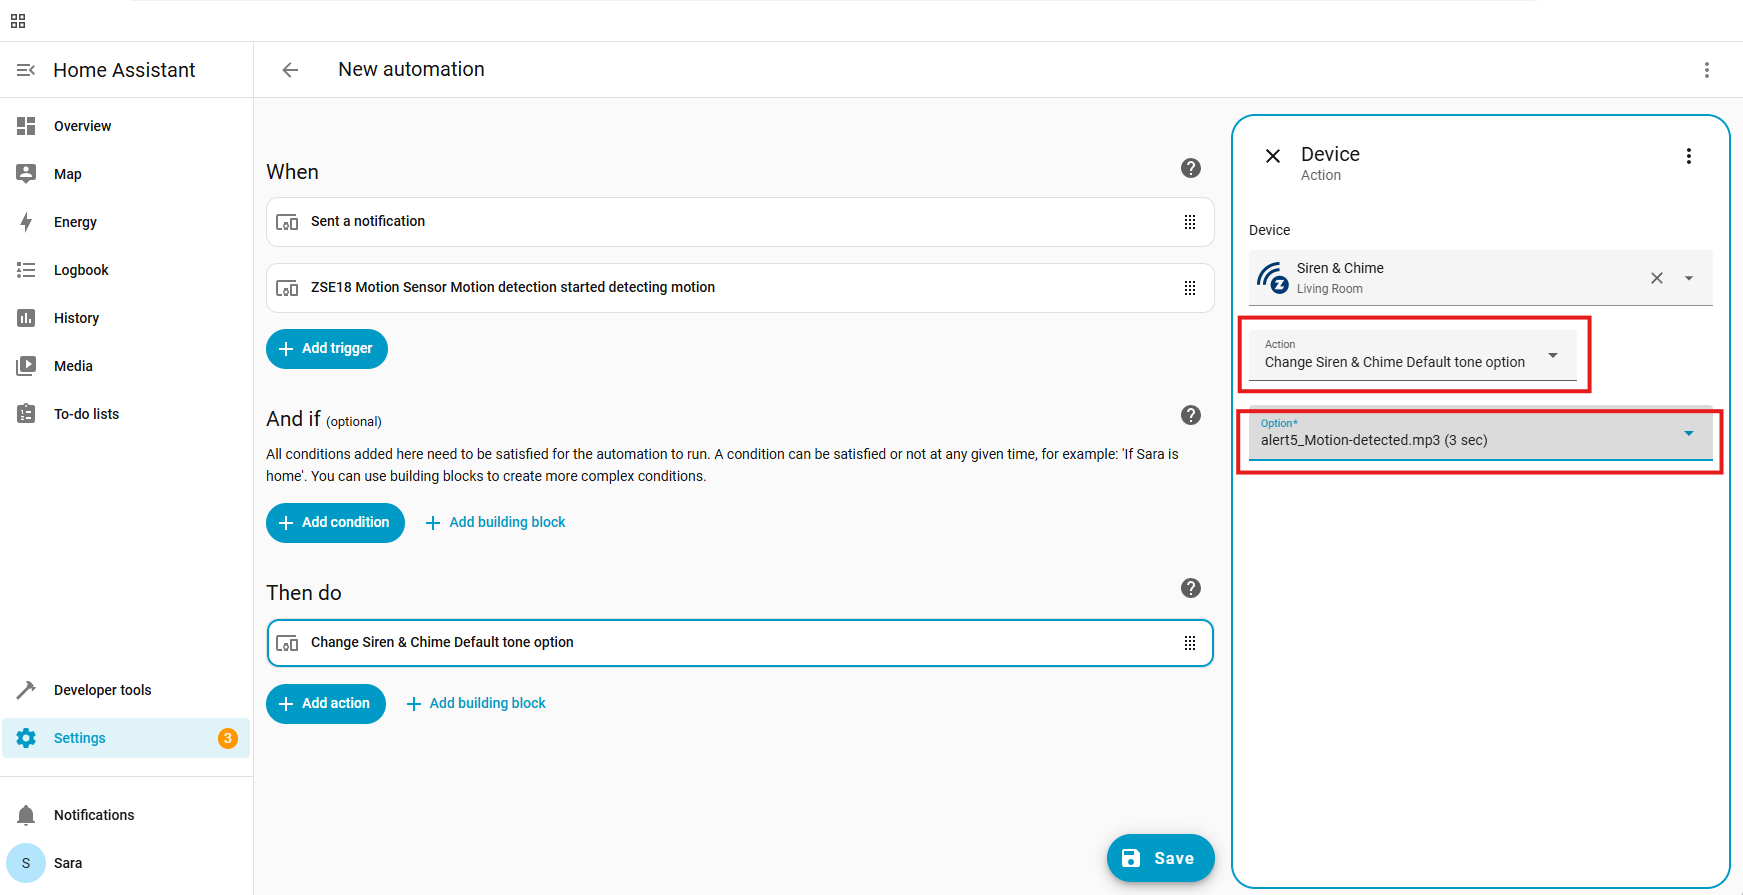
11. Select the ZSE50 Siren & Chime from your device options. Next, select Action > Change Siren & Chime Default tone option in the second box. In the final box, you will select the desired sound. For our example, we are using the Motion Detected sound:
12. DO NOT SKIP THIS STEP: Click +Add action again. Select the ZSE50 Siren & Chime as the device. Action > Turn on Siren & Chime Basic. Click Save.
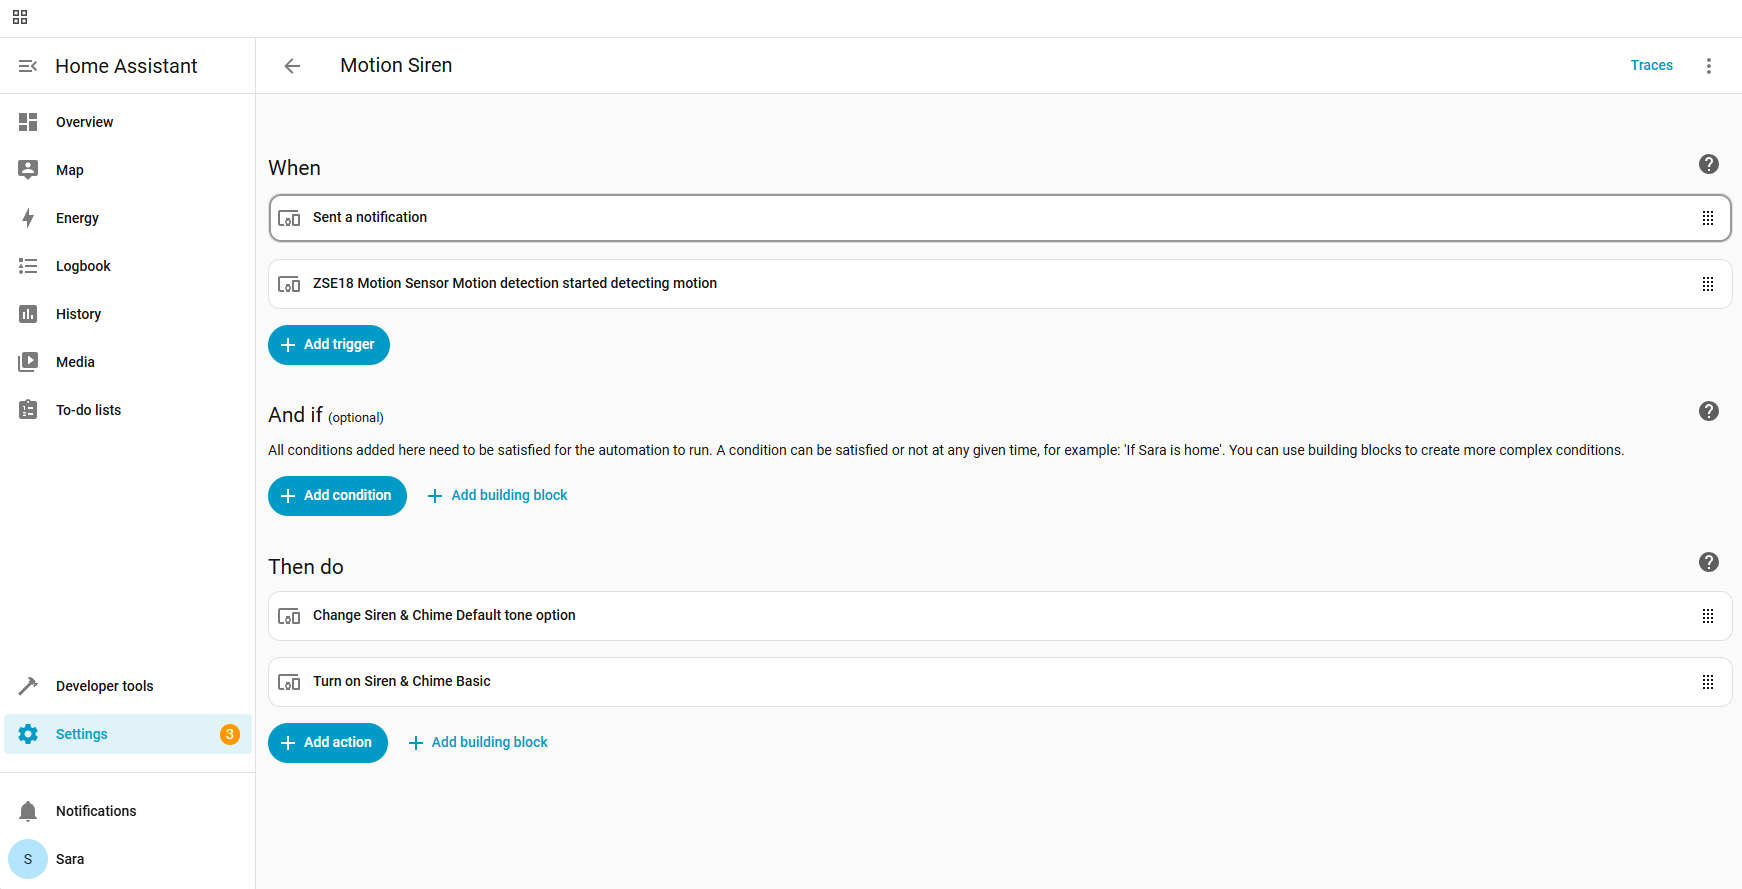
13. Here is the final scene example. Test your scene.
Please let us know if you have any questions!

