

You can wire your Zooz S2 ZEN26 and ZEN27 switches in a 4-way if one of the boxes has direct connection to power and neutral. Load and line can be in separate boxes, that's fine!
How do you check for power and neutral? The easiest way to find out is to look for a black wire bundle and white wire bundle in the back of your multi-gang box. If you're dealing with single boxes only, you'll need to measure voltage on the black leads coming into each box in a 14-2 romex. Still not sure what to do? Send us a few pics and we'll help you out!
We've created 4-way diagrams for the most common 3 switch set-up. But there are many different ways to wire multi-point control installations so if you can't match yours with the below "before" drawing, please don't experiment and reach out to us first for custom instructions.
IMPORTANT: PLEASE READ before you proceed with the installation:
- A 4-way is what we call 3-point control so 3 different switches controlling the same set of lights.
- These instructions are for ZEN26 and ZEN27 models only. If you have ZEN21, ZEN22, ZEN23, or ZEN24 models, please click here to see the 4-way wiring diagram for your product.
- You have to install the Zooz switch in the box with direct connection to power line and neutral.
- Always use simple on/off 3-way and 4-way switches when connecting them to Zooz switches. No dimmers or electronic switches with a LED indicator may be wired to Zooz switches or dimmers.
- There are many different types of 3-way and 4-way switches, some will have common terminals on top of the switch, some on the bottom. Always locate the common terminals first and adjust the orientation of the wires accordingly. Don't follow the diagrams blindly.
- The colors of your wires may not match the ones in our diagrams so please make sure you've identified all wires correctly based on their source, not color only.
- The diagrams show all connections but ground (it was excluded to simplify the illustration). Make sure all ground wires are connected to all switches respectively.
Once you're 100% sure you've identified all wires, please make sure power is off and wire the Zooz switch according to the diagram below:
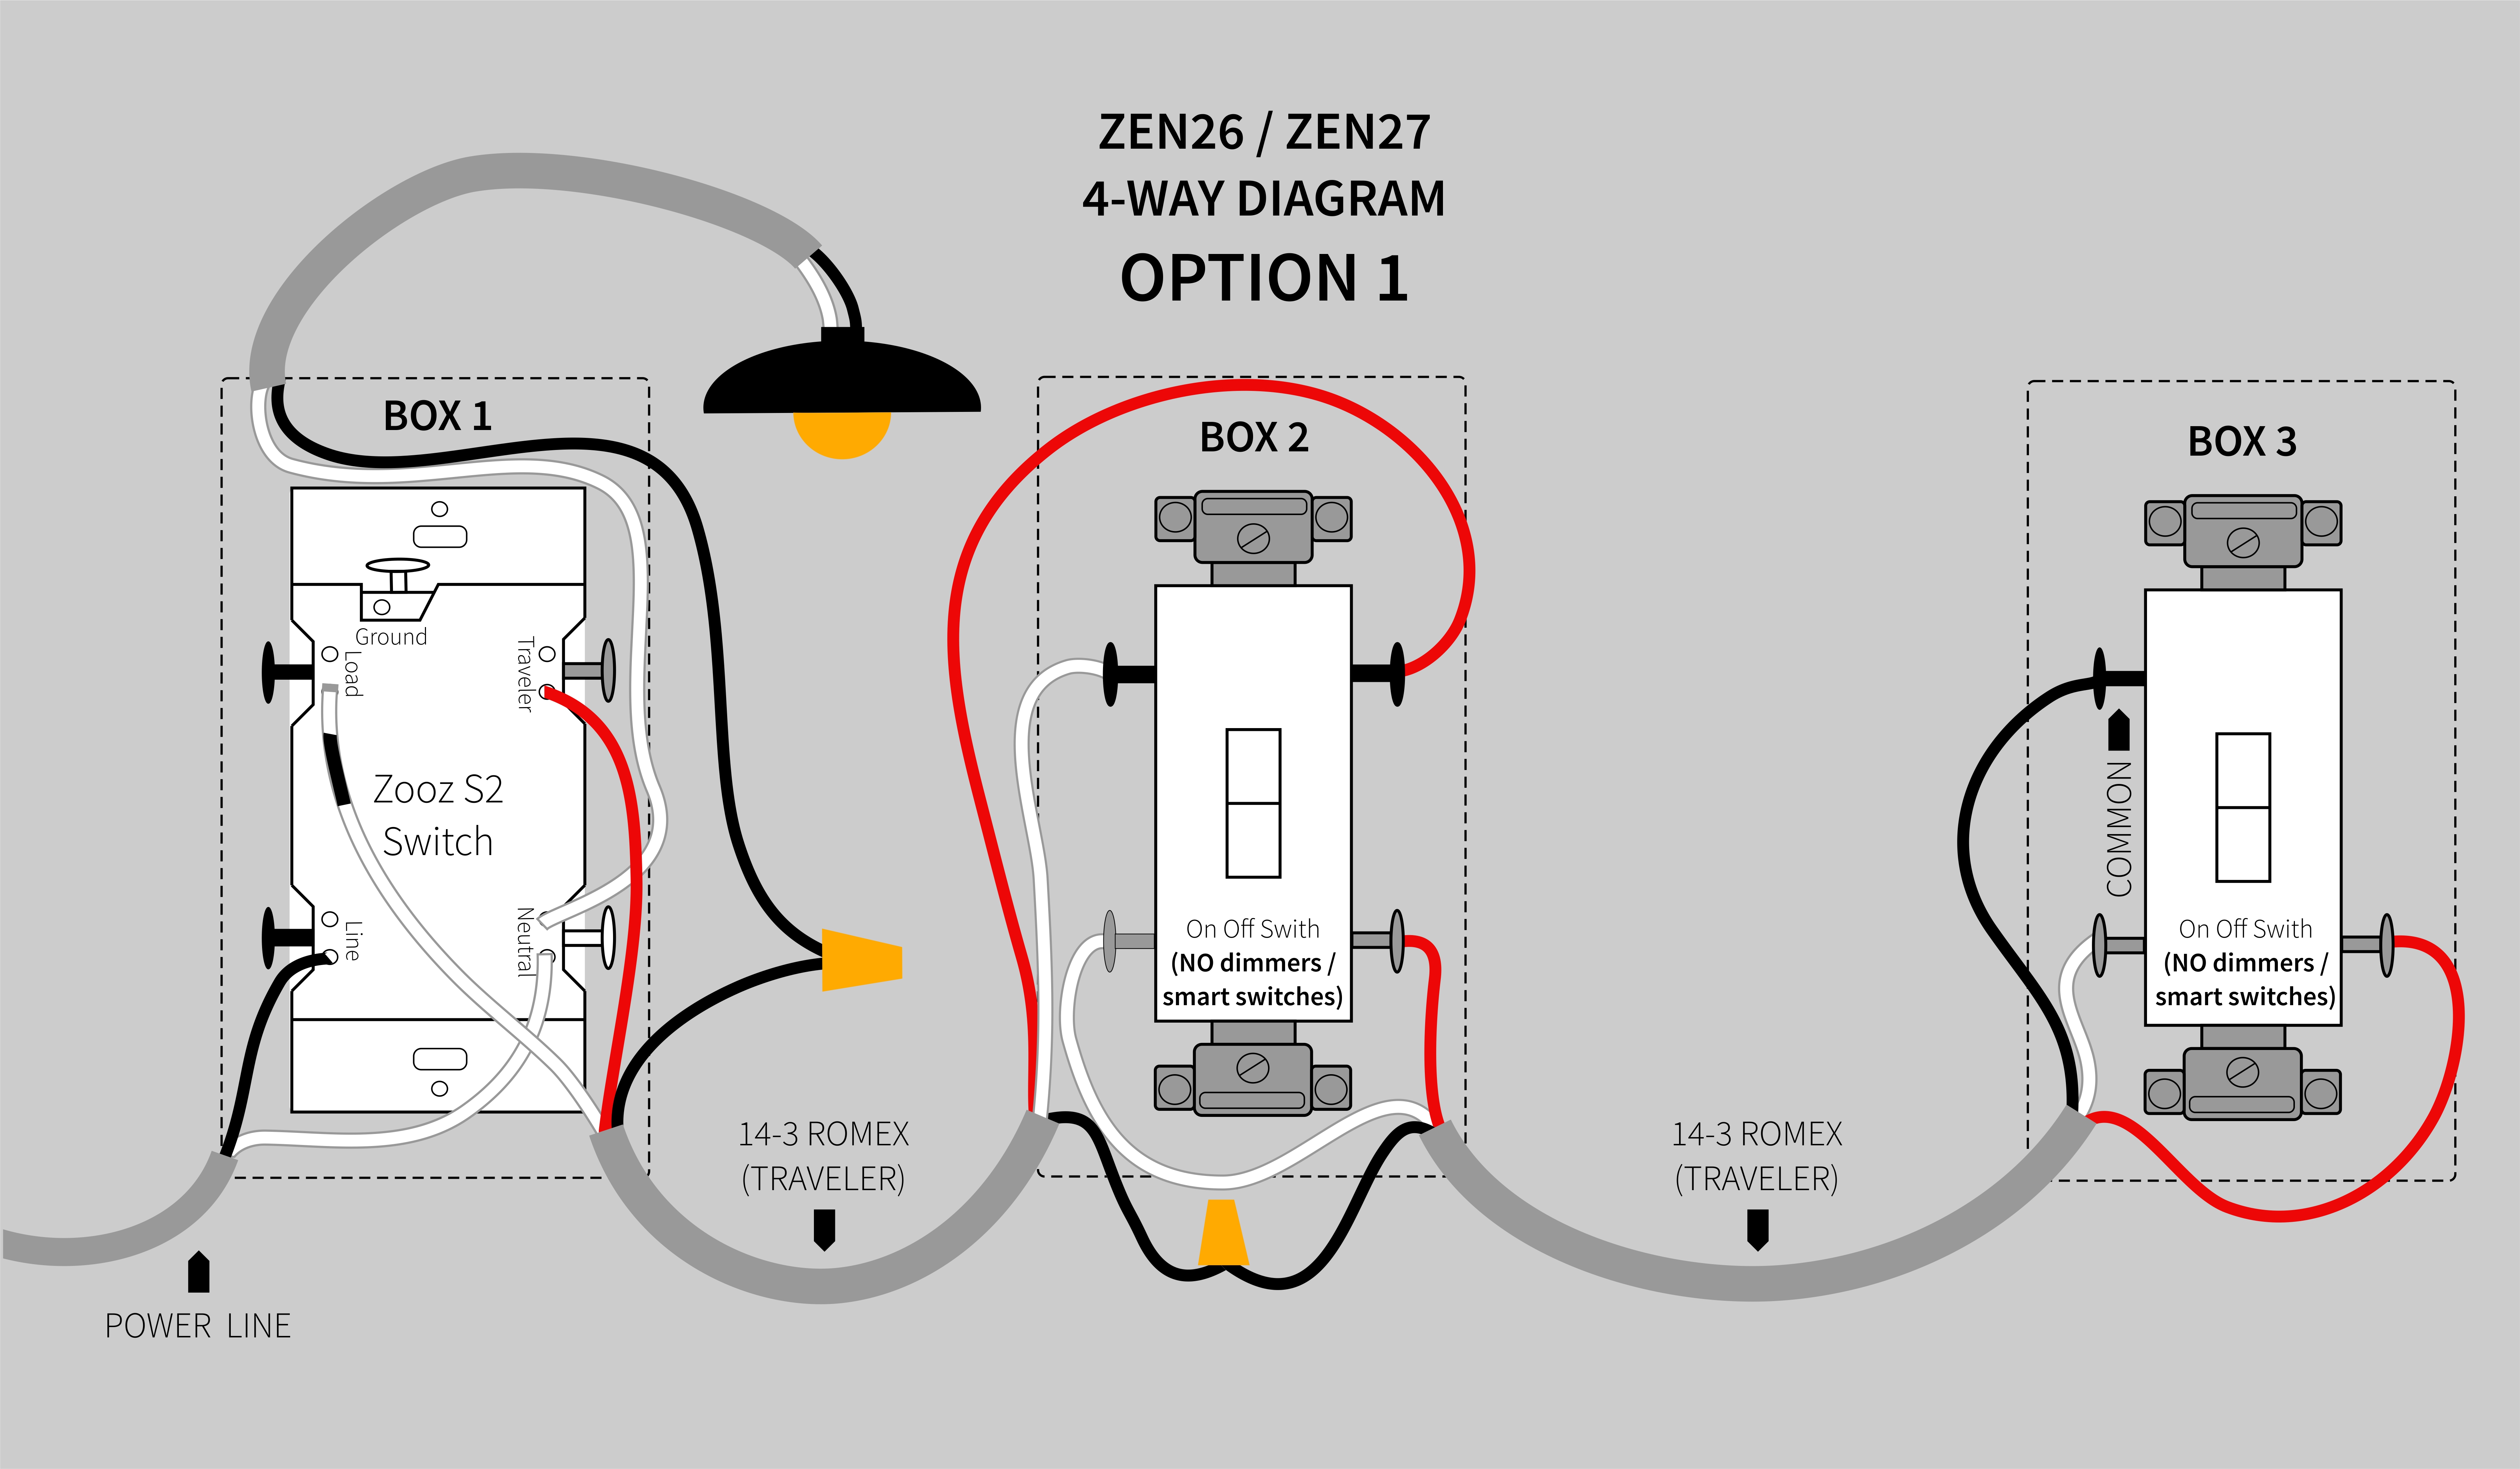
OPTION 1 with load and line in the same box (the less common set-up):

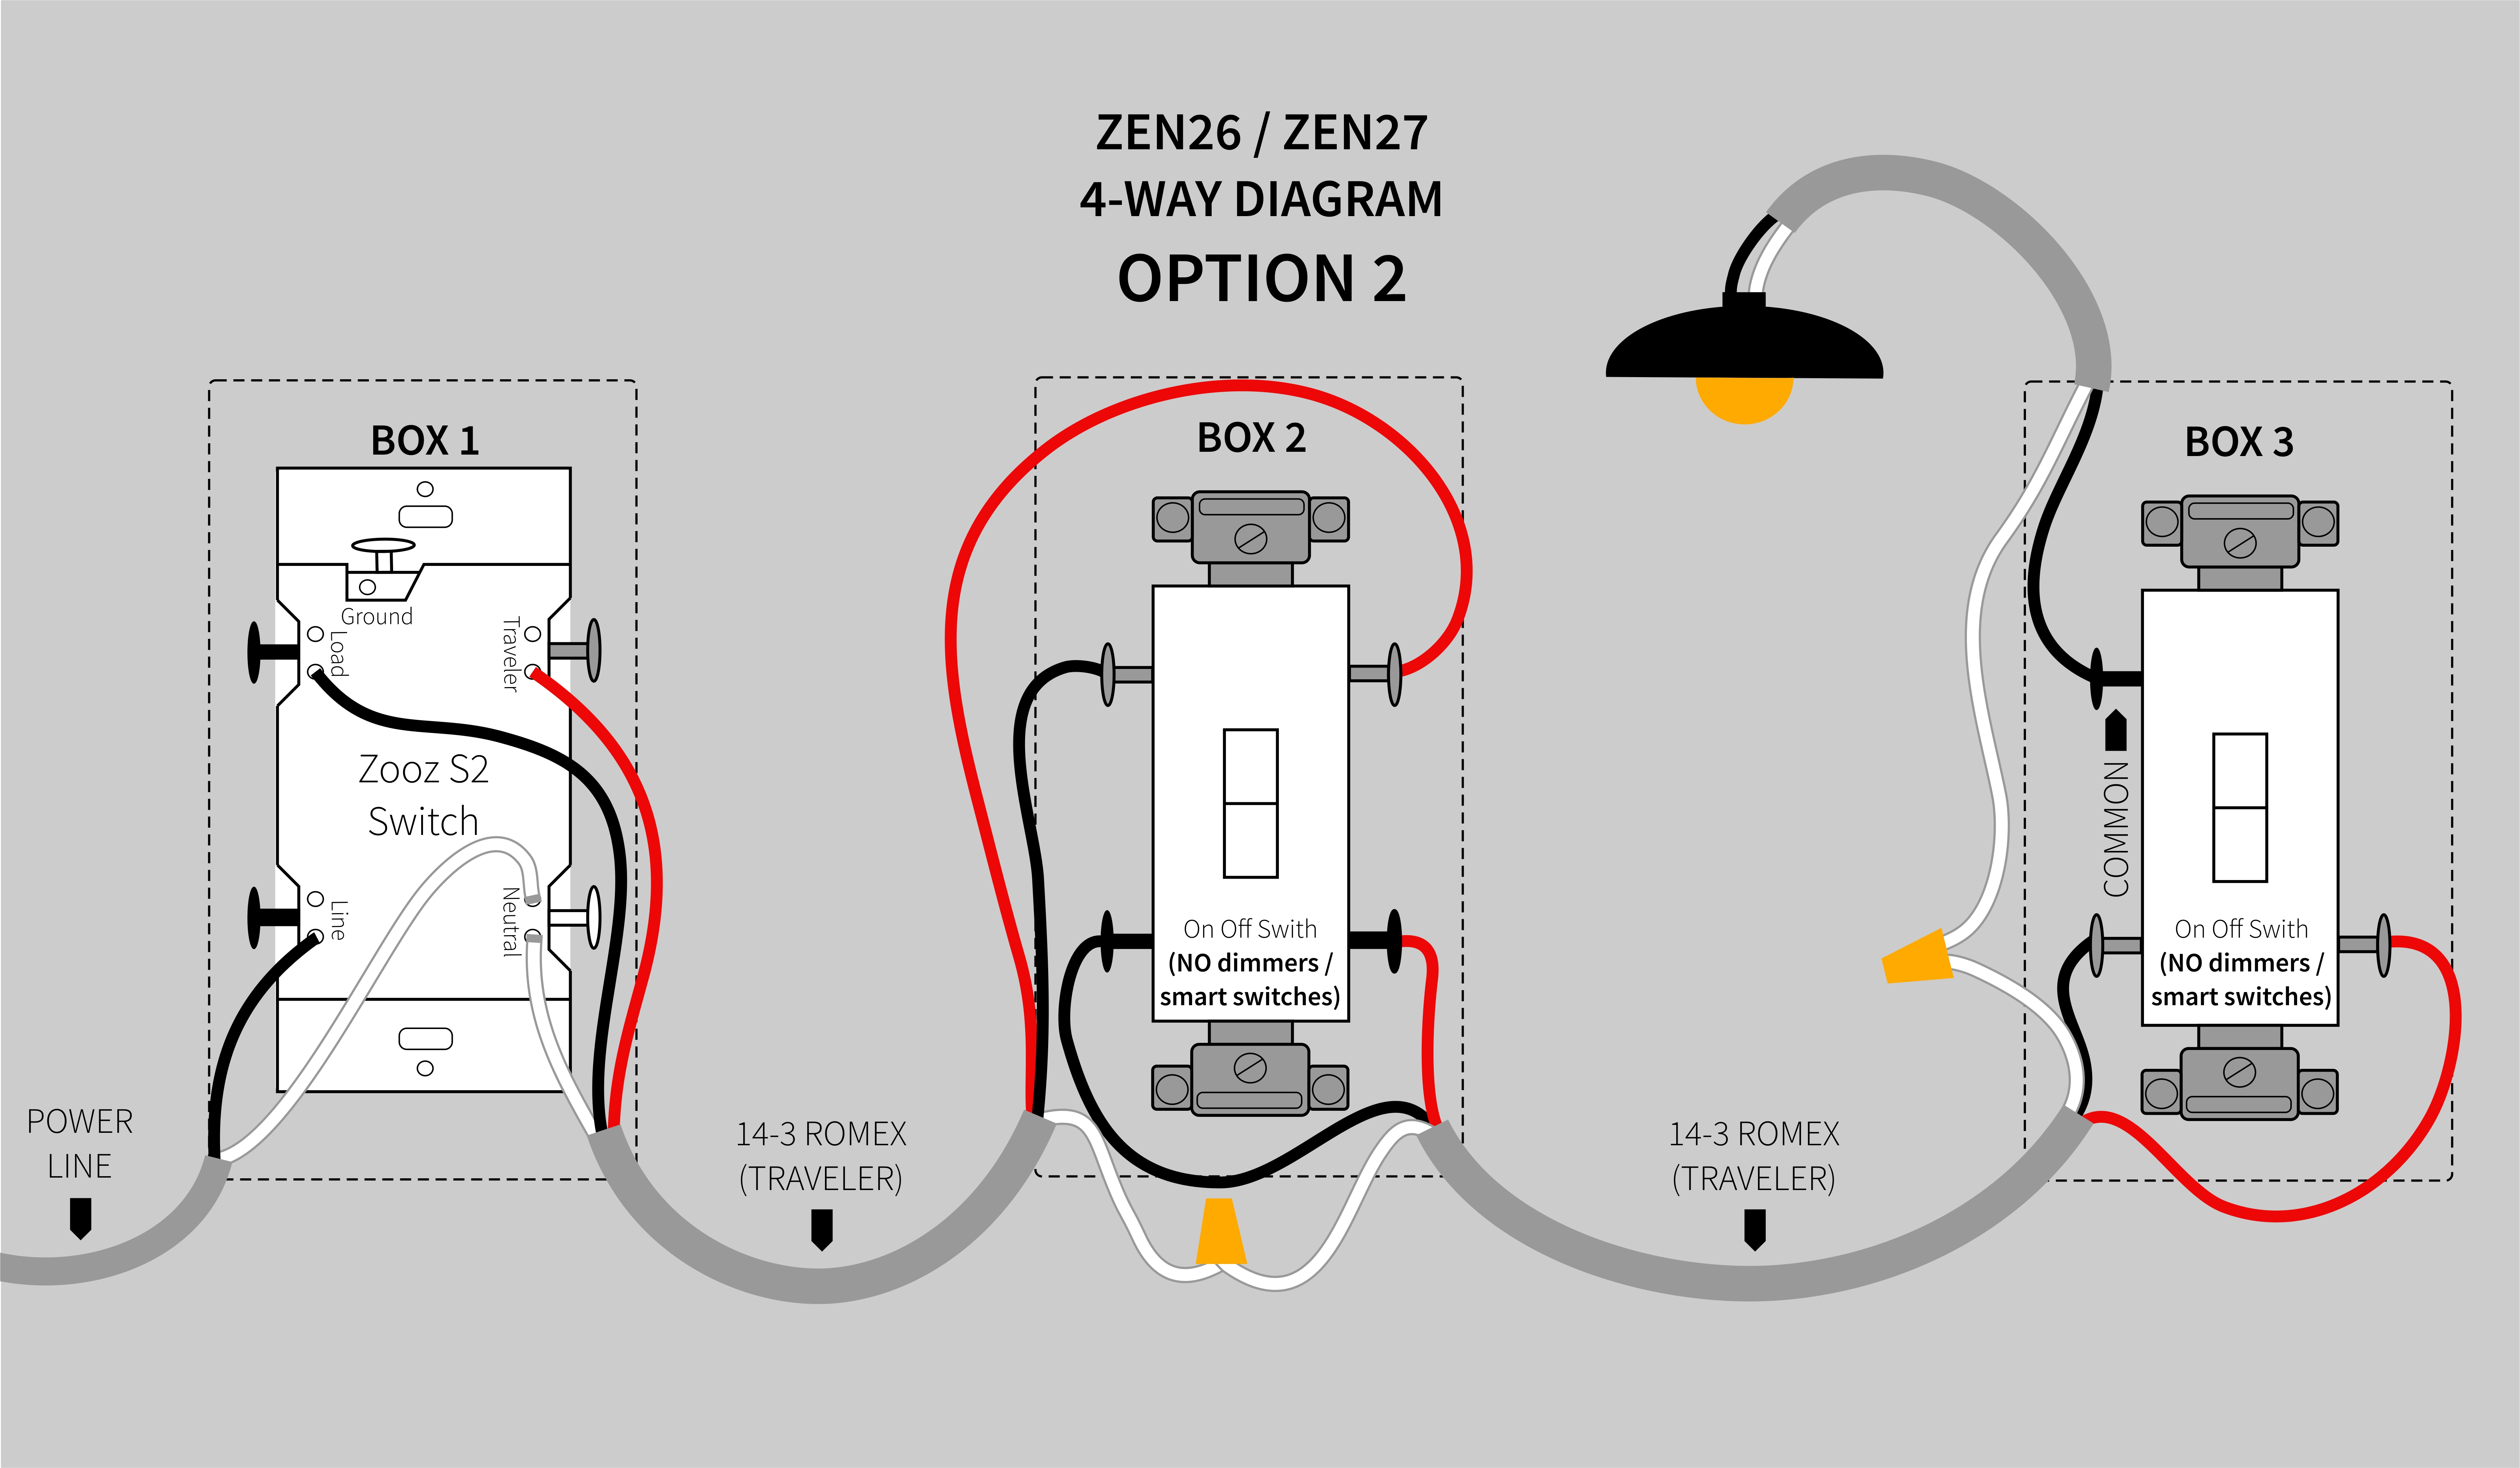
OPTION 2 with load and line in separate boxes (the most common set-up):

If you have any questions about the above diagrams - hold off on the wiring! Reach out to us with any questions. We're here to help.
